Normalizing the Loudness of Audio Content
Follow these guidelines to normalize your audio content so that it plays at a loudness level consistent with Alexa's voice.
When you create audio content for Alexa, whether for a Flash Briefing feed or for another custom skill, it's important that your audio content plays at a loudness level consistent with Alexa's voice. Audio clips should play at a consistent level without fluctuations in the sound. If you have ever watched television, and had a commercial play at a much louder level than the other content, you have experienced how disruptive an inconsistent loudness level is. If your audio clips don't play at a level consistent with the guidelines, your skill might not pass certification.
Loudness Requirements
You can use tools called loudness meters to normalize the loudness of your audio. A loudness meter measures sound in Loudness Units (LU). Loudness meters are different than peak meters and waveform meters in that they measure audio in the way that the human ear hears sound versus measuring the electrical level of the sound.
Loudness Units relative to full scale (LUFS) is loudness standard developed specifically to enable the normalization of audio content for broadcast, and should be used for audio clips that Alexa plays. Alexa has the following loudness guidelines:
- Program loudness for Alexa should average -14 dB LUFS/LKFS.
- The true-peak value should not exceed -2 dBFS
Your skill may be rejected if program loudness:
- Is lower than -19 dB LUFS
- Is higher than -9dB LUFS
- Exceeds true-peak guidelines
Typically, you measure loudness by using a Digital Audio Workstation (DAW) and a LUFS meter. If you're familiar with these tools, measure and adjust your audio clips to the previous guidelines. If you aren't familiar with these tools, follow the steps below to evaluate and modify your audio clips as necessary.
Measuring and adjusting the loudness of your audio clips
Complete the following steps to use Audacity to measure and adjust the loudness of your audio clips. Audaciy is a free audio editor and recorder and dpMeter II is a free digital audio multi-channel meter, which operates as a plug in to Audacity. If you have tools that you're already familiar with, you can skip these steps, and use those tools to normalize your audio files.
Download and install the tools
- Download and install Audacity for your operating system.
- Download and install dpMeter II for your operating system.
Enable dpMeter II as a plug in
- To enable dpMeter II as a plug in, on the Effect menu, select Add/Remove Plug Ins..
- Click New, and find dpMeter II in the list. Click Enable, and then click OK
- Now, show the Effect menu again and choose dpMeterII…
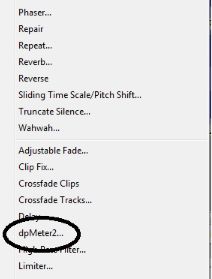
- When dpMeter II starts, change the loudness units to LUFS going to MODE and selecting EBU R128, which changes the MODE display to EBU.

Measuring and adjusting loudness
You will play back the audio file and adjust the loudness by setting the GAIN value. Finally, you will export the file.
Play the file
- In dpMeter II, go to File -> Open and find one of the audio file you want to evaluate.
- Click the green arrow at the bottom of the interface to start playback.
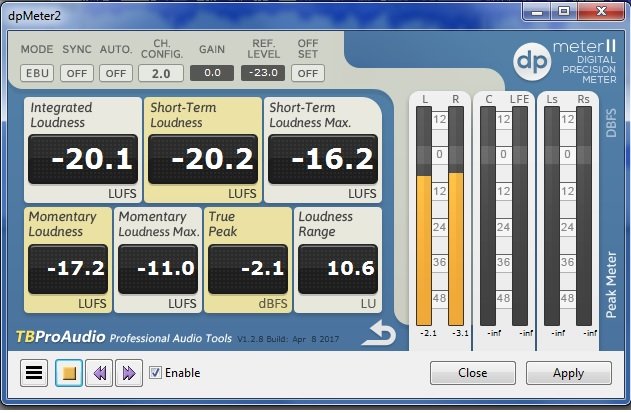
- Play back the entire audio file if it's short or if it's a longer file, sample the audio at various playback times to get an idea of the full loudness range. You will do this by monitoring the Integrated Loudness value at different points in the audio file. You can reset the loudness values by clicking the looping arrow. You can see these in the following image.
Adjust the loudness
- Calculate how you need to adjust the loudness to hit the desired program loudness of -14 LUFS. If your sample is too quiet, it will be a register a number less than -14. If your sample is too loud, the value will higher than -14.
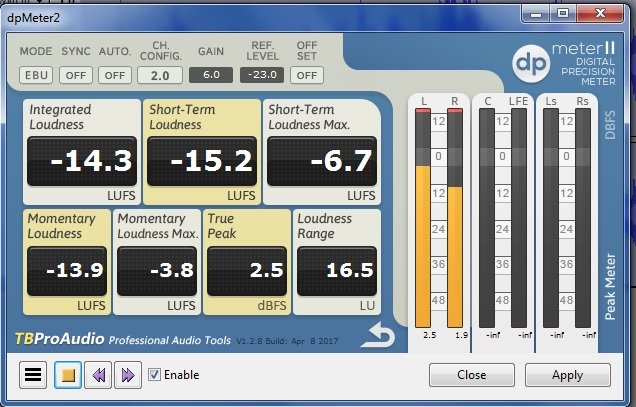
- In the GAIN box, enter the value you've calculated and hit Apply. For example, for an audio file that averaged a loudness value of -20.1, you could enter a GAIN value of 6.0 to result in a target value of -14.1.
It's important to note that you will probably not be able to adjust the volume to -14 LUFS exactly at all points in the audio file, but you should get as close as you can to this value.
Save the file as a new MP3
-
Export the file with adjusted loudness as an MP3. To do this, in Audacity, Select File -> Export Audio.
- For Name, enter a file name
- For Save as Type, select MP3. You may be prompted to install LAME to enable MP3 export if you haven't used this feature of Audacity before.
- For Quality, select Extreme (220-260 kbps)
- Click Save
Your file is now ready to use with Alexa.
Additional Tools
The tools covered in this topic are two of the many tools that you can use to normalize audio content. You can also use a command-line tool for automating the process.
For example, the loadnormfilter of FFmpeg can be used to adjust the loudness of audio content.
Following is an example command using FFmpeg to view the loudness of a file:
$ ffmpeg -i test.mp3 -af loudnorm=I=-14:TP=-3:LRA=11:print_format=json -f null -
This command specifies:
loudnormas the audio filter:-af loudnorm- Integrated loudness of -14:
I=-14 - True peak value of -3 (lower than the -2 threshold):
TP=-3 - Loudness range of 11:
LRA=11 - Input file:
test.mp3 - Specify no output format
-f null -(specify an output file to change the loudness) - Console print format as json:
print_format=json
For the full list of options you can pass to the loudnorm filter, see the FFmpeg documentation.
Last updated: Oct 30, 2025