
Network Proxy (Developer Tools on Fire TV)
The Developer Tools Menu provides a Network Proxy option that allows you to inspect the HTTP traffic. If your app communicates with remote services or websites, it's often useful to inspect the HTTP or HTTPS traffic it generates. This includes requests initiated by your app and the responses it receives, as well as HTTP headers containing (among other things) cookies and caching information.
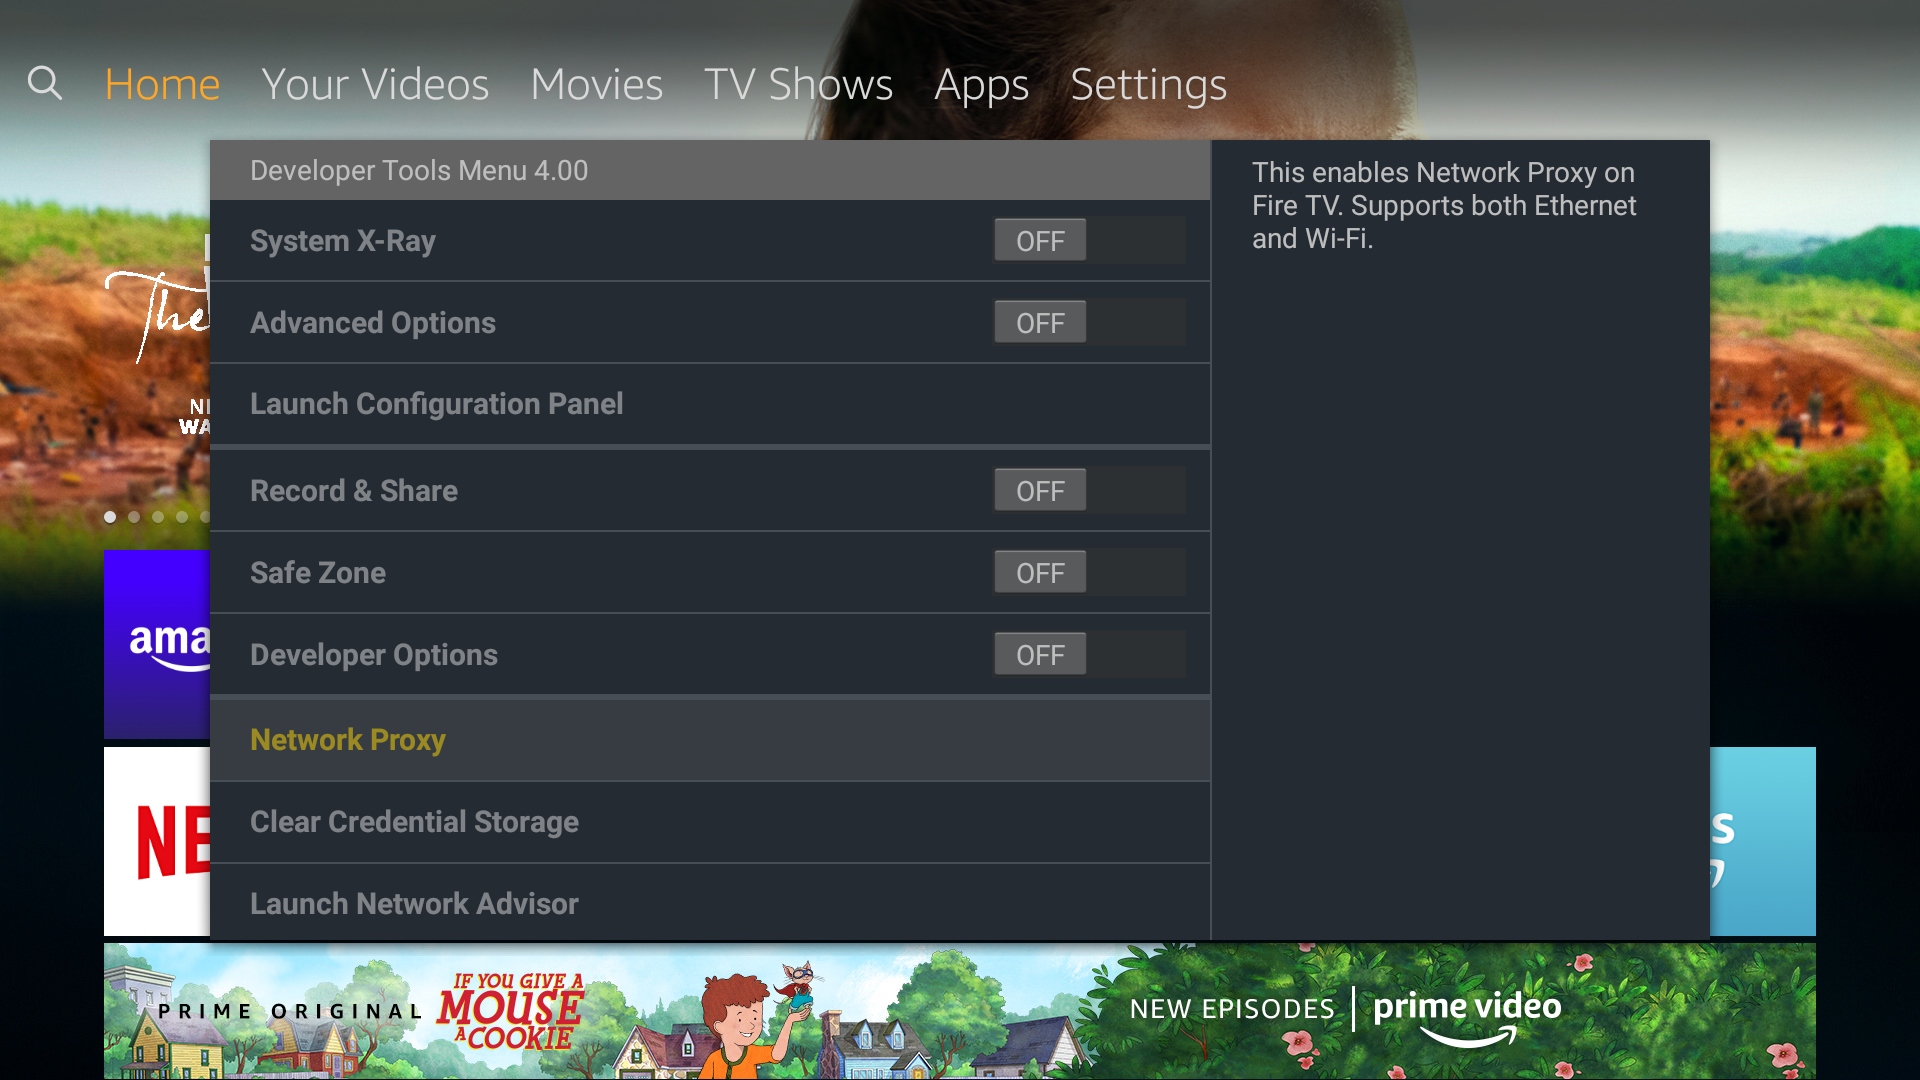
Network Proxy
If your app communicates with remote services or websites, it's often useful to inspect the HTTP or HTTPS traffic it generates. This includes requests initiated by your app and the responses it receives, as well as HTTP headers containing (among other things) cookies and caching information.
The Network Proxy option allows you to specify the hostname and port of a proxy through which all network traffic will pass, allowing you to observe the data sent to or from your app. The proxy host and your Fire TV must be on the same network.
Working with HTTPS and Encrypted Data using Charles Proxy
If your app works with sensitive information, it is likely that you rely on HTTPS connections to protect against eavesdropping and man-in-the-middle attacks. In this case, traffic is SSL-encrypted between source and destination, keeping it private—the data is inaccessible even to a proxy you configure yourself through the Network Proxy option.
Some proxies support SSL Proxying, allowing you to view network traffic even when it's encrypted. Charles Proxy is a popular utility that offers this feature. When your app attempts to communicate with a remote server, Charles Proxy intercepts the server certificate, and dynamically generates and signs one of its own. It uses this substitute certificate to establish a secure connection with your app, then securely connects to the remote site using the original server certificate it received, allowing you to view in plain text the communication between your app and the SSL web server.
To take advantage of SSL Proxying in Charles Proxy, your app must trust the certificate authority (Charles CA) used to sign the substitute certificate that Charles Proxy generates. On Fire OS 5, simply installing the certificate on your device is sufficient, since all apps implicitly trust certificates installed at the device level. On Fire OS 6, each app must explicitly specify which certificates it trusts by listing them in res/xml/network_security_config.xml.
To determine the Fire OS version installed on your test device, go to Settings > My Fire TV > About > Fire TV and look at the "Software Version" details. You can also review the complete list of Fire TV devices and their corresponding Fire OS versions.
The following steps assume you have already installed and configured Charles Proxy. See the documentation if you are new to the application.
Trusting Charles CA on Fire OS 5
- Obtain the certificate file in PEM format from within the Charles Proxy application. From the menu, choose Help > SSL Proxying > Save Charles Root Certificate….
- Upload the certificate file to your Fire TV device:
adb push charles-ssl-proxying-certificate.pem /storage/emulated/0/Download - Bring up the Certificate Installer dialog for the file you uploaded:
adb shell am start -a "android.intent.action.VIEW" -d "file:///storage/emulated/0/Download/charles-ssl-proxying-certificate.pem" -t "application/x-x509-ca-cert" -
Provide a friendly name and ensure that VPN and apps is selected under Credential use.
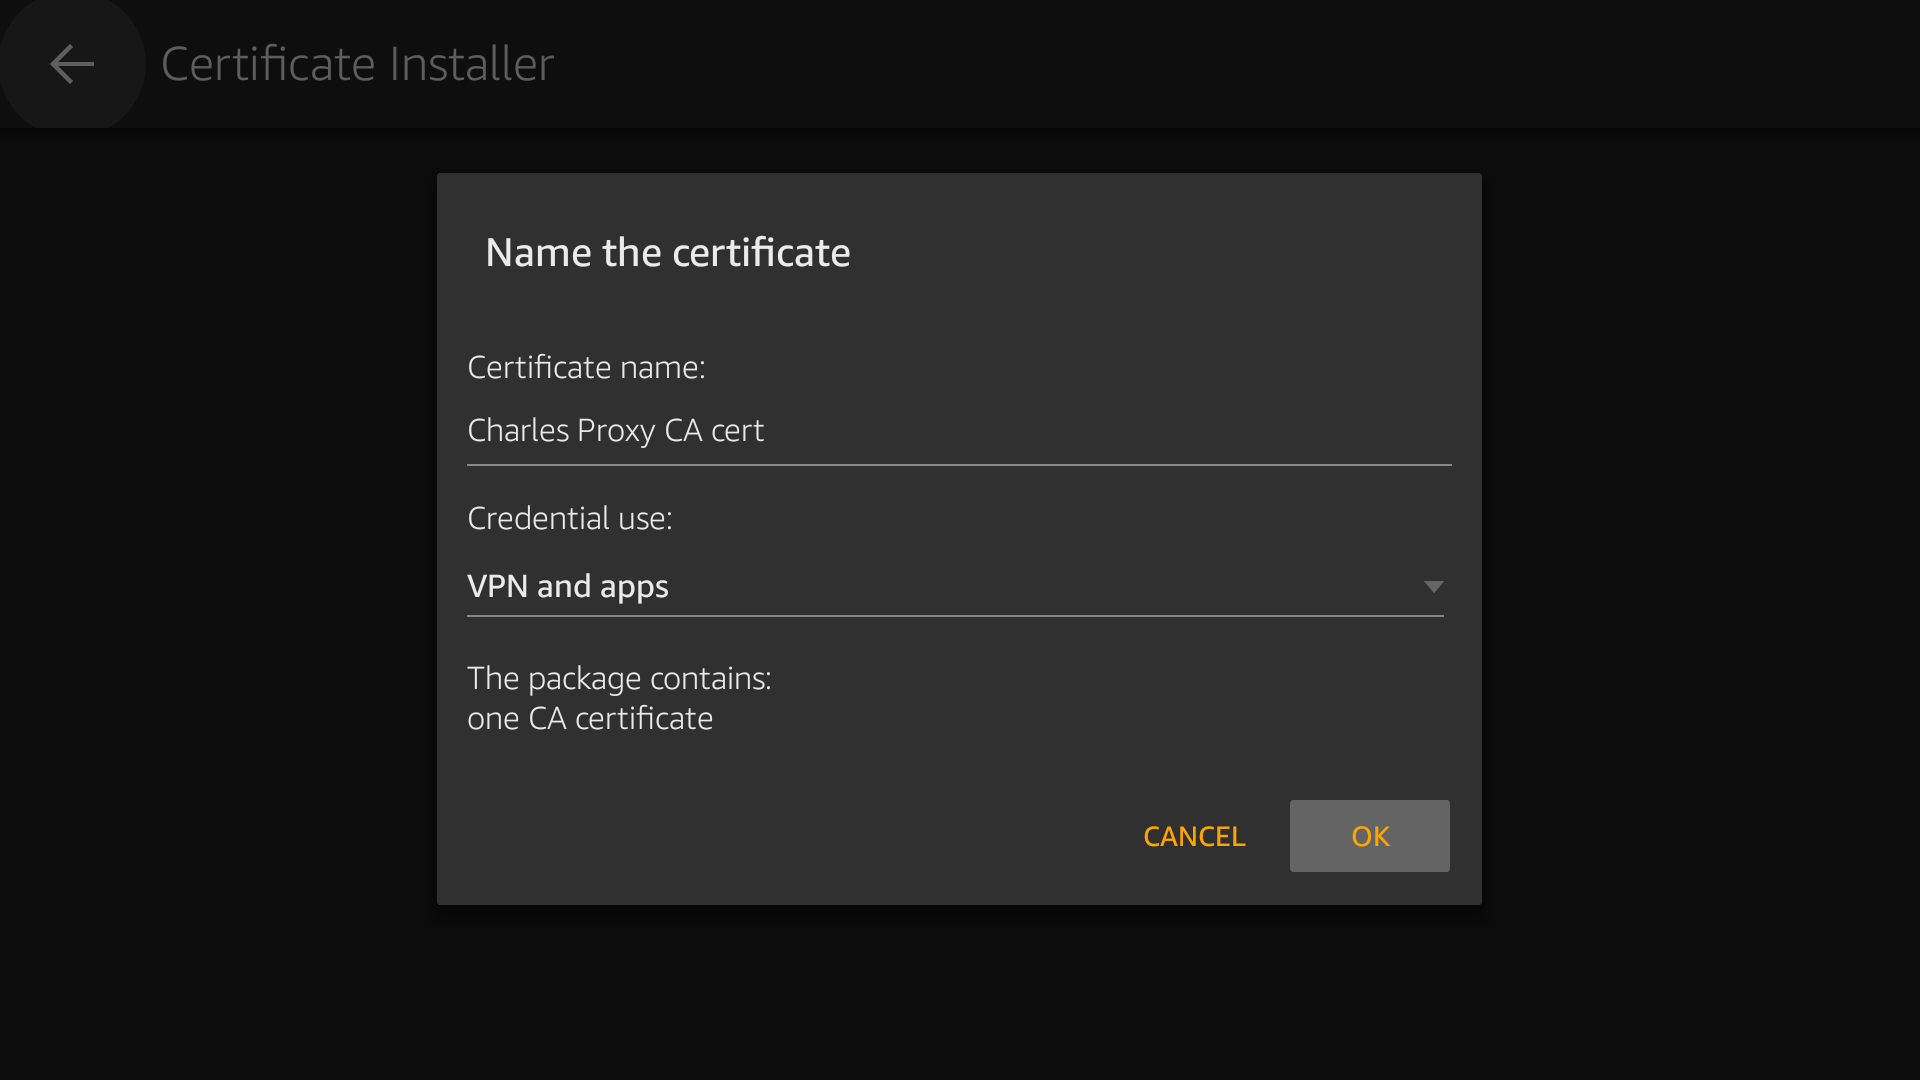
- Press OK to install the certificate. You will be asked to authenticate with your Amazon credentials and an onscreen notification will confirm success.
Trusting Charles CA on Fire OS 6
- Obtain and install the certificate file as for Fire OS 5.
-
Update your Android project's
AndroidManifest.xmlto include a network security configuration file:<?xml version="1.0" encoding="utf-8"?> <manifest ... > <application android:networkSecurityConfig="@xml/network_security_config" ... > ... </application> </manifest> - Add
android:debuggable="true"to theelement if your IDEs and build tools don't set this flag automatically. See details on how to Configure CAs for debugging. -
Add the following
res/xml/network_security_config.xmlto your Android project to explicitly trust all installed certificates:<?xml version="1.0" encoding="utf-8"?> <network-security-config> <debug-overrides> <trust-anchors> <!-- Trust the following CA while debuggable only --> <certificates src="user"/> </trust-anchors> </debug-overrides> </network-security-config>
—OR—
- Obtain the certificate file as for Fire OS 5, but do not install it on the device.
- Instead, embed the file directly in your app by copying it to the
res/rawsubdirectory of your Android project. You can rename the file for convenience, if you want (for example,res/raw/my_ca). -
Update your Android project's manifest to add a network security configuration file such as
res/xml/network_security_config.xml, but change the src attribute to use the filename you chose for the certificate:... <!-- Trust the following CA while debuggable only --> <certificates src="@raw/my_ca"/> ...
Inspecting Encrypted Traffic
After you have configured your device to trust the Charles CA certificate, you can enable the Network Proxy on your device and begin observing encrypted traffic to and from your app. It is important to perform the following steps in the order listed.
To inspect encrypted traffic using Charles Proxy:
- Make sure Charles Proxy is running.
-
Turn on SSL Proxying in the Charles Proxy application. From the menu, choose Proxy > SSL Proxy Settings…, then use Add to specify which hosts to observe. Subdomains such as
wwware considered distinct and should be listed individually.
-
On your device, set Network Proxy mode to Manual and specify the hostname (or IP address) and port number where Charles Proxy is running.

- Launch your app.
You can now view secure network traffic between your app and the server endpoints for which you enabled SSL Proxying in Charles Proxy. The data is unencrypted for display by Charles Proxy, then re-encrypted for delivery to its final destination. You can see cleartext headers and bodies of each request and response.

For more information about using Charles Proxy to inspect your app's network traffic, see the documentation.
See Also
For more details, see the following:
Last updated: Jan 28, 2021