
Step 3: Browse the Content of a Leanback-Enabled Android App (Fire TV)
Now, let's take a closer look into the first and most basic component of an Android app for Fire TV, the BrowseFragment.
After we launch our freshly created TV Android app, built using the Android Studio App Wizard, we will encounter an interface that will look very similar to this:
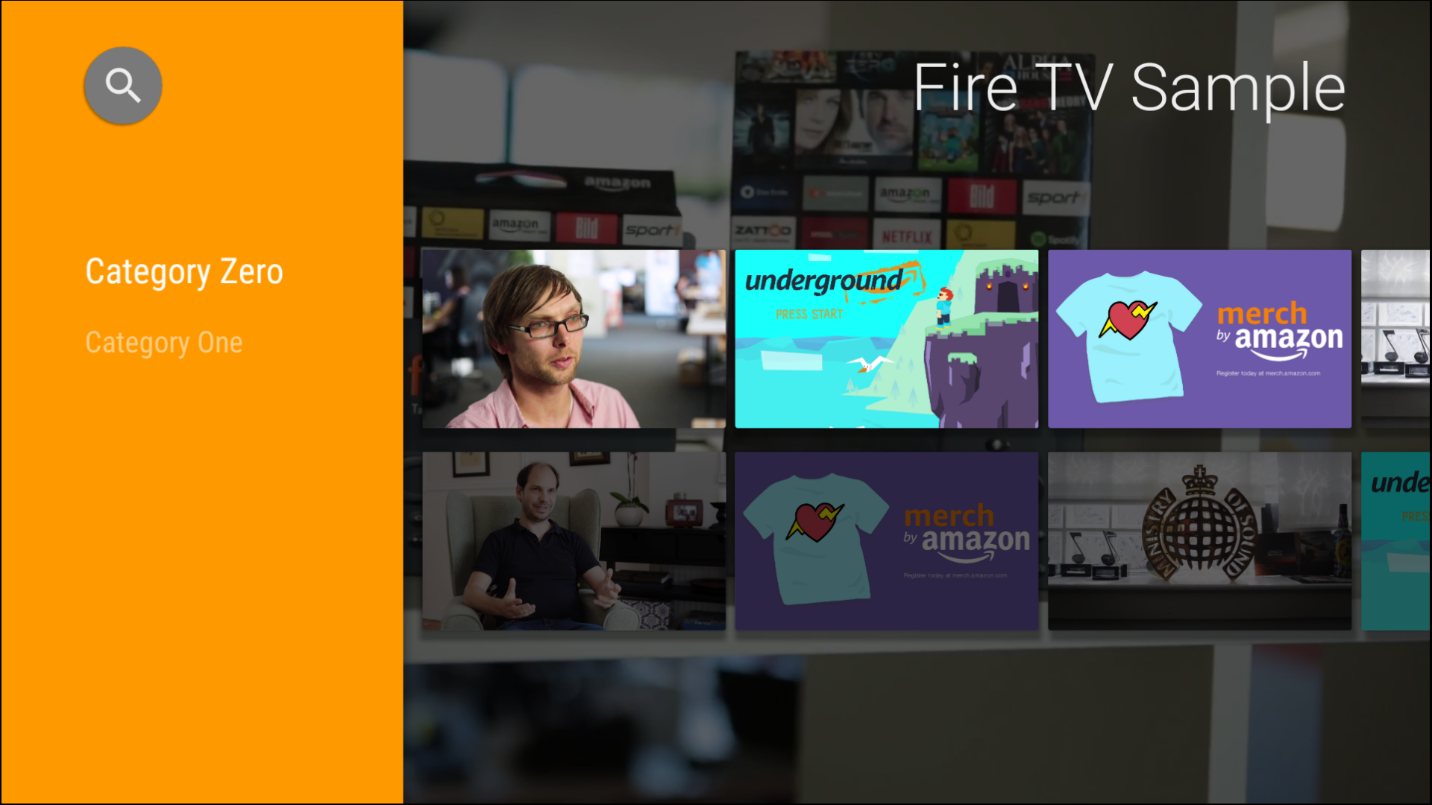
Everything we see in this activity is generated inside a class called BrowseFragment. The BrowseFragment creates an interface to allow the user to easily browse content within the app, most typically videos or movies.
The BrowseFragment itself is actually composed by two sub-fragments: the HeadersFragment and the RowsFragment.

The HeadersFragment shows the header of each row of content, and it can be shown or hidden. Typically it contains the "category" of the content contained in that specific row.
The RowsFragment contains the rows of contents, usually displayed as video thumbnails. We will see how to populate these content rows using ObjectAdapters.
Populating the BrowseFragment
Content rows are horizontal lists populated through Adapters, which arrange the content using classes dedicated to define the look and feel of the app called Presenters.
In order to populate a single row of content, you will use an ArrayObjectAdapter, which you'll call listRowAdapter. This adapter will be responsible for displaying the content of a single row.
For this example, let's also assume we defined a class called "movie" that contains all the information for a movie, like title and description.
Finally, we have a HeaderItem that you will use to define the header of the row. You could, for example, define the "comedy" category.
Here is a visual representation of what a listRowAdapter and HeaderItem would look like:

Let's assume we have a method SetupMovies, which will populate a list of movies that you can then pass to the Adapter. The code below is what you will use to populate a single row and define the header item.
public class MainFragment extends BrowseFragment {

    private void loadRows() {

	//let's generate the list of movies
        List list = MovieList.setupMovies();

//The CardPresenter defines the UI of the items in the row
CardPresenter cardPresenter = new CardPresenter();

//Create the adapter for the row
        ArrayObjectAdapter listRowAdapter
                             = new ArrayObjectAdapter(cardPresenter);

	//let's populate the Adapter
	for (Movie movie:list) {
            listRowAdapter.add(movie);
        }

        //Create the header of this row
        HeaderItem header = new HeaderItem(0, "Comedy");

      }
    }
Usually a media streaming app would have more than a single row of content. So, you need to add multiple Adapters to your BrowseFragment. The easiest way to do this is to have a higher-level Adapter that can manage multiple ListRowAdapters. You can call this class RowsAdapter.
The RowsAdapter will contain multiple ListRowAdapters and will have its own Presenter to define how the rows of content should be displayed.

You will populate the RowsAdapter by adding multiple listRows, combining listRowAdapters and relative HeaderItems. To do that, you use the class ListRow that receives HeaderItem and ArrayObjectAdapter as parameters.
public class MainFragment extends BrowseFragment {
 ...

     //create a RowsAdapter
     ArrayObjectAdapter rowsAdapter
		= new ArrayObjectAdapter(new ListRowPresenter());

     //add multiple rows
     rowsAdapter.add(new ListRow(headerItem1, listRowAdapter1));
     rowsAdapter.add(new ListRow(headerItem2, listRowAdapter2));


     setAdapter(mRowsAdapter);
   }
When you call setAdapter, you populate all the rows in the BrowseFragment and it displays the main interface.
Next Steps
Continue on to the next step: Step 4: Edit the User Interface Through Presenters.
Last updated: Oct 29, 2020