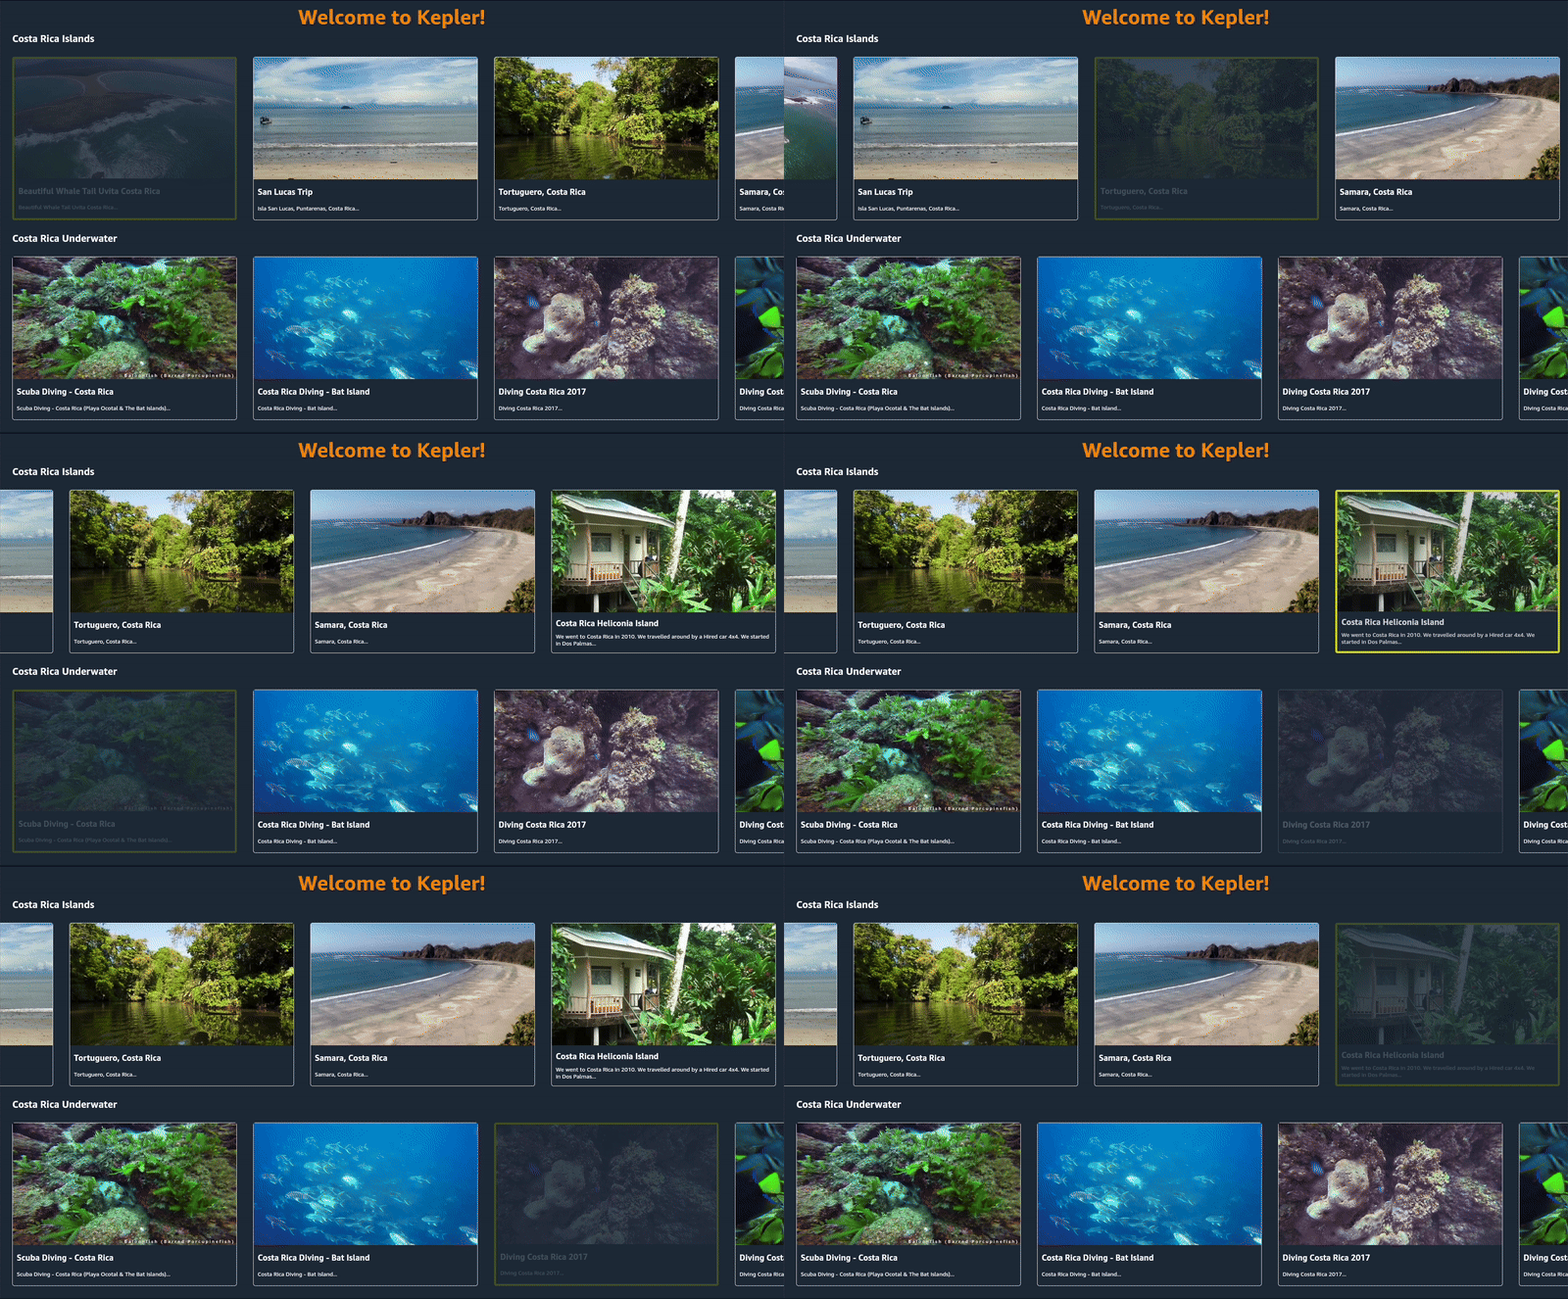
ビデオリストのレンダリング
今度は、islandVideos配列とunderwaterVideos配列の各アイテムのビデオカードをレンダリングします。これを実行する方法は複数あります。
- .map関数などのJavaScriptロジックを使用してJSXの配列を繰り返し処理し、各アイテムのコンポーネントを作成する。
- 配列オブジェクトを受け取るReact NativeのFlatListコンポーネントを使用する。
ここでは2番目の方法を選択します。FlatListの方が.mapよりも効率的で、より簡単だと思われるためです。
FlatListの作成
- まず、FlatList、View、StyleSheetを
LandingScreen.tsxの「react-native」からインポートします。
import { FlatList, View, StyleSheet } from 'react-native';
- VideoCardコンポーネントをFlatListコンポーネントに置き換えます。
- アイテムを水平方向に表示するための
horizontalプロパティを追加します。 - FlatListに
dataプロパティを追加してislandVideosに設定します。これがFlatListでレンダリングされるソースデータです。
<FlatList
  horizontal
  data={islandVideos}
/>
renderItemプロパティを追加します。これはdataプロパティのitem(この例では1つのビデオ要素)をアロー関数に渡します。アロー関数では、そのアイテムをレンダリングするJSXを指定します。- VideoCardコンポーネントを
renderItemに追加し、Viewでラップします。 - VideoCardに
keyプロパティを追加します。FlatListがこれを使用してアイテムを追跡します(キーは一意である必要があります)。VideoCardでkeyを指定する代わりに、FlatListにkeyExtractorプロパティを追加することもできます。詳細については、React NativeのFlatListに関するドキュメント(英語のみ)を参照してください。 title、description、imgURLの各プロパティをVideoCardコンポーネントに追加し、itemの対応するフィールドを渡します。underwaterVideos用に2つ目のFlatListを作成してください。- 各行に
Textコンポーネントを追加して、カテゴリにラベルを付けます。
<Text>コスタリカの島々</Text>
<FlatList
  horizontal
  data={islandVideos}
  renderItem={({item}) => (
    <View>
      <VideoCard
        key={item.id}
        title={item.title}
        description={item.description}
        imgURL={item.imgURL}
      />
    </View>
  )}
/>
<Text>コスタリカの水中</Text>
<FlatList
  horizontal
  data={underwaterVideos}
  renderItem={({item}) => (
    <View>
      <VideoCard
        key={item.id}
        title={item.title}
        description={item.description}
        imgURL={item.imgURL}
      />
    </View>
  )}
/>
- アプリを更新し、VideoCardがレンダリングされていることを確認します。
スタイルの追加
VideoCardの画面での見栄えをよくするために、スタイルを追加しましょう。
- LandingScreenのアロー関数の後に、
flatList、itemContainer、categoryTitleという名前のスタイルを含むStyleSheetを作成します。これらのスタイルはカードにスペースを挿入し、カテゴリタイトルを若干見やすくします。
const styles = StyleSheet.create({
  flatList: {
    padding: 10,
  },
  itemContainer: {
    margin: 10,
  },
  categoryTitle: {
    fontSize: 24,
    fontWeight: 'bold',
    color: 'white',
    marginLeft: 30,
  },
});
- 次に、
flatListスタイルをFlatListに追加し、itemContainerスタイルをViewに追加し、categoryTitleをTextに追加します。
<Text style={styles.categoryTitle}>コスタリカの島々</Text>
<FlatList
  style={styles.flatList}
  horizontal
  data={islandVideos}
  renderItem={({item}) => (
    <View style={styles.itemContainer}>
      <VideoCard
        key={item.id}
        title={item.title}
        description={item.description}
        imgURL={item.imgURL}
      />
    </View>
  )}
/>
TVFocusGuideViewでの行の折り返し
これで、2行の間でフォーカスが確実に処理されるようにTVFocusGuideViewコンポーネントを使用できます。このコンポーネントにより、アプリは複数回訪問したときのフォーカスを見つけて回復し、記憶することができます。
@amazon-devices/react-native-keplerからTVFocusGuideViewをインポートします。
import {TVFocusGuideView} from '@amazon-devices/react-native-kepler';
- FlatListをTVFocusGuideViewでラップし、オートフォーカスをtrueに設定すると、TVFocusGuideが自動的にフォーカスを管理できるようになります。
更新されたLandingScreen.tsxは次のようになります。
import React, {useState, useEffect} from 'react';
import {FlatList, StyleSheet, View, Text} from 'react-native';
import Header from '../components/Header';
import VideoCard from '../components/VideoCard';
import {TVFocusGuideView} from '@amazon-devices/react-native-kepler';

interface IVideo {
  id: string;
  title: string;
  description: string;
  duration: number;
  thumbURL: string;
  imgURL: string;
  videoURL: string;
  categories: Array<string>;
  channel_id: number;
}

const LandingScreen = () => {
  const [islandVideos, setIslandVideos] = useState<IVideo[]>([]);
  const [underwaterVideos, setUnderwaterVideos] = useState<IVideo[]>([]);

  const url = 'https://d2ob7xfxpe6plv.cloudfront.net/TestData.json';

  const getAllVideos = () => {
    fetch(url)
      .then((response) => response.json())
      .then((data) => {
        // 各カテゴリの動画をフィルタリングします
        const islands = data.testData.filter(
          (video: IVideo) =>
            video.categories && video.categories.includes('コスタリカの島々'),
        );

        const underwater = data.testData.filter(
          (video: IVideo) =>
            video.categories &&
            video.categories.includes('コスタリカの水中'),
        );

        setIslandVideos(islands);
        setUnderwaterVideos(underwater);
      })
      .catch((error) => {
        console.log(error);
      });
  };

  useEffect(() => {
    getAllVideos();
  }, []);

  return (
    <>
      <Header />
      <TVFocusGuideView autoFocus={true}>
        <Text style={styles.categoryTitle}>コスタリカの島々</Text>
        <FlatList
          style={styles.flatList}
          horizontal
          data={islandVideos}
          renderItem={({item}) => (
            <View style={styles.itemContainer}>
              <VideoCard
                title={item.title}
                description={item.description}
                imgURL={item.imgURL}
                pressFunction={() => {}}
              />
            </View>
          )}
        />
      </TVFocusGuideView>
      <TVFocusGuideView autoFocus={true}>
        <Text style={styles.categoryTitle}>コスタリカの水中</Text>
        <FlatList
          style={styles.flatList}
          horizontal
          data={underwaterVideos}
          renderItem={({item}) => (
            <View style={styles.itemContainer}>
              <VideoCard
                title={item.title}
                description={item.description}
                imgURL={item.imgURL}
                pressFunction={() => {}}
              />
            </View>
          )}
        />
      </TVFocusGuideView>
    </>
  );
};

const styles = StyleSheet.create({
  flatList: {
    padding: 10,
  },
  itemContainer: {
    margin: 10,
  },
  categoryTitle: {
    fontSize: 24,
    fontWeight: 'bold',
    color: 'white',
    marginLeft: 30,
  },
});

export default LandingScreen;
- アプリを更新し、既存の行から別の行に移動します。新しい行の対応する項目に移動するのではなく、移動元の項目にフォーカスが保持されていることに注目してください。 この動作はTVFocusGuideViewコンポーネントによって制御されています。

おめでとうございます! ビデオアプリの基盤を構築したこのラボのパート1を無事終了しました。再利用可能なコンポーネントを作成し、データ取得を実装し、VideoCardにインタラクティブ機能を追加しました。パート2では、アプリの機能を拡張します。

