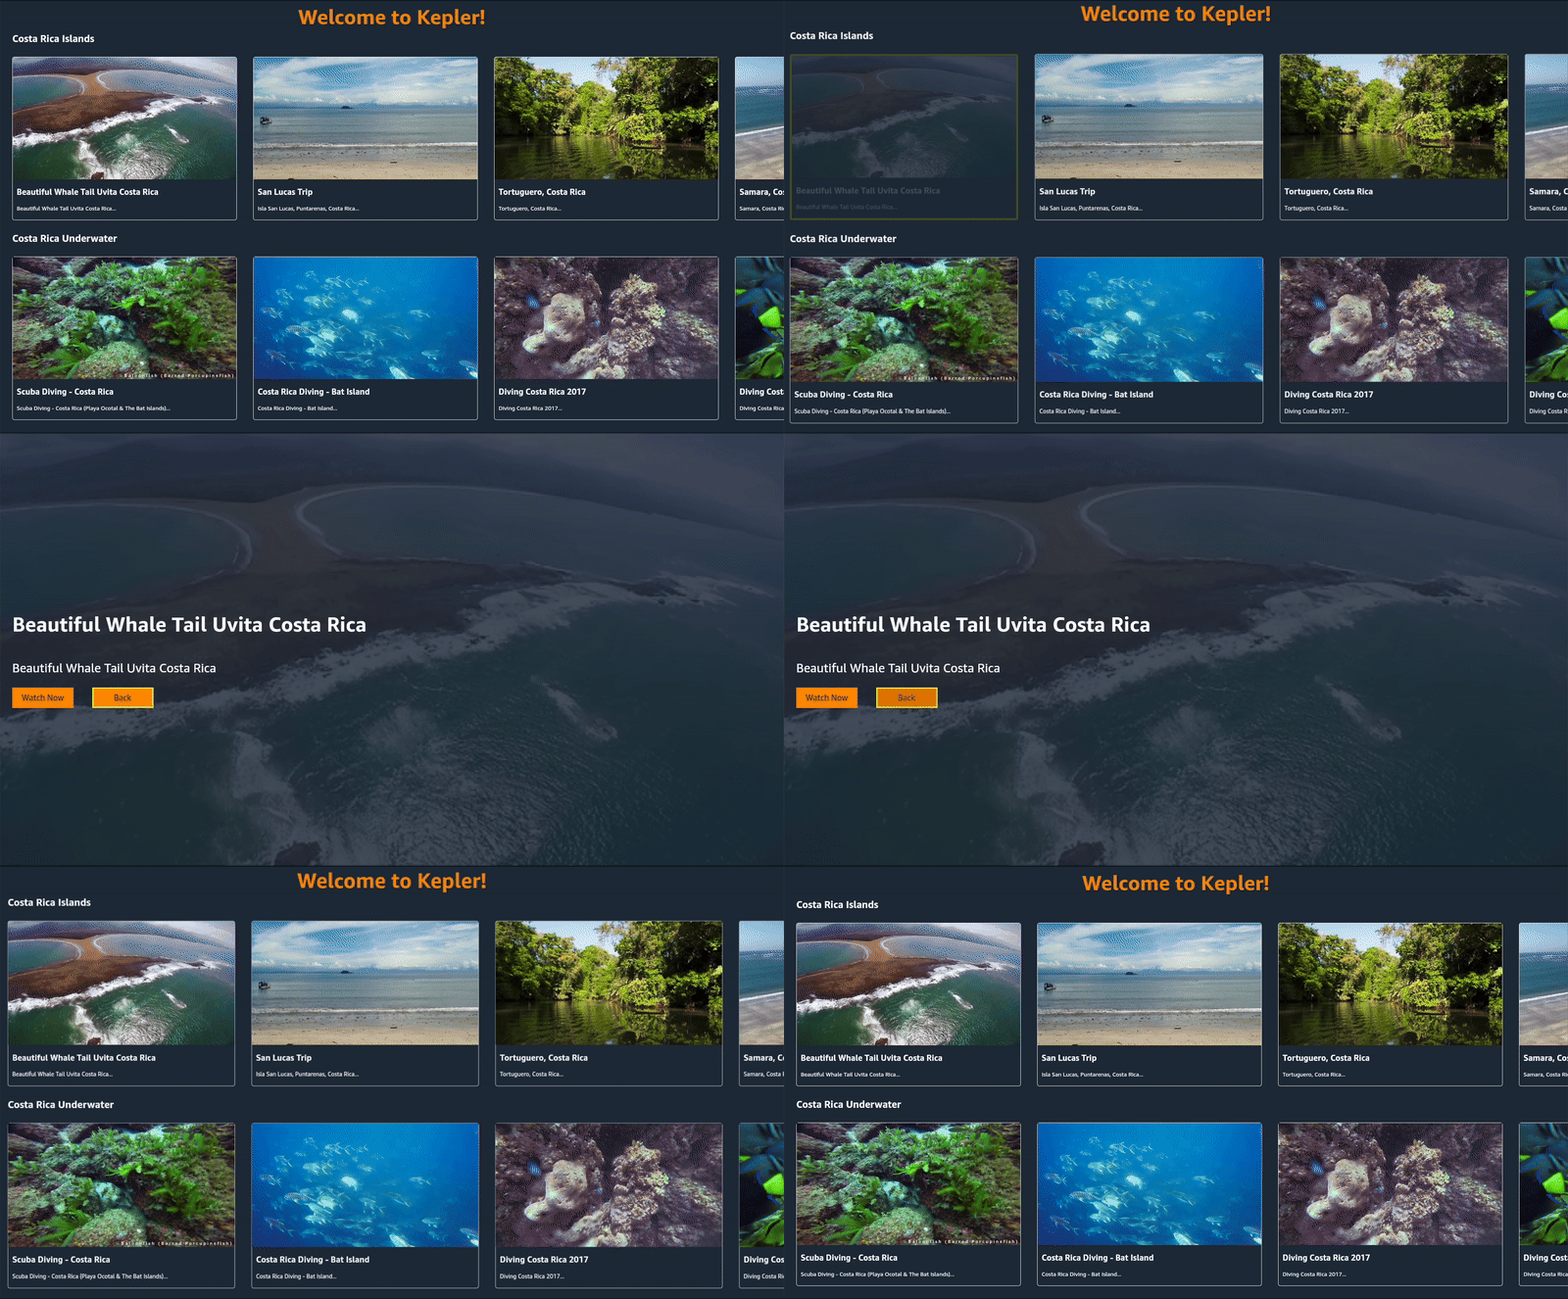
ビデオの詳細画面のナビゲーション
ビデオの詳細画面のナビゲーション
オープンベータ版ドキュメント:本テクニカルドキュメントは、リリース前のオープンベータ版の一部としてAmazonから提供されるものです。ここで説明されている機能は、Amazonがフィードバックを受け取り、機能の開発を繰り返す過程で変更される可能性があります。最新の機能の情報については、リリースノートを参照してください。
ビデオデータのレンダリング
VideoDetailsScreenに渡すデータをレンダリングしましょう。
VideoDetailScreen.tsxを開きます。- VideoDetailScreenコンポーネントのパラメーターリストで、
navigationとrouteを分割して、any型として宣言します。
const VideoDetailScreen = ({ navigation, route }: any) => {
  // VideoDetailScreenのコード
}
routeからビデオを取得する新しい変数を定義します。
const video = route.params.video;
- ImageBackgroundの
sourceプロパティを更新し、{{ uri:video.imgURL }}に設定します。
<ImageBackground
  source={{ uri: video.imgURL }}
  imageStyle={styles.image}
  style={styles.screenContainer}
>
- Textコンポーネントの「ビデオタイトル」と「ビデオの説明」を
{video.title}と{video.description}に置き換えます。
<Text style={styles.videoTitle}>{video.title}</Text>
<Text style={styles.videoDescription}>{video.description}</Text>
ナビゲーションボタンの追加
ボタンを追加して、ナビゲーションできるように設定しましょう。
- 作成したButtonコンポーネントをインポートします。
- 2つのテキストフィールドの下にビューを追加します。
- このビューに
buttonContainerというスタイルプロパティを指定し、スタイルシートに次のスタイルを追加します。
 buttonContainer: {
    display: 'flex',
    flexDirection: 'row',
    justifyContent: 'space-between',
    marginLeft: 30,
    width: '18%',
  },
- ビュー内に2つのButtonコンポーネントを追加します。
  <View style={styles.buttonContainer}>
    <Button/>
    <Button/>
  </View>
最初のボタンの場合:
- buttonTextプロパティを「今すぐ観る」に設定します。
- 今のところpressFunctionプロパティは空に設定しておきます。次のセクションで、新しいVideoPlaybackScreenに移動するよう設定します。
<Button
  buttonText="今すぐ観る"
  pressFunction={() => {} }
/>
2つ目のボタンコンポーネントの場合:
- buttonTextプロパティを「戻る」に設定します。
- pressFunctionプロパティを
{() => navigation.goBack()}に設定します。これにより、スタック内の前の画面であるLandingScreenに戻ります。
<Button
  buttonText="戻る"
  pressFunction={() => navigation.goBack()}
/>
VideoDetailScreen.tsxのコードは次のようになります。
import React from 'react';
import {ImageBackground, Text, View, StyleSheet} from 'react-native';
import {Button} from '../components';

const VideoDetailScreen = ({navigation, route}: any) => {
  const video = route.params.video;

  return (
    <ImageBackground
      source={{uri: video.imgURL}}
      imageStyle={styles.image}
      style={styles.screenContainer}>
      <Text style={styles.videoTitle}>{video.title}</Text>
      <Text style={styles.videoDescription}>{video.description}</Text>
      <View style={styles.buttonContainer}>
        <Button
          buttonText="今すぐ観る"
          pressFunction={() =>
            navigation.navigate('VideoPlaybackScreen', {
              videoURL: video.videoURL,
            })
          }
        />
        <Button buttonText="戻る" pressFunction={() => navigation.goBack()} />
      </View>
    </ImageBackground>
  );
};

const styles = StyleSheet.create({
  image: {
    opacity: 0.2,
  },
  screenContainer: {
    display: 'flex',
    height: '100%',
    justifyContent: 'center',
  },
  videoTitle: {
    fontSize: 50,
    color: 'white',
    fontWeight: '700',
    margin: 30,
  },
  videoDescription: {
    color: 'white',
    fontSize: 30,
    margin: 30,
  },
  buttonContainer: {
    display: 'flex',
    flexDirection: 'row',
    justifyContent: 'space-between',
    marginLeft: 30,
    width: '18%',
  },
});

export default VideoDetailScreen;
- アプリを更新し、背景画像、タイトル、説明が表示されていることを確認します。
- [戻る] ボタンをクリックするとLandingScreenに戻ることを確認します。次のセクションでは、[今すぐ観る] ボタンをテストします。


