
Set Up Fast Refresh to Build Apps Using Vega CLI
Fast Refresh is a React Native feature that lets you see code changes instantly without rebuilding your app. Fast Refresh works in both Vega Studio and Vega command-line interface (CLI) environments. Fast Refresh is automatic in Vega Studio (Debug mode) but requires manual setup with Vega CLI. Follow the instructions on this page.
Prerequisites
- Install the Vega SDK.
-
Complete setup of either:
Connect your Vega Virtual Device to Metro Server
Have your app's directory path ready:
- Open two terminal windows (A and B).
-
Start the Vega Virtual Device in terminal A:
vega virtual-device start -
Navigate to your app’s directory in terminal B:
cd <your app directory> // Example output cd sampleapp -
Install the dependencies:
npm install -
Build the app:
npm run build:debug -
Start the Metro Server in terminal B:
npm startThe Metro Server loads dependencies and displays its logo.

-
Return to terminal A and start port forwarding:
vega device start-port-forwarding --device <DEVICE_NAME> -p <PORT> --forward false // Example output vega device start-port-forwarding --device VirtualDevice -p 8081 --forward false -
Run your app using the debug build:
vega run-app <PATH_TO_VPKG> <com.amazondeveloper.YOUR_APP_NAME.main> -d VirtualDevice

# To run `sampleapp` on x86 Vega Virtual Device, the command is:
vega run-app build/x86_64-release/sampleapp_x86_64.vpkg com.amazondeveloper.sampleapp.main -d VirtualDevice
Tip: Find your id in manifest.toml and customize the FQDN as needed.
Use a custom Metro Bundler port - Vega Virtual Device
Metro Bundler supports changing the default port.
-
Start Metro on a custom port:
npm start -- --port=<new_port>Tip: Replace<new_port>with your preferred port number (for example, 8082). -
Reverse-port-forward the custom port on the host:
vda reverse tcp:8081 tcp:<new_port>
End the Fast Refresh session - Vega Virtual Device
When you finish working on your app with Fast Refresh, you can:
-
Close your app.
vega device terminate-app --device <DEVICE_NAME> --appName <com.amazondeveloper.YOUR_APP_NAME.main> # The command to close the `sampleapp` on the Vega Virtual Device is: vega device terminate-app --device VirtualDevice --appName com.amazondeveloper.sampleapp.main -
Press Ctrl+C to stop the Metro Server.
-
Stop port forwarding:
vega device stop-port-forwarding --device <DEVICE_NAME> -p <PORT> --forward false # The command to stop port forwarding for the `sampleapp` on the Vega Virtual Device is: vega device stop-port-forwarding --device VirtualDevice -p 8081 --forward false -
Stop the Vega Virtual Device:
vega virtual-device stop
Connect your Fire TV Stick to Metro Server
-
Connect your Fire TV Stick to your computer.
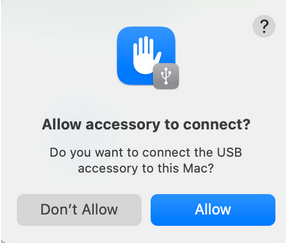
If you're a macOS user, you see a security prompt when connecting your Fire TV Stick to your computer. Click Allow.

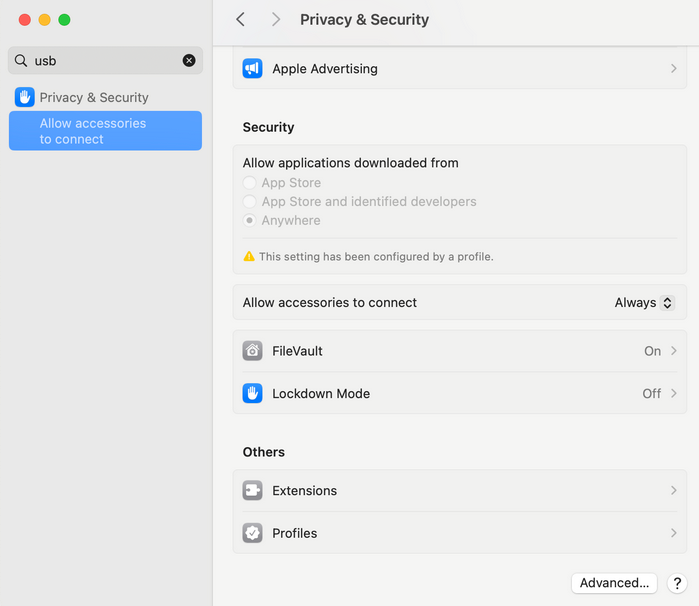
To avoid future prompts:
a. Go to Configuration > Privacy & Security.
b. Set Allow accessories to connect to Always.

- Open two terminal windows (A and B).
-
Navigate to your app’s directory in terminal A:
cd <your app directory> // Example output cd sampleapp -
Start the Metro Server in terminal A:
npm startThe Metro Server loads dependencies and displays its logo.
- Press r in the Metro Server window.
-
Start port forwarding in terminal B:
vega device start-port-forwarding --device <DEVICE_NAME> -p <PORT> --forward false

# For example, if your device serial number is `GXX2A1234567890A`, the full command would be:

vega device start-port-forwarding --device GXX2A1234567890A -p 8081 --forward false
Important: After you run the command, a deprecation warning appears. Continue to the next step.To check for your device's serial number, run the following command:
vega device list -
Install the dependencies:
npm install -
Build your app:
npm run build:app -
Run your app:
vega run-app <PATH_TO_VPKG> <com.amazondeveloper.YOUR_APP_NAME.main> --deviceId <DEVICE_NAME>

# To run the `sampleapp` app with the device serial number `GXX2A1234567890A`, the command would be:
vega run-app build/armv7-release/sampleapp_armv7.vpkg --deviceId GXX2A1234567890A
Use a custom Metro Bundler port - Fire TV Stick
Metro Bundler supports changing the default port.
-
Start Metro on a custom port:
npm start -- --port=<new_port>Tip: Replace<new_port>with your preferred port number (for example, 8081). -
Reverse-port-forward the custom port on the host:
vda reverse tcp:8081 tcp:<new_port>
End the Fast Refresh session - Fire TV Stick
When you finish working on your app with Fast Refresh, disconnect the device.
Troubleshooting
For setup issues, see Resolve Fast Refresh Issues.
Related topics
Build an app using the Vega CLI
Last updated: Dec 22, 2025