
Set Up and Use Vega Studio
Vega Studio, an extension in Visual Studio Code (VS Code) for building Vega apps. Installing the Vega Software Development Kit (SDK) automatically includes this tool, giving you:
- Integrated debugging tools
- Real-time performance monitoring
- Built-in app optimization features
- Direct device management for Fire TV Stick
- Comprehensive testing capabilities
When you install the Vega SDK, it automatically configures the Vega Studio in VS Code. With Vega Studio, you can access all Vega development tools and commands directly from VS Code command palette.
Prerequisites
-
Open VS Code and look for the Vega extension icon
 from the activity bar or navigate to Code > Settings > Extensions.
 -
Enter "Vega Studio" in the Extensions: Marketplace search field.
If you see the Vega extension icon, continue to Build Your App or learn the basic features and advance configuration options in Vega Studio.
If you don't see the Vega extension icon, continue to Install Vega Studio manually.
Install Vega Studio manually
Choose one of these installation options:
Option 1: Install from Microsoft Marketplace
- Select Install.
- Select Open Visual Studio Code.
- Select Continue if prompted.
- Look for the Vega extension icon from the activity bar.
Option 2: Install from Vega SDK
-
Verify if your Vega SDK is in the PATH:
export KEPLER_SDK_PATH=<path to sdk>
export PATH=$KEPLER_SDK_PATH/bin:$PATH
Replace
<path to sdk>with your actual directory path. -
Open a terminal and enter:
kepler setup-studio --install - Select Reload if prompted.
- Look for the Vega extension icon from the activity bar.
Learn the basic features
After installation of Vega Studio, you can access all development tools through the Vega Studio panel.
- Open VS Code.
- Look for the Vega extension icon from the activity bar.
-
Select the Vega extension icon to open the Vega Studio panel, which contains the following sections:
-
Projects - Create, manage, and organize your development projects
-
Build Modes - Configure debug and release build settings
-
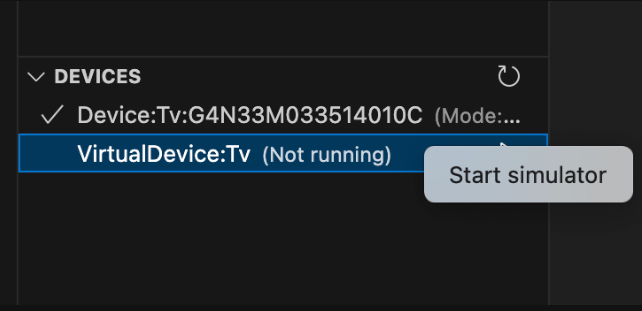
Devices - Manage and monitor connected devices
-
App Performance Tools - Monitor and optimize app performance
-
Help and Feedback - Access documentation, tutorials, and submit support requests
-
Manage your Vega projects
The Projects section lists your current projects with options to build, install, or run.
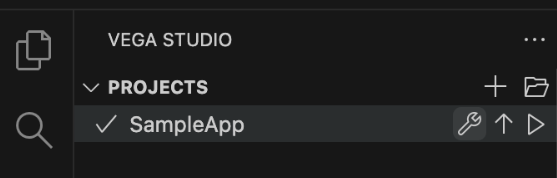
Select your build mode
The Build Modes section lets you choose between Debug and Release builds for your Vega app. Your selection applies to all subsequent builds until changed.

- Debug mode - Designed for development and testing. It includes debugging artifacts and enables the Metro Packager (React Native's JavaScript bundler), allowing real-time code updates through Fast Refresh.
Vega Studio automatically enables Fast Refresh when you use Debug mode. To use Fast Refresh:
- Build your app in Vega Studio.
- Run your app on Vega Virtual Device or Fire TV Stick.
- Make changes to your code. You should see changes instantly on your device.
- Release mode - Creates optimized, production-ready code intended for final deployment and publishing. It disables development features like Fast Refresh, removes debugging information, and reduces file size for improved runtime performance.
The distinction between Debug and Release modes applies to all Vega apps, including React Native for Vega apps. While Debug mode provides development tools like Fast Refresh, Release mode optimizes the app for production use.
View your devices
The Devices section shows all devices (virtual device or physical devices) connected to your machine. The device list updates automatically when you connect or disconnect devices.
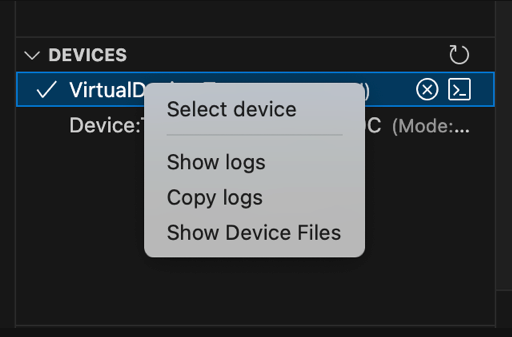
You can start a device from this interface.
Select a device to run your project on.

You can also open terminal sessions for direct device interaction.
Access performance monitoring tools
This section provides access to performance monitoring tools to optimize your app. Some tools are only available when apps run on physical devices.
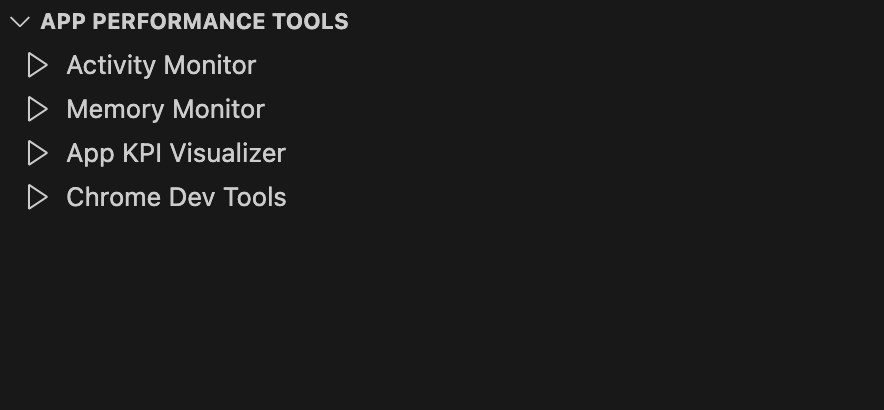
- Activity Monitor - Monitors app memory and CPU usage in real time
- Memory Monitor - Monitors app memory usage in real time
- App KPI Visualizer - Measures key performance indicators and verifies if your app meets the performance standard
- Chrome Dev Tools - Inspect, debug, and profile your apps. Use as an alternative to the built-in VS Code debugger
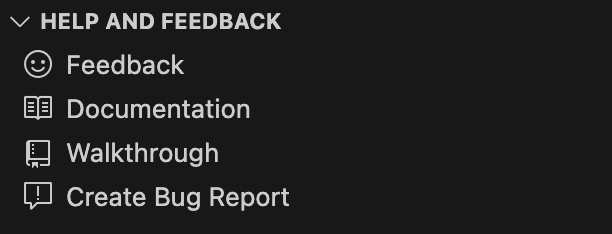
Submit feedback or issues, find resources and guides
This section provides links to:
-
Feedback - Lets you submit feedback or issues to the Vega team
-
Documentation - Links to resources for getting started with Vega development
-
Walkthrough - Guides for project setup, build modes, device management, and performance tools
-
Create bug report - Gathers diagnostic information about your system, devices, and logs
When you click the Create bug report link, it activates the Bug Report tool which gathers diagnostic information about your system, devices, and logs. The tool saves the information as a file on your computer that you can attach when you submit a support ticket.
The report includes:
System information
- Operating system details (platform, version, architecture)
- Hardware information (memory, CPU)
- Environment details (Node.js version, SDK version)
Device information
- List of connected Vega devices
- Device details (type, OS, architecture)
- Device status information
Log files
- Vega Studio extension logs
- React Native application logs
- Vega SDK logs
- Device logs (for connected devices)
- Latest aggregated crash report (ACR) from the device
Protect your privacy
Before submitting a bug report, review the entire file as it may contain personal information such as usernames, home directory paths, file paths, or other sensitive data. Evaluate the report contents and remove any private information before submission.
When to create a bug report
Create and submit a bug report when:
- Vega Studio shows errors or unexpected behavior
- Vega Studio crashes or freezes
- Features don't work as expected
- The virtual device or device crashes
How to create a bug report
- Open the Help and Feedback view in Vega Studio.
-
Select Create Bug Report.
The system:
- Generates a bug report file (this may take a minute)
- Saves the file to your home directory
- Shows you the file location
- Opens the Appstore Developer Support page
- When you see the Appstore Developer Support page, fill out the information.
- Attach the generated bug report file (10MB size limit) to your support ticket.
If the system fails to generate report:
- Restart VS Code.
- Repeat steps 1-4.
Need help?
These resources can help you resolve issues or get answers to your questions:
- Create a support case to get direct help from Amazon support
- Use the DevAssistant to find information you need
- Visit the community forum to see if other developers have encountered similar issues
Configure advanced options
Vega Studio provides advanced settings to customize your development environment and optimize your workflow. These options help you tailor the extension behavior to match your specific development needs.
Automatic device detection
Vega Studio automatically updates the device list to show connection status in real time.

To turn on or off the automatic device detection:
- Go to Extensions > Vega Studio.
- Navigate to Vega > Features: Automatic Device Detection.
- Check the box to turn on this feature, or uncheck to turn off.
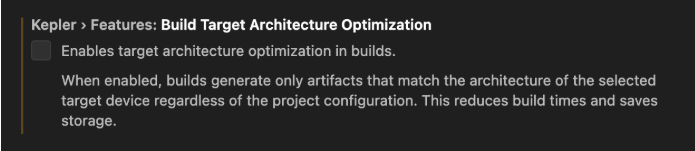
Build target architecture optimization
Vega Studio optimizes builds by creating artifacts only for your target device architecture, reducing build times and package sizes.
For example, when targeting Fire TV Stick:
- ✅ Generates: armv7 artifacts
- ❌ Skips: x86_64 and aarch64 artifacts
To turn on or off the build target architecture optimization:
- Go to Extensions > Vega Studio > Settings.
- Navigate to Vega > Features: Build Target Architecture Optimization.
- Check the box to turn on this feature, or uncheck to turn off.
Launch options
Vega Studio lets you pass options (parameters) to a launch app command by configuring the options in VS Code.
To configure launch options:
-
Open VS Code settings:
- Mac: Code > Settings > Settings
- Linux: File > Preferences > Settings
-
Choose your configuration options:
- User - Applies to all projects under the current user
- Workspace - Applies to all projects under the workspace
- Project - Applies to a specific project
For example, in the following image, the setting option to configure is Workspace.

-
Go to Extensions > Vega Studio.
-
In the Vega Launch Options section, enter your launch options.
Important: VS Code settings are nested. Folder settings override Workspace settings, which override User settings. See VS Code Settings.

Monorepo support
A monolithic repository (monorepo) contains multiple projects or packages within a single repository. Starting from v0.20, Vega Studio supports packages with monorepo layout through npm and Yarn workspaces (Yarn v2 layouts are preferred, but v1 is also supported except for nohoist).
With monorepo support, you can:
- Open monorepo packages
- Import Vega projects into VS Code workspace
- Manage multiple projects efficiently
Monorepo structure streamlines development by enabling code sharing and reuse, centralizing dependency management, and simplifying project setup.
Vega SDK includes npm package manager by default. If you prefer Yarn, see Set Up Yarn Workspace.
Turn on or off the monorepo support
Go to Settings > Vega > Features: Monorepo.

Modify monorepo behavior
-
Go to Settings > Vega > Features: Monorepo Synchronization.
-
Choose from these options:
- Auto – Automatically detects and imports sub-packages in the background when you open or add monorepo package to VS Code workspace.
- Ask for confirmation – Detects sub-packages, but asks for permission before importing.
Note: Import can installnpmdependencies and cause VS Code workspace to reload.
Understand the different workflows
When using monorepo layout packages, the workflows differ in these ways:
- Open workspace without a monorepo package – Identifies the package layout in the background without interfering with your workflow.
- Open workspace with a monorepo package – Identifies the layout, enumerates sub-packages, detects Vega projects, and adds them to the workspace (depends on your monorepo synchronization setting as described in monorepo support).
- Add a monorepo package to VS Code workspace – Functions the same as opening a workspace with a monorepo package.
-
Build entire monorepo – Uses VS Code default build task.
Vega Studio doesn't support auto-configuration of the build task. You must manually configure it. In VS Code, you can do one of the following:
- Go to Terminal > Run Build Task.
- Press
Cmd+Shift+Bon your keyboard. - Go to command palette and enter Tasks: Run Build Task.
- Add a Vega project to a monorepo – See instructions in Add Vega projects to a monorepo.
- VS Code Explorer view – Shows Vega projects inside the monorepo and as separate entries in the VS Code workspace.
- Vega Studio view – Displays Vega projects as normal.
- Other workflows – Remain unchanged from non-monorepo workspaces.
Add Vega projects to a monorepo
- Create a new Vega project from a template in the packages directory of your monorepo.
-
Update the JS app package dependency:
// REPLACE "@prefix/module-name": "file:...../prefix-module-name-0.0.1.tgz" // WITH "@prefix/module-name": "*" -
Add
node_modulespath tometro.config.js:const path = require('path'); const config = { projectRoot: __dirname, watchFolders: [ path.resolve(__dirname, '../../packages'), path.resolve(__dirname, '../../node_modules') ], resolver: { disableHierarchicalLookup: true, nodeModulesPaths: [ path.resolve(__dirname, 'node_modules'), path.resolve(__dirname, '../../node_modules') ] } }; - Remove unnecessary lock files and package artifacts (especially package-lock.json files when using Yarn).
-
For
Yarnwith corepack, specify the package manager in package.json:"packageManager": "yarn@x.y.z"
Troubleshoot monorepo issues
If you encounter issue when working with monorepo in Vega Studio, see Resolve Monorepo issues for solutions.
Related topics
Last updated: Oct 31, 2025