
Create the VideoCard Component
Define the VideoCard component
Now that we have our basic Header component, we need to create our VideoCard component.
- Go to the
componentsfolder and create a file calledVideoCard.tsx.
We should now have two files:
src/
├── components/
│   ├── Header.tsx
│   └── VideoCard.tsx
└── App.tsx
- Import React from 'react', and import StyleSheet, Text, View, and Image from 'react-native'. These components are needed to render a video's title, description, and image.
- Create an arrow function called VideoCard.
- Return a View that contains an Image component and another View with two Text components (title and description). For now, hard code the Text values to "title" and "description", and the Image source to https://le1.cdn01.net/videos/0000169/0169322/thumbs/0169322__002f.jpg.
- Export the VideoCard, so that it can be used by other components and screens.
The code in VideoCard.tsx should look like this:
import * as React from 'react';
import {StyleSheet, Text, View, Image} from 'react-native';

const VideoCard = () => {
  return (
    <View>
      <Image
        source={{
          uri: 'https://le1.cdn01.net/videos/0000169/0169322/thumbs/0169322__002f.jpg',
        }}
      />
      <View>
        <Text>Title</Text>
        <Text>Description</Text>
      </View>
    </View>
  );
};

export default VideoCard;
Add Styling
Next, we need to create a new StyleSheet for styling the components in VideoCard.
- Add the StyleSheet below after the VideoCard component.
const styles = StyleSheet.create({
  videoCardContainer: {
    height: 400,
    width: 550,
    borderWidth: 1,
    borderColor: 'white',
    borderRadius: 5,
  },
  videoTextContainer: {
    height: '25%',
    display: 'flex',
    justifyContent: 'space-around',
    padding: 10,
  },
  videoImage: {
    height: '75%',
  },
  videoTitle: {
    fontSize: 20,
    fontWeight: 'bold',
    color: 'white',
  },
  videoDescription: {
    color: 'white',
  },
});
We are using borderRadius to round the edges of the container. We're also setting justifyContent to 'space-around', to get some automatic spacing around the title and description. To learn more about the different options for justifyContent, visit the flexbox documentation.
- Add the new styles to their respective components.
<View style={styles.videoCardContainer}>
  <Image
    style={styles.videoImage}
    source={{
      uri: 'https://le1.cdn01.net/videos/0000169/0169322/thumbs/0169322__002f.jpg',
    }}
  />
  <View style={styles.videoTextContainer}>
    <Text style={styles.videoTitle}>Title</Text>
    <Text style={styles.videoDescription}>Description</Text>
  </View>
</View>
The VideoCard.tsx file should now look like this:
import * as React from 'react';
import {StyleSheet, Text, View, Image} from 'react-native';

const VideoCard = () => {
  return (
    <View style={styles.videoCardContainer}>
      <Image
        style={styles.videoImage}
        source={{
          uri: 'https://le1.cdn01.net/videos/0000169/0169322/thumbs/0169322__002f.jpg',
        }}
      />
      <View style={styles.videoTextContainer}>
        <Text style={styles.videoTitle}>Title</Text>
        <Text style={styles.videoDescription}>Description</Text>
      </View>
    </View>
  );
};

const styles = StyleSheet.create({
  videoCardContainer: {
    height: 400,
    width: 550,
    borderWidth: 1,
    borderColor: 'white',
    borderRadius: 5,
  },
  videoTextContainer: {
    height: '25%',
    display: 'flex',
    justifyContent: 'space-around',
    padding: 10,
  },
  videoImage: {
    height: '75%',
  },
  videoTitle: {
    fontSize: 20,
    fontWeight: 'bold',
    color: 'white',
  },
  videoDescription: {
    color: 'white',
  },
});

export default VideoCard;
Render the VideoCard component
Now let's go ahead and render our VideoCard from our main App.tsx.
- Import VideoCard to your
App.tsxfile.
import VideoCard from './components/VideoCard'
- Add the VideoCard component after the Header component in the App's return statement.
- Since JSX requires a parent element, wrap Header and VideoCard in an empty fragment.
export const App = () => {
  return (
    <>
      <Header />
      <VideoCard />
    </>
  );
};
Now our App.tsx should look like this:
import * as React from 'react';
import Header from './components/Header';
import VideoCard from './components/VideoCard';

export const App = () => {
  return (
    <>
      <Header />
      <VideoCard />
    </>
  );
};
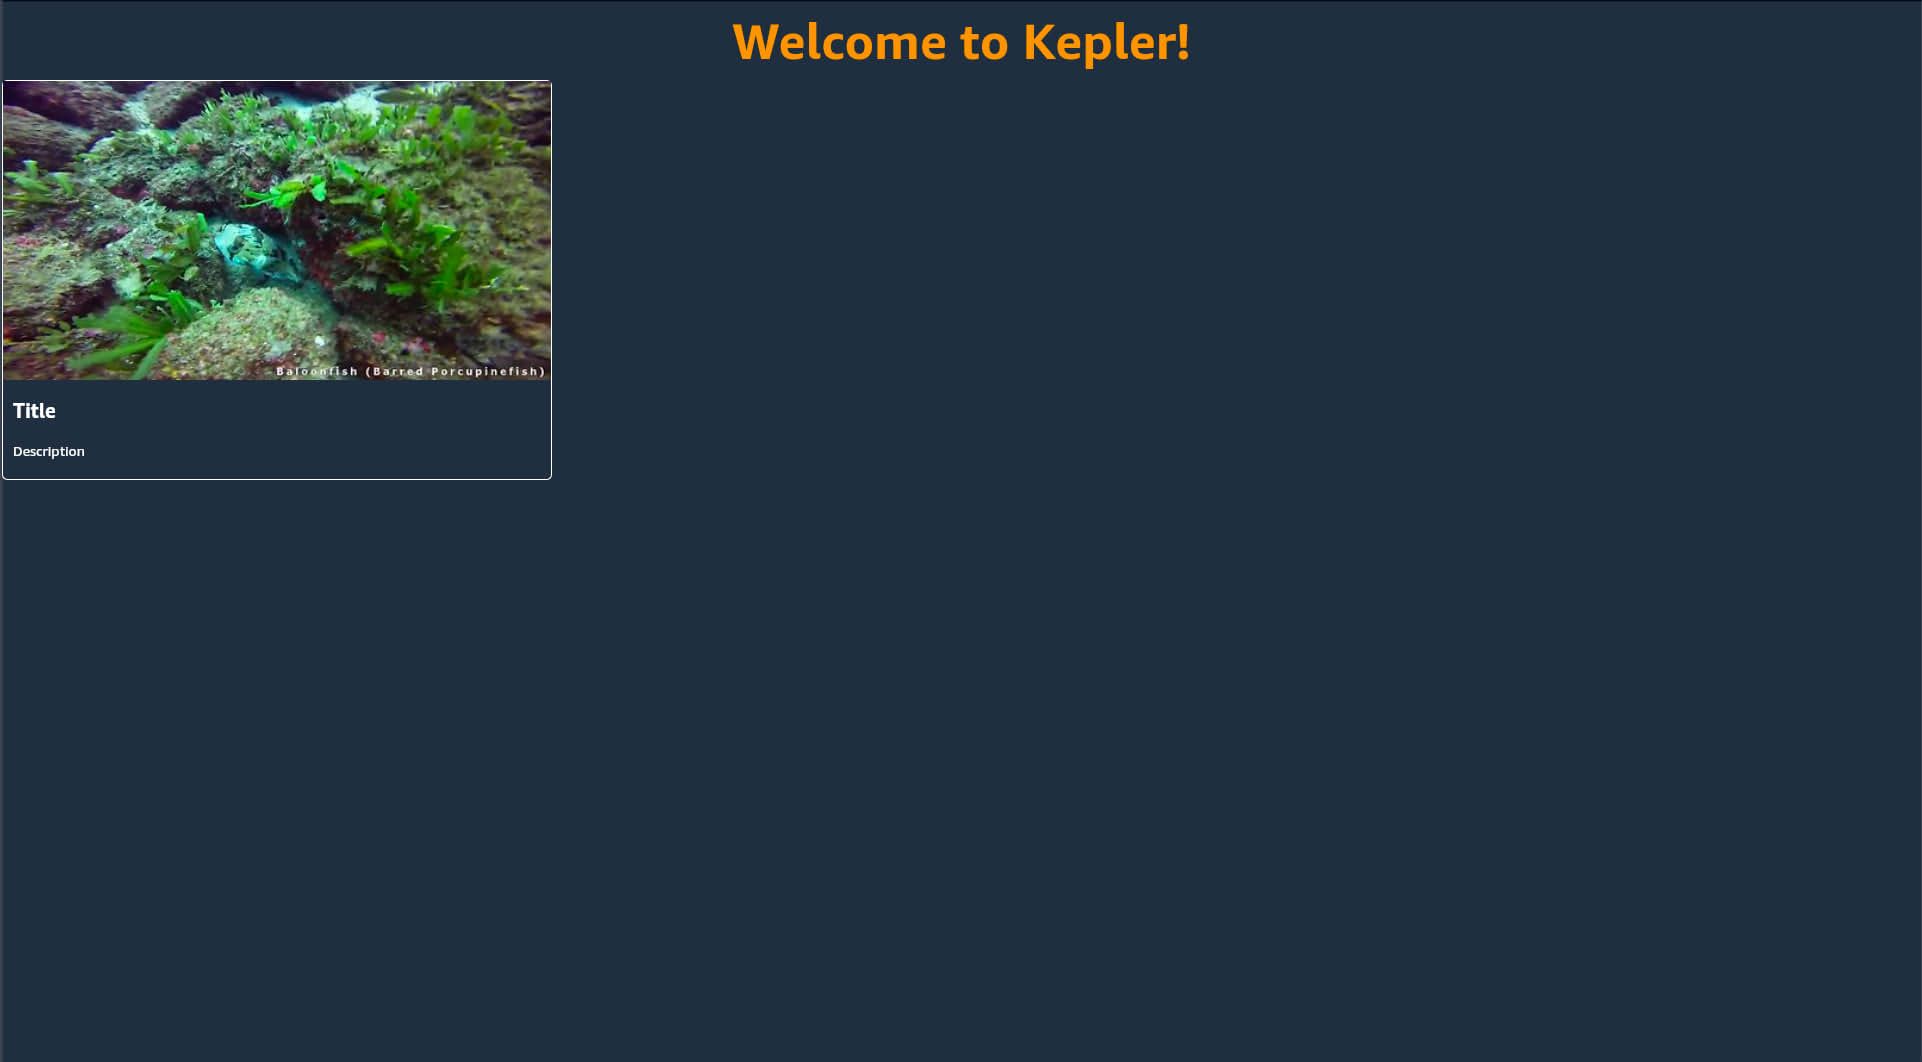
There is our video card!
Note that if this does not show up, check your Metro console for errors:
- If you are using the VegaStudio check the Output window
- If you are using the CLI check the terminal running the metro server
Last updated: Feb 09, 2026