

Create a live app test
Use the instructions in these sections to create a new live app test or to add a new version of an app to an existing test. If you’ve already submitted your app to LAT previously, you have two options for submitting a new version of your app to LAT. You can either create a new test or add an upcoming version to the existing test. Reasons you might want to create a new test:- You have both a Fire OS and Vega OS version of your app, and you want to test the different binary types in a separate tracks
- You want to save time by testing a future feature in parallel with an upcoming patch version of your app
- You found issues during your previous live app test cycle and want to test the fixes
- You’re working on updates linearly and don’t require a separate test track
To create a new live app test
- Go to the Developer Console Dashboard, sign in to your account, and then select My Apps from the top navigation bar.
-
Find your app in the list, click the menu icon
 , and then select Live App Testing.
-
If you don’t have an app listing for your app yet, follow these steps:
- From the navigation bar, select My Apps.
- Select Add new app.
- Complete the New App Submission page, click Save.
- Under your app’s name in the sidebar, select Live App Testing.
- Select Create new test on the Live App Testing dashboard.
-
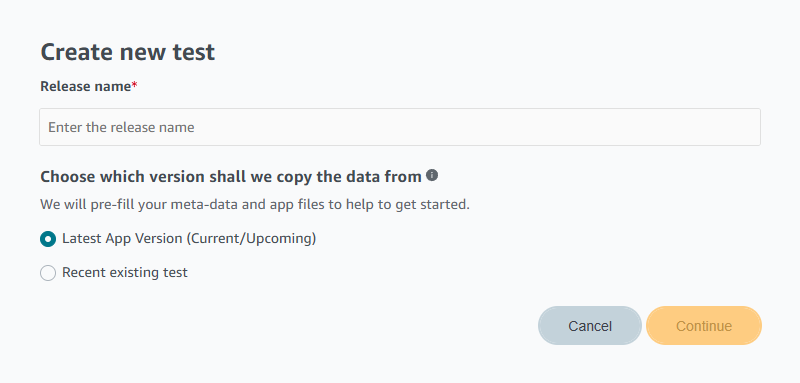
In the Create new test dialog, enter a name for the test. Naming your test is required.
This name appears on the Live App Testing dashboard. You can edit this name later by clicking the pencil icon when adding details for your live app test.
Choose whether you want to copy the details from your latest app release or from another live app test.
- Click Continue.
- Follow the steps in Enter details for your live app test.
To add an upcoming version for an existing live app test
- Go to the Developer Console Dashboard, sign in to your account, and then select My Apps from the top navigation bar.
-
Find your app in the list, click the menu icon , and then select Live App Testing.
- On the Live App Testing dashboard, find the existing test track and click Add upcoming version.
- In the dialog, enter a name for the test. This name appears on the Live App Testing dashboard. You can edit this name later by clicking the pencil icon when adding details for your live app test.
- Choose whether you want to copy the details from the latest app version or from the previous live app test, then click Continue.
- Follow the steps in Enter details for your live app test.
Enter details for your live app test
Whether you’re creating a new live app test, or adding a new version to an existing live app test, you must make sure all required fields are complete before you submit your app to LAT. The following image shows the Create Live App Test screen.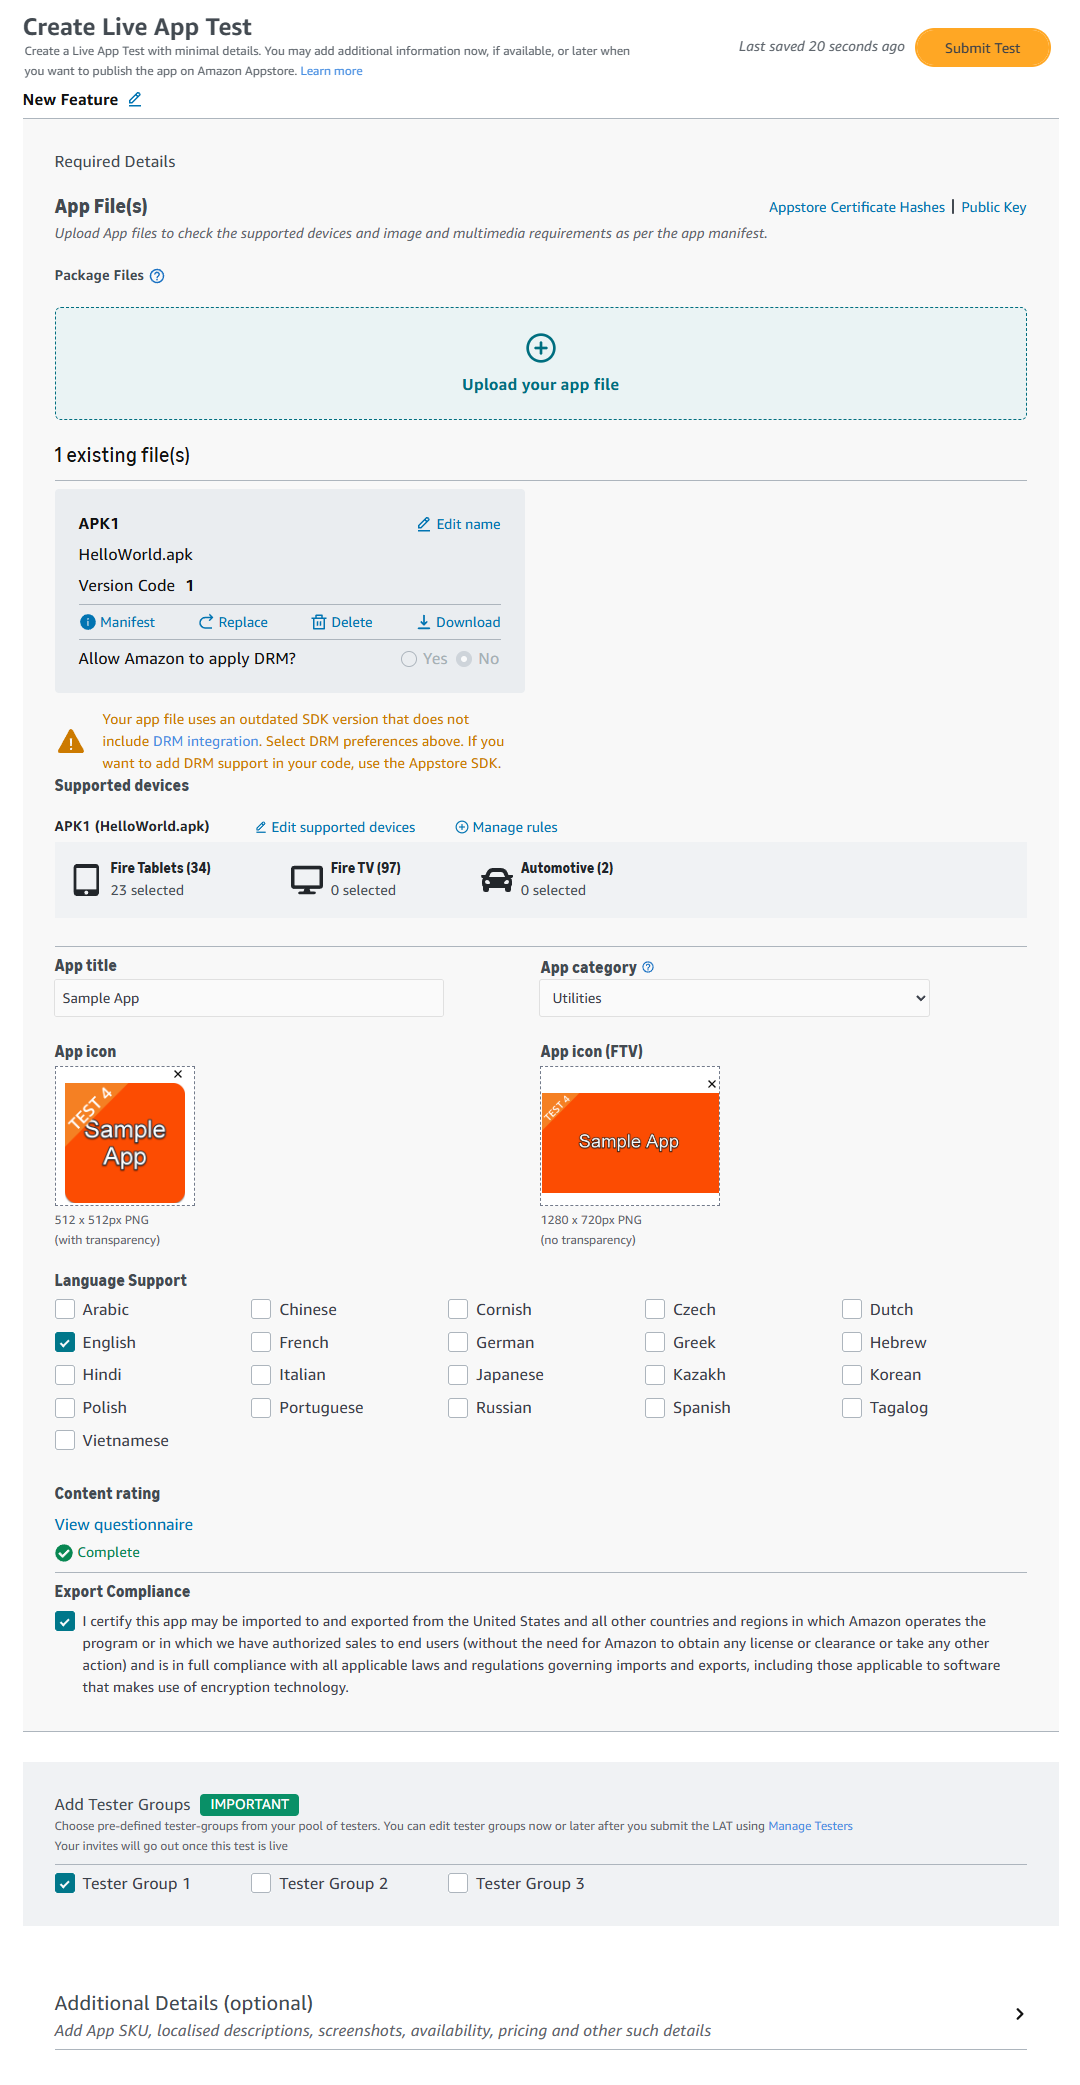
Create Live App Test screen. Click to enlarge.
- On the Create Live App Test screen, upload your app package file.
-
In the Required Details section, complete all fields.
You can update the name for your test by clicking the pencil icon.
The following list shows the required fields. To learn more about a field, click the name.
- App files
- Supported devices (appears after uploading your app file)
- App title
- App category
- App icon (see note)
- Language support
- Content rating
- Export compliance
- If you have existing tester groups, select the tester groups you want to add to this test.
-
Optionally, you can include additional details about your test.
The following list shows the optional fields. To learn more about a field, click the name.
- Availability
- Pricing
- App SKU
- Localized app description and screenshots
- When you finish entering information, click Submit Test.
Differences from standard app submission process
Live App Testing submission differs from the standard app submission workflow. The following fields that are available in the app submission flow, aren’t available during LAT submission:- Customer support contact
- Target audience
- User data privacy
- Long description
- Keywords
- Product feature bullets
- Small icon
- Promotional image
- Video
- Fire TV assets
- Localized icons
- Testing instructions
Manage tests on the Live App Testing dashboard
You can manage your active tests and see past tests on the Live App Testing dashboard. To get familiar with the sections of the Live App Testing dashboard, review the following image.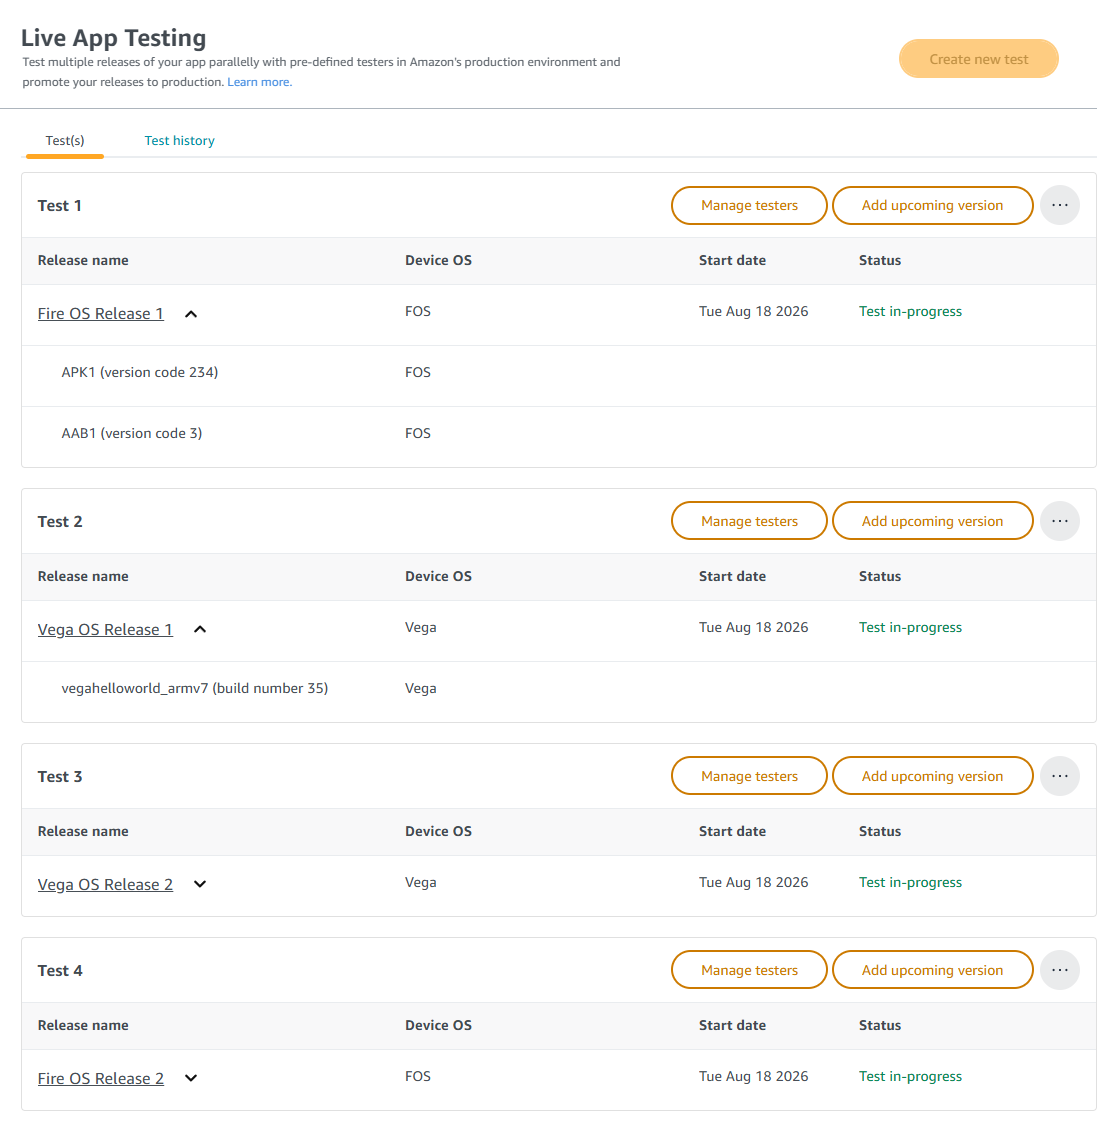 Key points
- The dashboard has two tabs, Test(s) and Test history.
- For every LAT test you create, you individually manage active tests and testers on the Test(s) tab.
- You can view past tests in the Test history tab.
- You can add up to a maximum of five test tracks, named “Test 1” through “Test 5”.
- The name you entered when you first created the test appears as the Release name.
- When your testers download the app, the app icon will have a flag indicating the test number the app is associated with, such as “Test 1”.
- Go to the Developer Console dashboard, sign in to your account, and then select My Apps from the top navigation bar.
- Find your app in the list, click the menu icon , and then select Live App Testing.
