
Register for Login with Amazon
Before you can use Login with Amazon in your Android app, you must register the application with Login with Amazon. Your Login with Amazon application registration contains basic information about your business, and information about each website or mobile app you create that supports Login with Amazon. This business information is displayed to users each time they use Login with Amazon on your websites and mobile app. Users will see the name of your application, your logo, and a link to your privacy policy.
- Create a New Security Profile
- Enable your Existing Security Profile for Login with Amazon
- Add a Registered Appstore or Developer Console app to your Security Profile
- Add Android Settings to your Security Profile
- Android App Signatures and API Keys
- Delete your Security Profile
Create a New Security Profile
Skip this section if you have already created a security profile in the Amazon Developer Console.
-
Visit https://developer.amazon.com/loginwithamazon/console/site/lwa/overview.html. You will be asked to login to the Developer Console, which handles application registration for Login with Amazon. If this is your first time using the Developer Console, you will be asked to set up an account.
-
Click Create a New Security Profile. This will take you to the Security Profile Management page.
-
Enter a Name and a Description for your security profile. A security profile associates user data and security credentials with one or more related apps. The Name is the name displayed on the consent screen when users agree to share information with your application. This name applies to Android, iOS, and website versions of your application.
-
You must enter a Consent Privacy Notice URL for your application. The Privacy Notice URL is the location of your company or application's privacy policy (for example, http://www.example.com/privacy.html). This link is displayed to users on the consent screen. It applies to Android, iOS, and website versions of your application.
-
If you want to add a Consent Logo Image for your application, click Upload Image. This logo is displayed on the sign-in and consent screen to represent your business or website. It applies to Android, iOS, and website versions of your application. The logo will be shrunk to 50 pixels in height if it is taller than 50 pixels; there is no limitation on the width of the logo.
-
-
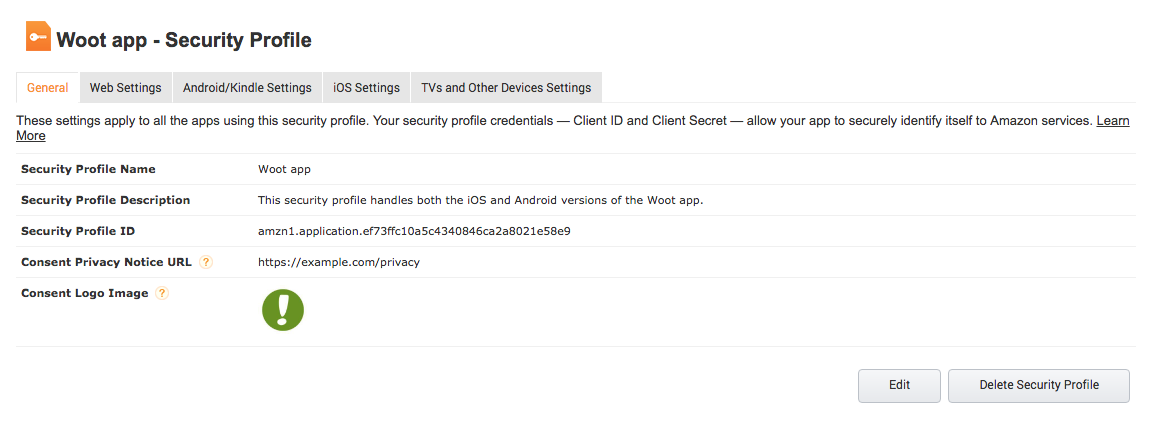
Click Save. Your security profile should look similar to this:
Enable your Existing Security Profile for Login with Amazon
Skip this section if you used the instructions above to create a new security profile. Security profiles created using the instructions above are already enabled for Login with Amazon.
-
Visit https://developer.amazon.com/loginwithamazon/console/site/lwa/overview.html. You will be asked to login to the Developer Console.
-
Click Select a security profile, then choose your security profile from the drop-down menu.

-
Click the Confirm button that appears to the right.
-
A form appears, where you must enter consent screen information.

-
You must enter a Consent Privacy Notice URL for your application. The Privacy Notice URL is the location of your company or application's privacy policy (for example, http://www.example.com/privacy.html). This link is displayed to users on the consent screen. It applies to Android, iOS, and website versions of your application.
-
If you want to add a Consent Logo Image for your application, click Upload Image. This logo is displayed on the sign-in and consent screen to represent your business or website. It applies to Android, iOS, and website versions of your application. The logo will be shrunk to 50 pixels in height if it is taller than 50 pixels; there is no limitation on the width of the logo.
-
Click Save. The screen will refresh, and show a message underneath the Confirm button that states: "Login with Amazon successfully enabled for security profile".
Add a Registered Appstore or Developer Console app to your Security Profile
If you have already registered your apps at https://developer.amazon.com/myapps.html, you can add them to your security profile to enable them for Login with Amazon.
Otherwise, you can skip this step and proceed to Add Android Settings to your Security Profile.
- Visit https://developer.amazon.com/myapps.html.
- Select your app from the list. This will take you to the Upload Your App File screen for your app.
- Click Login with Amazon from the list of tabs at the top.
-
Associate the app with your security profile by selecting it from the drop-down menu. Click Confirm.

Add Android Settings to your Security Profile
After creating a security profile on the Developer Console, you can add settings for specific websites and mobile apps that will use Login with Amazon with that profile. To enable Login with Amazon for Android, you have to specify the package name and signature for the app project. Login with Amazon will use these values to generate an API key . The API key will grant your app access to the Login with Amazon authorization service . Follow these steps to add Android settings to your profile:
- Visit https://developer.amazon.com/loginwithamazon/console/site/lwa/overview.html.
- Go to the security profile that you want to use for your app.
- Locate the security profile you want to modify from the table.
- Hover over the
 button shown in the Manage column.
 - Select the Kindle/Android Settings menu item.
Note: If your desired security profile is not shown in the table, it is not yet enabled for Login with Amazon. In this case, use the drop-down menu above the table to Select a Security Profile, then click Confirm. You'll be required to enter a Consent Privacy Notice URL and optionally select a Consent Logo Image, both of which will be displayed on the sign-in and consent screens. If you don't have an existing security profile for your app, see Create a New Security Profile.
- Enter the API Key Name that your app will use to authenticate with Login with Amazon. This does not have to be the official name of your app. It simply identifies this particular Android app among the apps and websites registered to your security profile.
- Enter your Package Name. This must match the package name of your Android project. To determine the package name of your Android Project, open the project in Android Studio. Double-click
AndroidManifest.XMLin the Project View to open the file, and select the Manifest tab. The Package name is at the top. - Enter the app Signatures. This includes both the MD5 and SHA-256 hash values used to verify your application. The MD5 signature must be in the form of 16 hexadecimal pairs separated by colons (for example:
01:23:45:67:89:ab:cd:ef:01:23:45:67:89:ab:cd:ef) and the SHA-256 signature must be in the form of 32 hexadecimal pairs separated by colons (for example:01:23:45:67:89:ab:cd:ef:01:23:45:67:89:ab:cd:ef:01:23:45:67:89:ab:cd:ef:01:23:45:67:89:ab:cd:ef). See Android App Signatures and API Keys for steps you can use to extract the signature from your project. - Click Generate New Key.
Android App Signatures and API Keys
The app signature is a hash value that is applied to every Android app when it is built. Amazon uses both the MD5 and SHA-256 app signatures to construct your API Key. The API Key enables Amazon services to recognize your app. See Create a Login with Amazon Project to learn how to add an API key to your project.
App signatures are stored in a keystore. Generally for Android apps there is a debug keystore and a release keystore. To find the location of the debug keystore in Android Studio, open the Build menu, select Edit Build Types, then go to the Signing tab, and locate the debug keystore in the Store File field.
A release keystore is normally created when you export your Android app to create a signed APK file. Through the export process, if you are creating a new release keystore you will select its location. By default it will be placed in the same location as your default debug keystore.
If you have registered your app using the debug signature during development, you will have to add a new Android setting to your application when you are ready to release the app. The new app setting must use the signature from the release keystore.
See Signing Your Applications on developer.android.com for more information.
Determining an Android App Signature
- If you have a signed APK file:
- Unzip the APK file and extract
CERT.RSA. (You can rename the APK extension to ZIP if necessary). -
From the command line, run:
keytool -printcert -file CERT.RSAKeytoolis located in thebindirectory of your Java installation.
- Unzip the APK file and extract
- If you have a keystore file:
-
From the command line, run:
keytool -list -v -alias <alias> -keystore <keystore.filename>Keytoolis located in thebindirectory of your Java installation. The alias is the name of the key used to sign the app. -
Enter the password for the key and press Enter.
-
- Under Certificate Fingerprints, copy both the MD5 and SHA-256 values.
Retrieving an Android API Key
After you have registered an Android setting and provided an app signature, you can retrieve the API key from the registration page for your Login with Amazon application. You will need to place that API key into a file in your Android project. Until you do, the app will not be authorized to communicate with the Login with Amazon authorization service.
- Visit https://developer.amazon.com/loginwithamazon/console/site/lwa/overview.html.
- Go to the security profile that you want to use for your app:
- Locate the security profile you want to modify from the table.
- Hover over the
button shown in the Manage column.
- Select the Kindle/Android Settings menu item.
-
Find the API Key Name for the key on the list, then click Show in the associated Key column. Copy the API Key that appears in the popup window.
Note: The API Key is based, in part, on the time it is generated. Thus, subsequent API Keys you generate may differ from the original. You can use any of these API Keys in your app as they are all valid.You can also delete or edit any of your keys by hovering over the
icon and selecting Edit or Delete. Any mistakenly deleted keys can be restored by clicking Show Deleted API Keys, then clicking Restore next to the name of the key you’d like to recover. - See Add Your API Key to Your Project for instructions on adding the API key to your Android app.
Delete your Security Profile
If needed, you can delete any security profile not associated with an app distributed through the Amazon Appstore. Navigate to the Security Profile Management page, select a profile, and then click Delete Security Profile. A confirmation form appears. Type the word delete into the text field then click Delete to confirm the action.
If a security profile is mistakenly deleted, it’s fully recoverable from the Security Profile Management page. Click the Show Deleted Security Profiles button, click on the name of the profile you’d like to restore, then click Restore Security Profile. A confirmation form appears. Click the Restore button to recover the security profile, including its Web, Android/Kindle, and iOS settings.
Last updated: Dec 20, 2023