
Manage Your SDK Versions
The Vega SDK Manager helps you manage SDK versions for your development projects. You can install SDK versions, switch between versions, and integrate with CI/CD pipelines. Like version managers for other platforms (nvm for Node.js, pyenv for Python), it lets you maintain multiple SDK versions and switch between them for each project.
Where to access the Vega SDK Manager
You can install the Vega SDK Manager from:
-
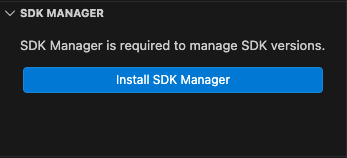
Vega Studio extension:

From the Vega Studio panel, SDK Manager section, select Install SDK Manager.
OR
From the command palette, enter Vega: Install SDK Manager.
See Set Up Vega Studio for more information.
-
Vega command-line interface (CLI): Follow the instructions on this page.
Prerequisites
Verify you have the Vega CLI before proceeding.
If you have the latest Vega SDK (version 0.22+): You already have the Vega CLI. Proceed to Install the SDK from the CLI.
If you have an older Vega SDK version: Upgrade to the latest version by following the Vega SDK installation instructions.
Install the SDK from the CLI
-
Run this command to check if you have the Vega CLI:
vega --versionNote: If you get acommand not founderror, follow the Vega SDK installation instructions. -
Install the Vega SDK (if needed):
Note: The SDK install command includes the Vega Virtual Device (VVD) by default. To skip VVD installation, runexport SKIP_VVD_INSTALL=truebefore running the install command.To install the latest SDK version
vega sdk installTo install a specific version
vega sdk install 1.2.3To see available versions
vega sdk list-remote -
Verify your installation:
vega sdk list-installed
Create a project
-
Install the SDK from the CLI if you haven't already.
-
Create a
vega-sdk-requirements.jsonfile in your project root:{ "vegaSdkVersion": "1.2.3" } -
Run a health check to verify your environment:
vega sdk config doctorThis verifies your SDK installation, checks environment configuration, and identifies potential issues.
How requirements files work
When you run any Vega command in a directory containing vega-sdk-requirements.json, Vega:
- Reads the
vegaSdkVersionfield in the file. - Uses the
vegaSdkVersionfor all SDK operations in that project. - Overrides any global default version settings.
Example project structure
Here's how a typical project with version requirements looks:
my-project/
├── vega-sdk-requirements.json
├── src/
└── README.md
Manage multiple projects
Each project can have its own SDK version by using vega-sdk-requirements.json:
# Project A uses SDK 1.2.3
cd project-a
cat vega-sdk-requirements.json  # {"vegaSdkVersion": "1.2.3"}
vega sdk list-installed  # Shows 1.2.3 as active
vega build

# Project B uses SDK 2.0.0
cd ../project-b
cat vega-sdk-requirements.json  # {"vegaSdkVersion": "2.0.0"}
vega sdk list-installed  # Shows 2.0.0 as active
vega build
Update SDK version
Update your SDK to get the latest features and bug fixes.
@amazon-devices/kepler-ui-components, an outdated VVD can cause module dependency errors during installation. Keep your SDK updated to avoid compatibility issues between your app and VVD.Quick update
-
Check available versions:
vega sdk list-remote -
Install new version:
vega sdk install 2.0.0 -
(Optional) Set the new version as your default:
vega sdk use 2.0.0 -
(Optional) Clean up old versions:
vega sdk uninstall 1.2.3
Safe update (test before committing)
Test new SDK versions in a separate branch before merging:
# Install new version alongside existing
vega sdk install 2.0.0

# Test in a separate branch
git checkout -b test-sdk-2.0.0
echo '{"vegaSdkVersion": "2.0.0"}' > vega-sdk-requirements.json
vega build

# If successful, merge and update team
git checkout main
git merge test-sdk-2.0.0
Link existing SDK installation
If you have a Vega SDK installed using the CLI installer or Vega Studio extension, you can link it instead of reinstalling. This saves time and disk space by reusing your existing installation.
# Auto-discover from KEPLER_SDK_PATH
vega sdk link --discover

# Or link from specific path
vega sdk link --path /path/to/existing/sdk

# Verify the link
vega sdk list-installed
CI/CD integration
For automated environments like CI/CD pipelines, Vega provides two methods to enable non-interactive mode. This prevents prompts or interactive behavior that would block automation.
Non-interactive mode for automation
Method 1: CLI flag (recommended for individual commands)
Use the --non-interactive flag to prevent prompts on specific commands.
# Install SDK without any prompts
vega sdk install --non-interactive

# Setup configuration non-interactively
vega sdk config setup --non-interactive --sdk-path /opt/vega-sdk

# Link SDK without prompts
vega sdk link --discover --non-interactive
Method 2: Environment variable (recommended for entire pipeline)
Set the NONINTERACTIVE environment variable when your entire pipeline should run without any user interaction. This is the preferred approach for CI/CD environments.
# Set environment variable for the entire session
export NONINTERACTIVE=true

# Now all commands run non-interactively
vega sdk install
vega sdk config setup
vega sdk link --discover
Precedence rules
When you use both methods, the CLI flag takes precedence:
- CLI flag (
--non-interactive) - Highest priority. - Environment variable (
NONINTERACTIVE=true) - Lower priority. - Default behavior (interactive mode) - Applies when you set neither option.
This lets you set a default behavior with the environment variable and override it with the CLI flag when needed.
VEGA_CONFIG_FILE environment variable. See Advanced Features for details.Advanced features
These advanced configuration options provide additional flexibility for specialized development environments and workflows.
Custom configuration file location
By default, Vega stores its configuration in ~/vega/config.json. You can customize this location using the VEGA_CONFIG_FILE environment variable. This is useful for:
- Running multiple Vega configurations on the same machine
- Using a shared configuration file across a team
- CI/CD environments where the default path isn't suitable
- Testing different configurations without affecting your main setup
Set custom configuration path
# Set custom configuration file location
export VEGA_CONFIG_FILE="/path/to/custom/config.json"

# Then run setup or any other command
vega sdk config setup

# Or combine in a single command
export VEGA_CONFIG_FILE="/path/to/custom/config.json" && vega sdk config setup
Make the custom configuration path persistent
To use a custom configuration location permanently, add the export to your shell profile:
# For bash (~/.bashrc or ~/.bash_profile)
echo 'export VEGA_CONFIG_FILE="/path/to/custom/config.json"' >> ~/.bashrc

# For zsh (~/.zshrc)
echo 'export VEGA_CONFIG_FILE="/path/to/custom/config.json"' >> ~/.zshrc
CI/CD example
# Set custom configuration for CI/CD pipeline
export VEGA_CONFIG_FILE="/opt/ci/config.json"
export NONINTERACTIVE=true

# Setup and install
vega sdk config setup --sdk-path /opt/vega-sdk
vega sdk install
Command reference
This section lists all SDK Manager commands with their descriptions. Use this as a quick lookup when you need specific command syntax.
Basic commands
| Command | Description |
|---|---|
vega sdk install |
Install latest SDK version |
vega sdk install <version> |
Install specific SDK version |
vega sdk list-installed |
Show installed versions |
vega sdk ls |
Short alias for list-installed |
vega sdk list-remote |
Show available versions |
vega sdk lr |
Short alias for list-remote |
vega sdk use <version> |
Set global default version |
vega sdk sv <version> |
Short alias for use |
vega sdk uninstall <version> |
Remove specific version |
vega sdk config setup |
Configure SDK settings |
vega sdk config doctor |
Health check |
vega sdk link --discover |
Auto-discover existing SDKs |
vega sdk link --path <path> |
Link SDK from specific path |
CI/CD commands
| Command | Description |
|---|---|
vega sdk install --non-interactive |
Non-interactive install |
vega sdk config setup --non-interactive |
Non-interactive setup |
vega sdk link --discover --non-interactive |
Non-interactive link |
vega update |
Update Vega CLI itself |
Help
| Command | Description |
|---|---|
vega --help |
General help |
vega sdk --help |
SDK command help |
vega sdk <command> --help |
Specific command help |
Global options
| Option | Description |
|---|---|
--json |
Output results in JSON format |
--verbose |
Show detailed output |
--version |
Display Vega version |
Troubleshooting
If you encounter any issues, see Troubleshooting SDK Manager Issues.
Related topics
Last updated: Mar 17, 2026