
在Vega虚拟设备或Fire TV上运行应用
了解如何使用Vega虚拟设备或Fire TV设备运行Vega应用。每种工具可满足不同的开发需求: Vega虚拟设备用于快速迭代,Fire TV设备用于生产就绪执行。
在Vega虚拟设备上运行应用
“Vega开发者工具” (VDT) 采用“Vega虚拟设备” (VVD),让您可在没有物理设备的情况下测试和运行Vega应用,为您提供以下控制选项:
- 直接在虚拟设备上进行鼠标交互
- 虚拟遥控器界面
- 键盘快捷键和命令
先决条件
-
警告: 如果您的应用使用
@amazon-devices/kepler-ui-components,则必须使用最新的 SDK 版本(0.22 或更高版本)进行 VVD 测试。比此更早的VVD版本不包含所需的原生模块,并且会因模块依赖关系错误而失败。对于使用更旧SDK构建的应用程序,请改为在物理Fire TV Stick上进行测试。 -
一款准备好进行测试的Vega应用。
-
(可选)注册您的Vega虚拟设备以使用亚马逊服务进行测试。
在Vega虚拟设备上运行应用的选项
您可以使用Vega Studio的用户界面 (UI) 或Vega CLI运行您的Vega应用。
选项1: 使用Vega Studio用户界面
-
导航到Vega Studio > 设备,然后选择
VirtualDevice:Tv。 -
选择播放按钮,启动虚拟设备。
-
等待VVD窗口打开,设备完成加载。
VirtualDevice:Tv的状态应显示为“已就绪”,而非“正在加载...”
-
选择项目名称旁边的播放按钮。
应用将启动并出现在Vega虚拟设备窗口中。
选项2: 使用Vega CLI
-
通过命令提示符启动Vega虚拟设备:
vega virtual-device start该命令将一直等到Vega虚拟设备启动。
Launching virtual device
Waiting for virtual device to boot.
Virtual device ready.
注意: Vega虚拟设备首次启动时,可能会请求访问麦克风。如果出现对话框,您可以选择允许或拒绝该请求。Vega虚拟设备不会使用麦克风,这两种都是安全选择。如未出现对话框,则无需执行任何操作,您的开发或测试体验也不会受到影响。Vega虚拟设备启动时,可能会超时。如果需要,使用
--timeout标记来延长等待时间。示例:
vega virtual-device start --timeout 120此命令允许虚拟设备等待120秒再完成启动过程。
启动Vega虚拟设备后,用户界面会在新窗口中打开。
-
加载并运行您的应用:
vega run-app <vpkg路径> <应用ID> -d VirtualDevice输出示例:
vega run-app sampleapp.vpkg com.amazondeveloper.sampleapp.main -d VirtualDevice-d标记指定您在Vega虚拟设备上运行应用。特定于架构的命令
虚拟程序包 (
vpkg) 的架构必须与开发计算机的架构相匹配才能正常执行。例如:Mac M系列设备:
vega run-app build/aarch64-release/sampleapp_aarch64.vpkg com.amazondeveloper.sampleapp.main -d VirtualDevicex86_64设备:
vega run-app build/x86_64-release/sampleapp_x86_64.vpkg com.amazondeveloper.sampleapp.main -d VirtualDevice提示: 初始安装后,使用vega device launch-app进行后续启动。在两次启动之间,应用数据保持不变。
在Vega虚拟设备上停止应用的选项
您可以使用Vega Studio的用户界面或命令行停止您的Vega应用。
选项1: 使用Vega Studio用户界面
-
导航到Vega Studio > 设备,然后选择
VirtualDevice:Tv。 -
选择停止按钮。
VirtualDevice:Tv的状态将变为“已停止”,同时VVD窗口关闭。
选项2: 使用Vega CLI
要停止Vega虚拟设备,请关闭虚拟设备窗口,或运行:
vega virtual-device stop
Vega虚拟设备窗口关闭,进程终止。
可选配置
注册Vega虚拟设备(仅当您使用亚马逊服务进行测试时)
要使用亚马逊服务进行测试,请先注册Vega虚拟设备。Vega虚拟设备启动后,请按照以下步骤操作:

-
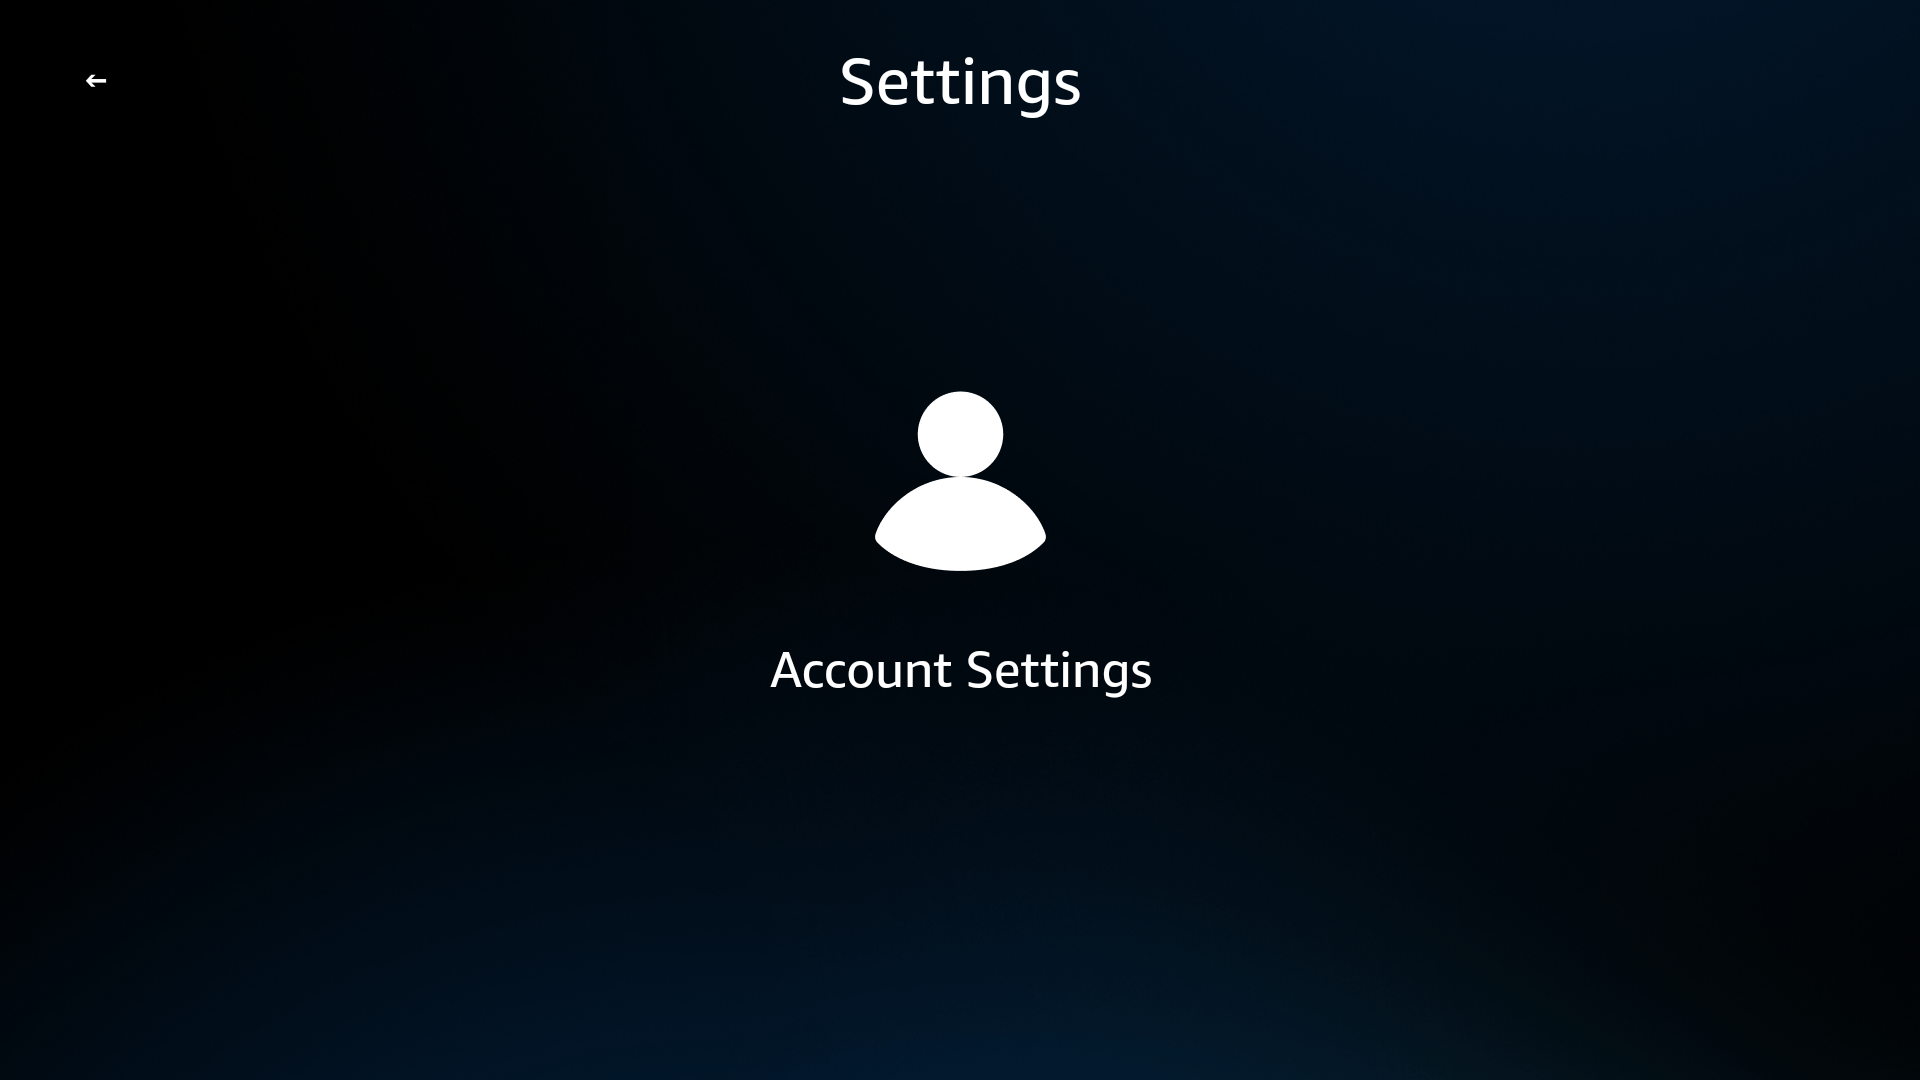
在Vega虚拟设备主屏幕的右上角,选择设置齿轮图标。
出现设置屏幕。

-
选择账户设置。
出现两个选项: 亚马逊账户和家长监护。

-
选择亚马逊账户。
出现亚马逊账户屏幕,其中包含注册账户按钮。

-
选择注册账户。
屏幕上出现注册码。
-
打开浏览器。
-
前往www.amazon.com/code(仅提供英文版)。
-
输入Vega虚拟设备所示的注册码。
-
返回Vega虚拟设备屏幕,等待出现“您的设备已成功注册”的确认消息。

-
选择确定。


启动时自定义Vega虚拟设备
Vega虚拟设备在启动时提供自定义选项。运行启动命令时,您可以使用以下标记:
-
禁止图形用户界面 (GUI):
vega virtual-device start --no-gui -
关闭OpenGL加速(仅限Ubuntu x86):
vega virtual-device start --no-gl-accel提示: OpenGL加速提高了图形性能。仅在对Ubuntu x86系统上的显示问题进行故障排除时才将其关闭。 -
修改默认显示分辨率:
vega virtual-device start --display-res=1920,1080
启用开发者模式以获得完整的inputd-cli功能
默认情况下,Vega虚拟设备提供有限的inputd-cli命令。启用开发者模式以访问用于自动化和测试的完整命令集:
-
打开虚拟设备的shell:
vega device shell -d VirtualDevice -
启用开发者模式:
vsm developer-mode enable执行此命令后,VVD将重新启动。重复步骤1以重新连接到虚拟设备的shell。
-
验证完整功能:
inputd-cli --help
inputd-cli命令,例如触摸、滑动、button_press和send_text。如果没有开发者模式,您只能使用基本命令(get_camera_cover_open_close、get_mic_state、get_screen_size)。转储呈现内容
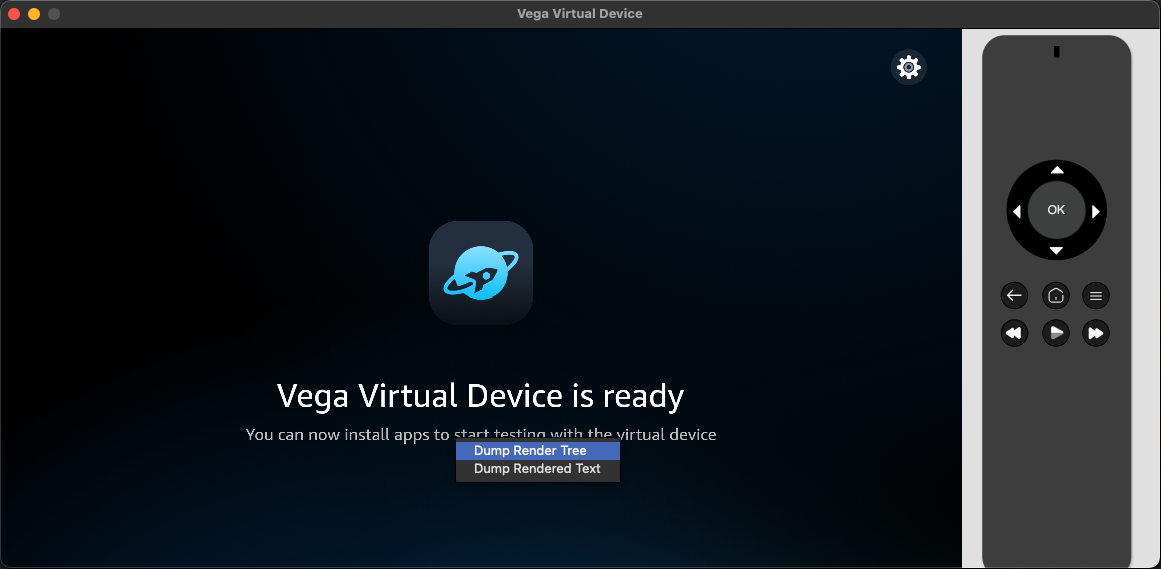
“转储呈现内容”功能支持您检查Vega虚拟设备屏幕上当前显示的内容。该功能支持两种输出格式:完整的用户界面层级XML呈现树,以及对可见文本进行纯文本提取。可用于调试布局问题、验证用户界面内容、审核无障碍功能属性,以及提取文本进行本地化测试。
要转储呈现内容:
-
请在Vega虚拟设备屏幕的任意位置打开上下文菜单。

-
从上下文菜单中任选一项:
-
Dump Render Tree: 导出用户界面层级的完整XML表示,包括全部组件的属性、位置和特性。输出内容与Appium检查器中的应用源完全一致。
此选项可用于调试布局问题、审核无障碍功能属性(例如可设定焦点状态和角色),或梳理用户界面结构,以编写自动化测试。
-
Dump Rendered Text: 仅提取用户界面中可见的文本内容。
此选项可用于快速验证内容,比如检查错误消息、验证本地化字符串,或查看屏幕副本。
-
-
在出现的文件保存对话框中,选择位置和文件名。
- 默认情况下,呈现树会另存为
.xml。 - 默认情况下,呈现文本会另存为
.txt。
- 默认情况下,呈现树会另存为
-
保存完成后,文件会自动在您的默认应用程序中打开。
Dump Render Tree输出示例 (XML):
<?xml版本="1.0"?>
<根ID="1">
  <应用ID="4294967297" 应用名称="com.amazon.myapp">
    <窗口 x="0" y="0" 宽="1920" 高="1080" id="4294967298">
      <子窗口 x="100" y="200" 宽="300" 高="50" 角色="button" 可设定焦点="true">
        <text>点击此处</text>
      </child>
    </window>
  </app>
</root>
Dump Rendered Text输出示例 (TXT):
点击此处
欢迎使用本应用
设置
启用家长监护
您可以使用家长监护,在设备激活应用启动保护时,测试应用的行为表现。此功能可在开发过程中,验证应用能否正确处理PIN码验证。
要启用家长监护:
-
请先注册Vega虚拟设备(如果尚未注册)。
请参阅注册Vega虚拟设备。
-
在账户设置屏幕中,选择家长监护。
出现家长监护屏幕,其中包含Enable Parental Controls(启用家长监护)按钮。
注意: 如果Enable Parental Controls呈灰显,则代表您尚未注册Vega虚拟设备。请按照注册Vega虚拟设备中的说明继续操作。
-
选择Enable Parental Controls。
-
请使用屏幕上的圆形拨盘,创建或输入Prime Video PIN码。
此PIN码与您的亚马逊账户相关联。如果尚未设置,设备会提示您新建一组5位PIN码。您可以在amazon.com/pin(仅提供英文版)中管理PIN码。

使用虚拟遥控器的方向键浏览数字(默认显示0–4,选择5-9可切换显示高位数字)。
-
等待PIN码验证完成。

验证成功后,家长监护设置屏幕会出现以下选项:
- Disable Parental Controls: 关闭家长监护功能。
- Change PIN: 更新Prime Video PIN码。
- Protect App Launches: 已开启: 启用后,每次在设备上启动应用时都会提示输入PIN码。


要测试应用启动保护:
先启用家长监护,并将Protect App Launches的状态设置为 已开启,然后导航到主屏幕并启动任意应用。“您的应用”屏幕上会出现PIN码输入对话框。该应用仅在用户输入有效PIN码后启动。
要禁用家长监护:
-
选择设置齿轮图标 > 账户设置 > 家长监护。
-
选择Disable Parental Controls。
-
按提示输入PIN码。
键盘快捷键
使用以下键盘快捷键来控制Vega虚拟设备:
| Fire TV Stick遥控器按钮 | Vega虚拟设备键盘按键 |
|---|---|
| Select(选择) | ENTER(回车键) |
| Up, Down, Right, Left(向上、向下、向右、向左) | Arrow keys(箭头键) |
| Back(后退) | ESC(退出键) |
| Homepage(主页) | F1 |
| Menu(菜单) | F2 |
| 快退 | F3 |
| Play/Pause(播放/暂停) | F4 |
| Fast Forward(快进) | F5 |
提供关于Vega虚拟设备的反馈
您可以直接通过模拟器或终端,分享关于Vega虚拟设备使用经验的反馈。系统不会收集个人身份信息。反馈中仅附带会话元数据(VVD版本、映像类型、主机操作系统)。
通过模拟器(macOS和Linux)分享:
在Vega虚拟设备屏幕的任意位置打开上下文菜单,然后选择Send Feedback…(发送反馈...)。桌面浏览器会打开一份简短的调查问卷。
通过macOS菜单栏分享:
在Vega虚拟设备运行的同时,选择应用程序菜单栏中的反馈 > 提供反馈…。
通过终端分享:
运行以下命令,随时打开反馈调查:
vega virtual-device feedback
此外,执行vega virtual-device stop命令后会出现一行提示,询问会话进展情况。按1(正面)、2(负面),或输入(跳过)。如果是负面反馈,您的浏览器会打开一份调查问卷。
本次VVD会话体验如何?👍 👎 [跳过]
提供反馈后的7–14天内,不会再出现CLI提示。图形用户界面入口(菜单栏、上下文菜单)始终可用,且不会中断您的工作流程。
要禁用CLI提示:
请设置以下环境变量:
导出KEPLER_CSAT_DISABLED=true
CI/CD管道和非交互式终端也会自动跳过提示。
--no-gui) 下运行Vega虚拟设备时,仅通过CLI提示和vega virtual-device feedback命令提供反馈。设置快速刷新
要自动检测代码更改并在Vega虚拟设备上实时显示更新,您可以设置快速刷新。
故障排除
如果您遇到Vega虚拟设备问题,请参阅解决Vega虚拟设备问题。
在Fire TV上运行应用
在提交到亚马逊应用商店之前,在Fire TV设备上运行Vega应用对于测试真实设备性能和确保兼容性至关重要。本部分将引导您设置用于开发的Fire TV设备、启用开发者模式以及侧载Vega应用进行测试。
开发者模式让您可以在设备上侧载应用和测试开发版本。所有Vega Fire TV设备都使用相同的开发者模式启用流程。
先决条件
- 安装Vega SDK。
- 确保安装了最新的SDK管理器(运行
vega update以获取最新版本)。 -
运行Vega OS的Fire TV设备(例如Fire TV Stick HD、Fire TV Stick 4K Select或Fire TV流媒体播放器)。
有关受支持设备的完整列表,请参阅Fire TV设备规格。
步骤1: 设置并注册Fire TV设备
继续操作前,请确保您使用的是Fire TV设备随附的遥控器。在开发和测试过程中,使用其他Fire TV设备随附的遥控器会导致配对问题。
-
连接Fire TV设备:
a.使用USB数据线连接到您的开发计算机。
b. 使用HDMI适配器连接到显示器。
显示遥控器配对屏幕。
-
完成遥控器配对:
a. 出现提示时,按Home(主页)按钮。
b. 按照屏幕上的指示进行操作。
c. 等待Fire TV标志出现。
如果数分钟内未出现Fire TV标志,请参阅解决Fire TV Stick问题,了解故障排除步骤。
-
配置设置:
a. 按遥控器上的播放/暂停按钮。
b. 选择您的首选语言。
c. 连接到您的网络。
d. 输入您的网络凭证。
警告: 设备检查无线 (OTA) 更新。在更新完成之前,请勿关闭设备电源或重新启动设备。中断更新可能会导致无法发现网络。 -
完成设备注册:
a. 在线或通过二维码登录您的亚马逊账户。
b. 按照屏幕上的指示进行操作。
c. 等待“Successfully registered”(成功注册)消息出现。
-
当您看到“Your Fire TV remote is now successfully set up”(您的Fire TV遥控器现已成功设置)时按OK(确定)。
步骤2: 配置开发者模式
开发者模式要求您使用Vega CLI,通过亚马逊开发者账户进行身份验证。此流程包括从Fire TV设备获取验证码,然后通过浏览器完成身份验证,最后在终端中完成设备启用。启用后,设备会自动重启。
-
访问Fire TV Settings(设置)菜单:
选项1: 使用Home按钮
a. 按下遥控器上的Home按钮进入Home屏幕。
b. 导航到顶部菜单栏。
c. 向右滚动查找并选择Settings图标(齿轮符号)。
选项2: 使用Home按钮快捷方式(速度更快)
a. 长按遥控器上的Home按钮3秒钟。
b. 从出现的快捷菜单中选择Settings(设置)。
-
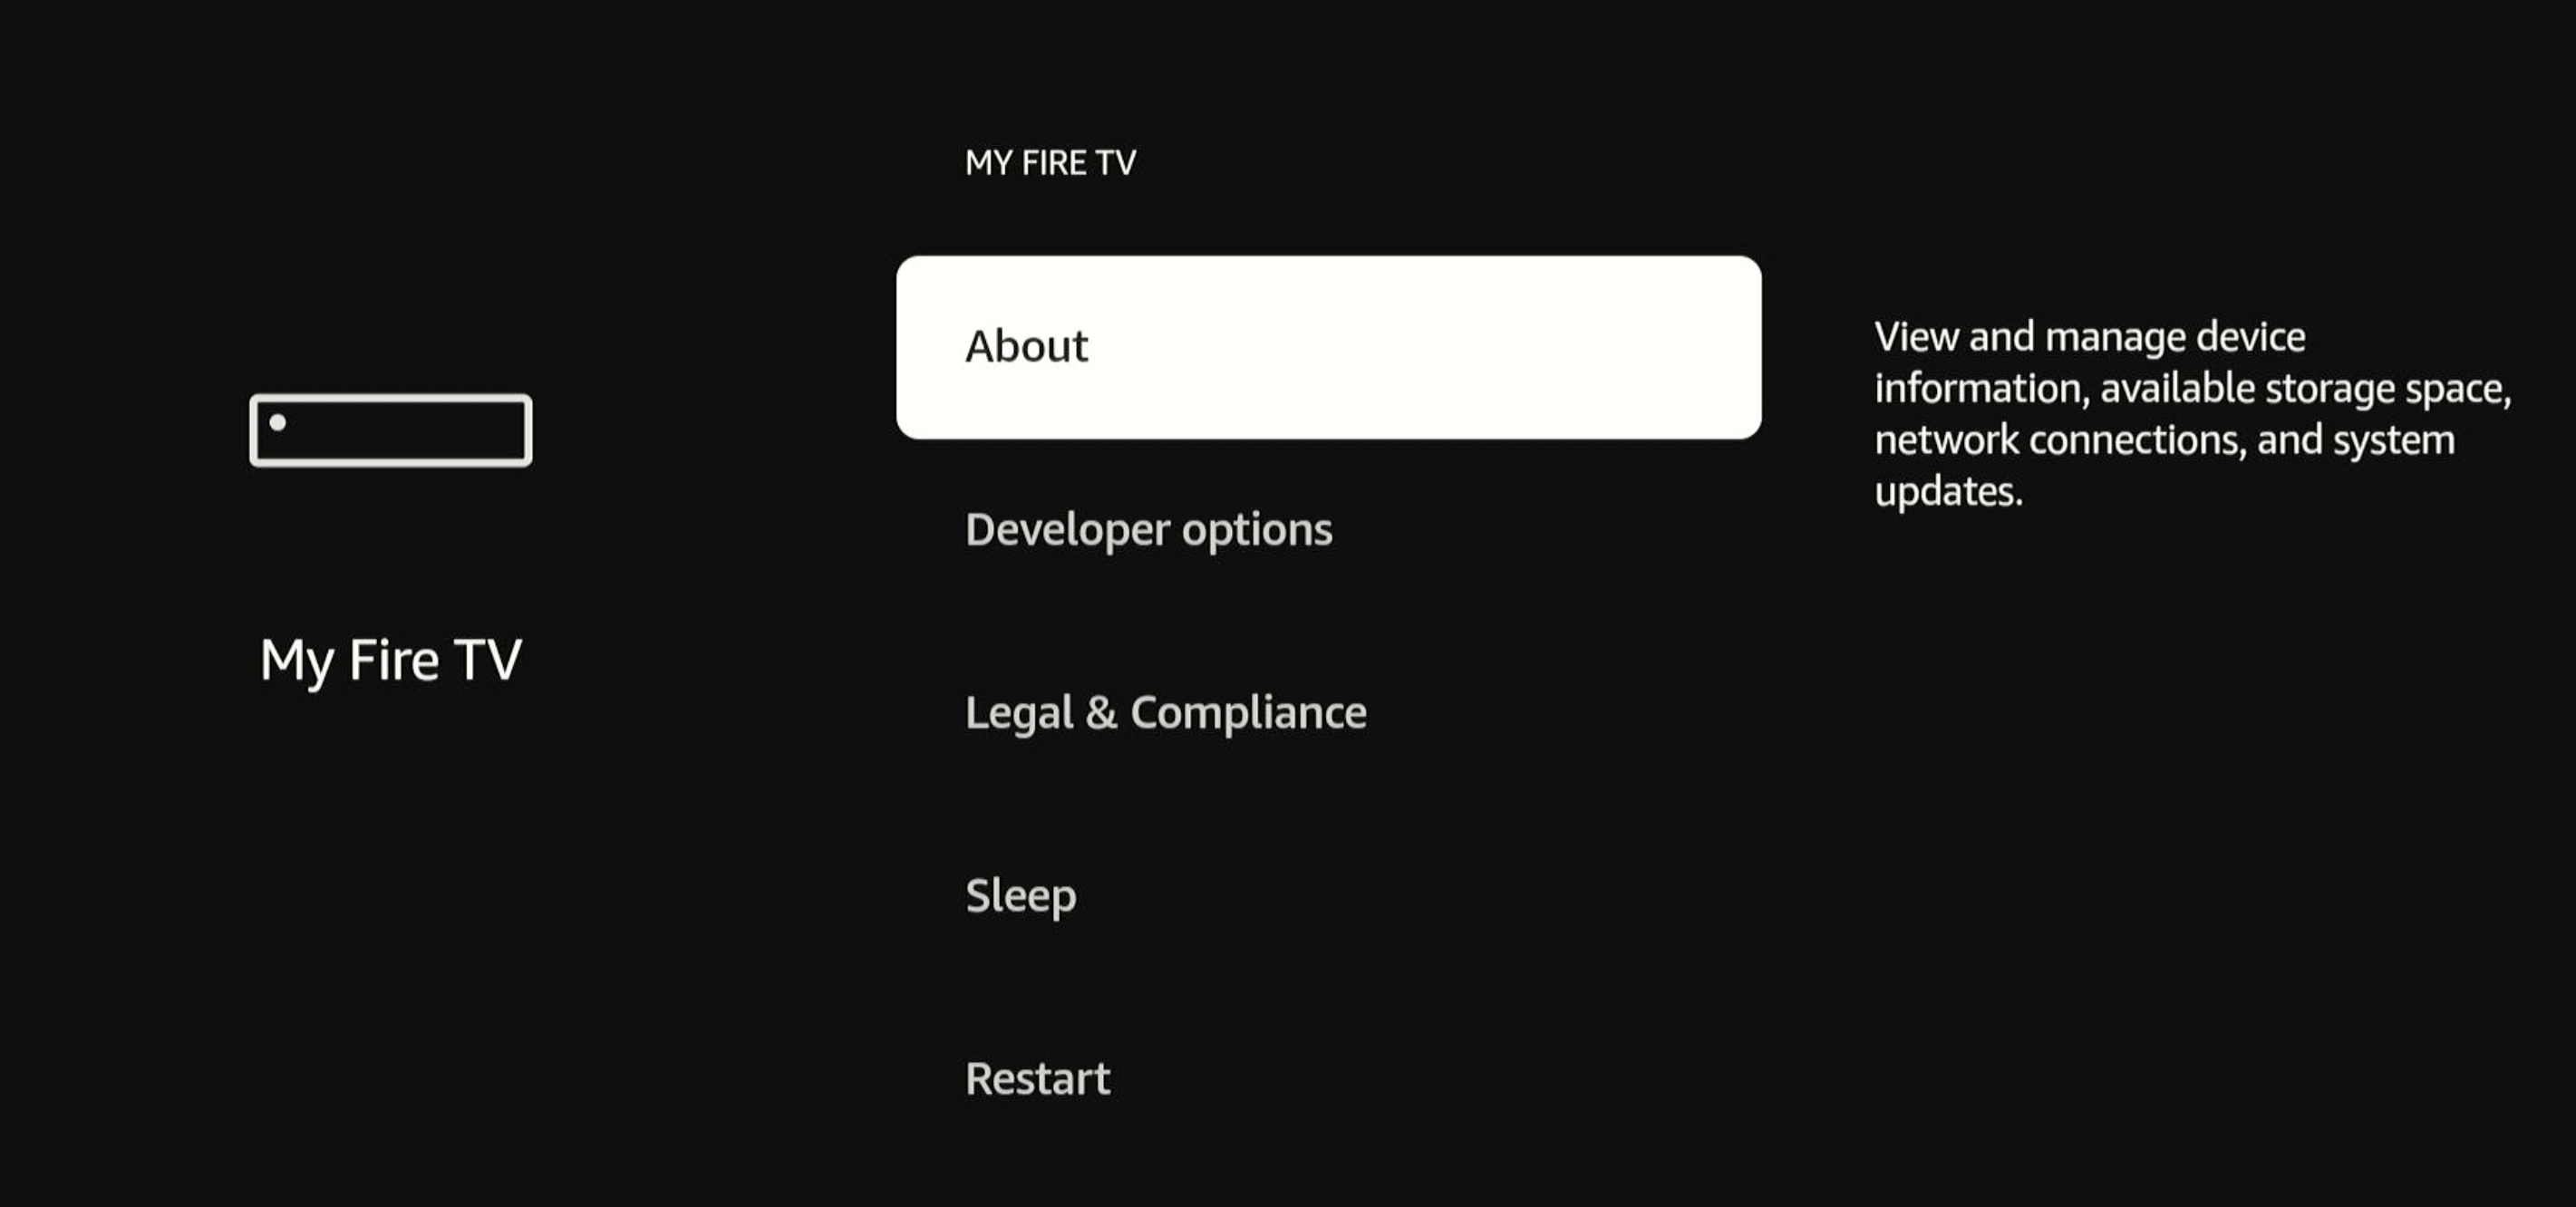
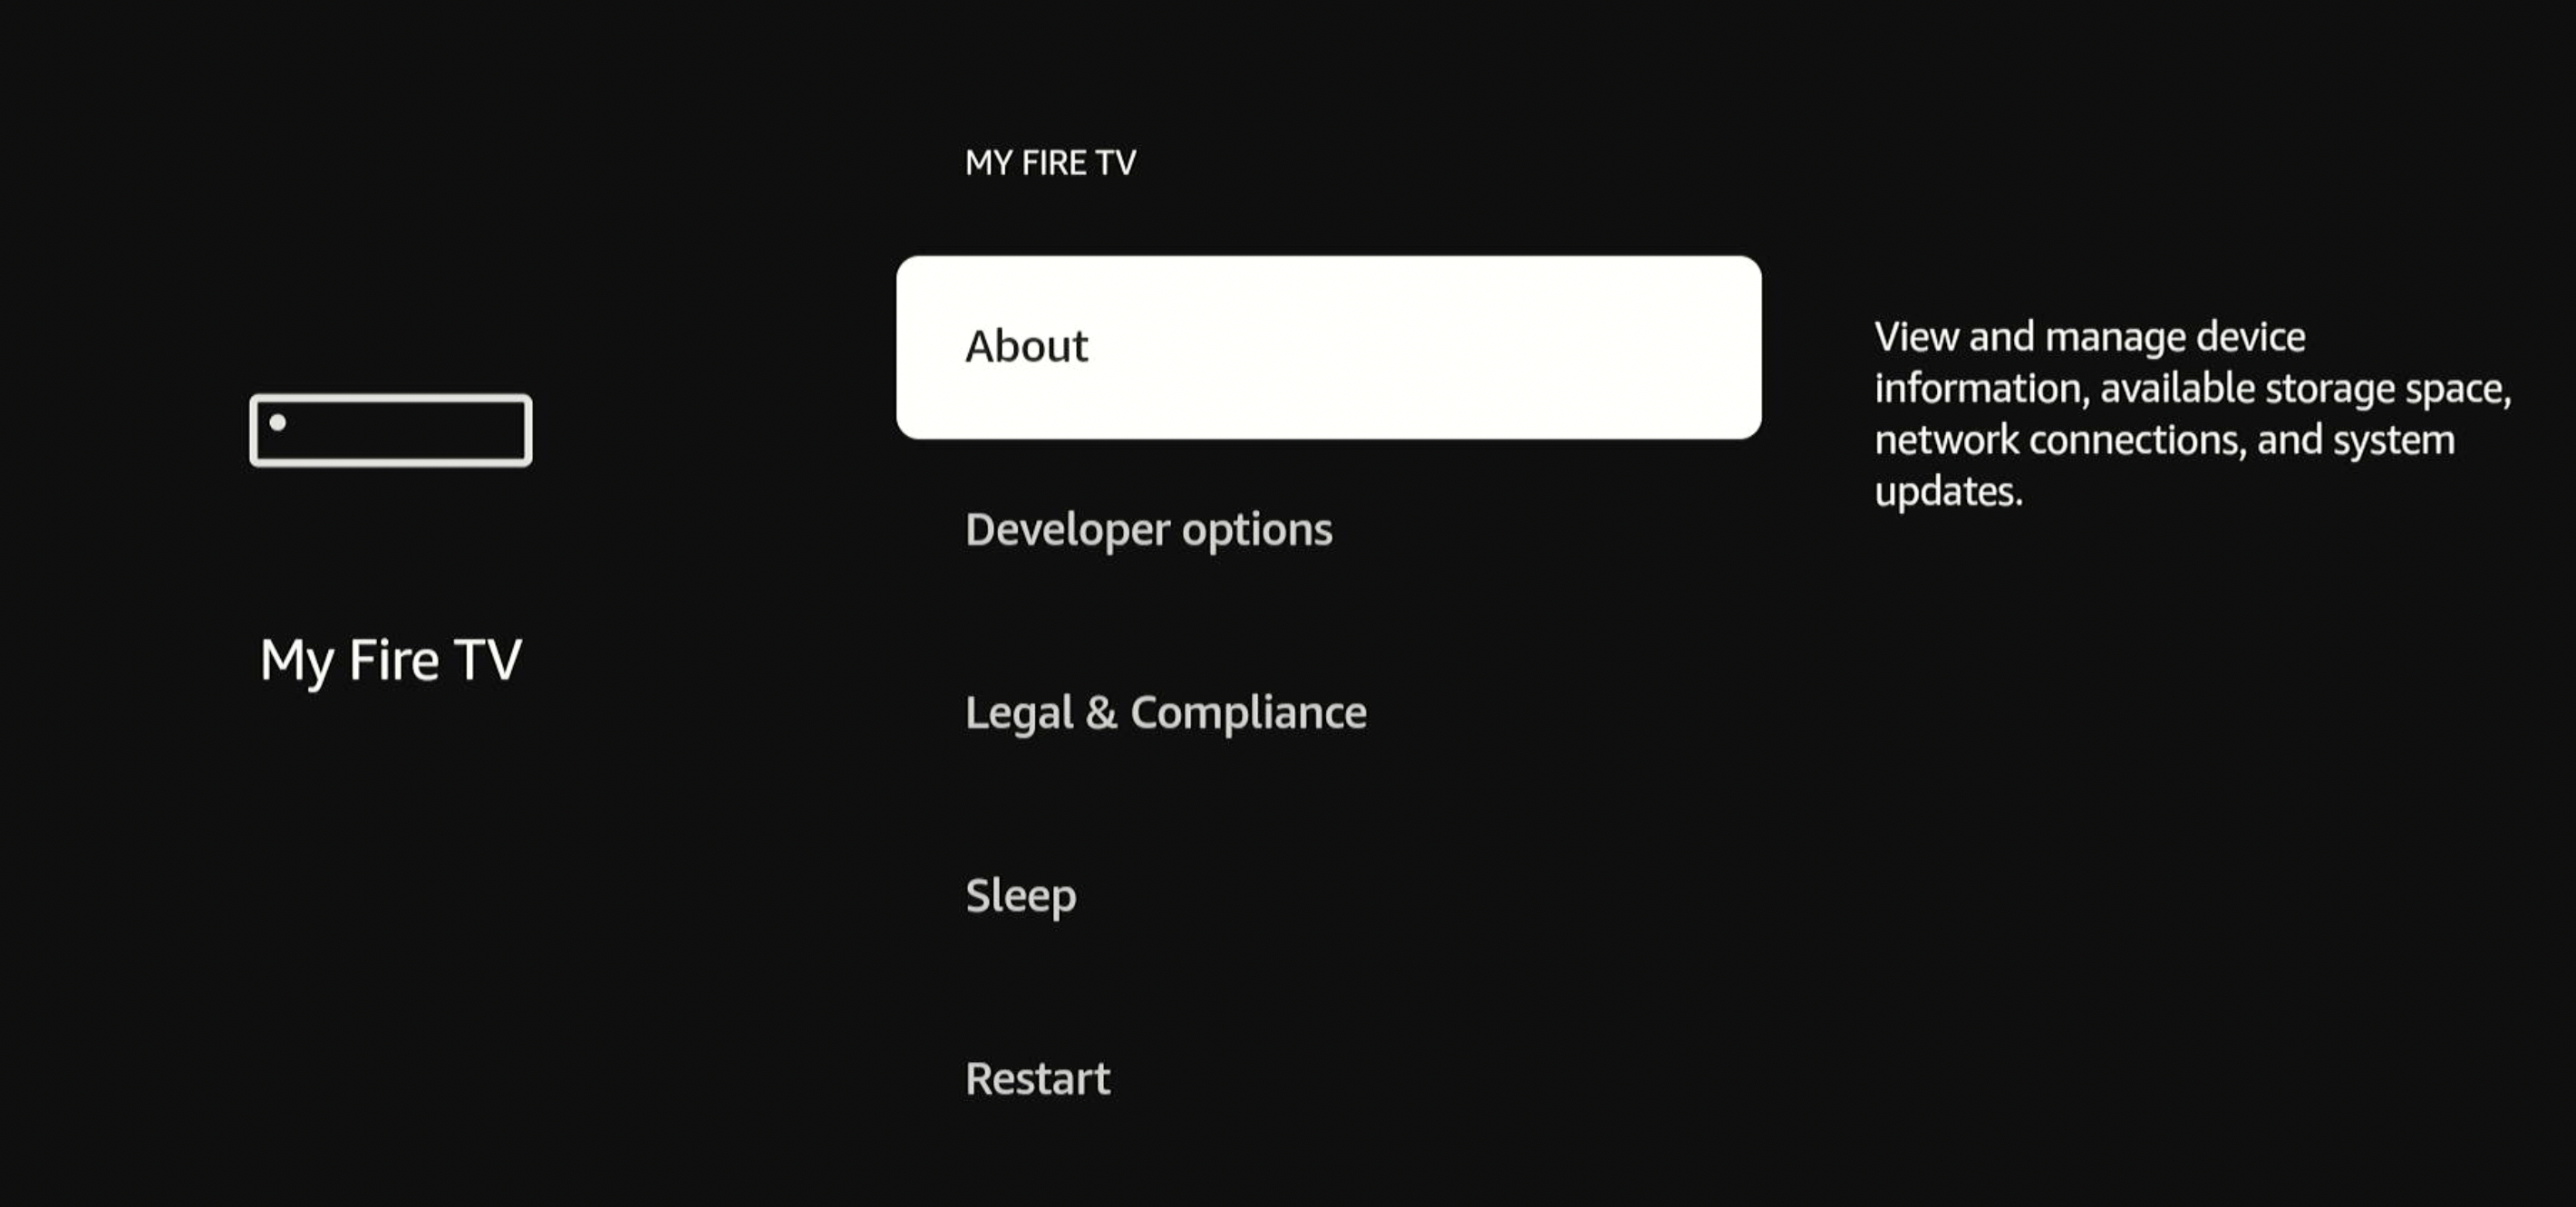
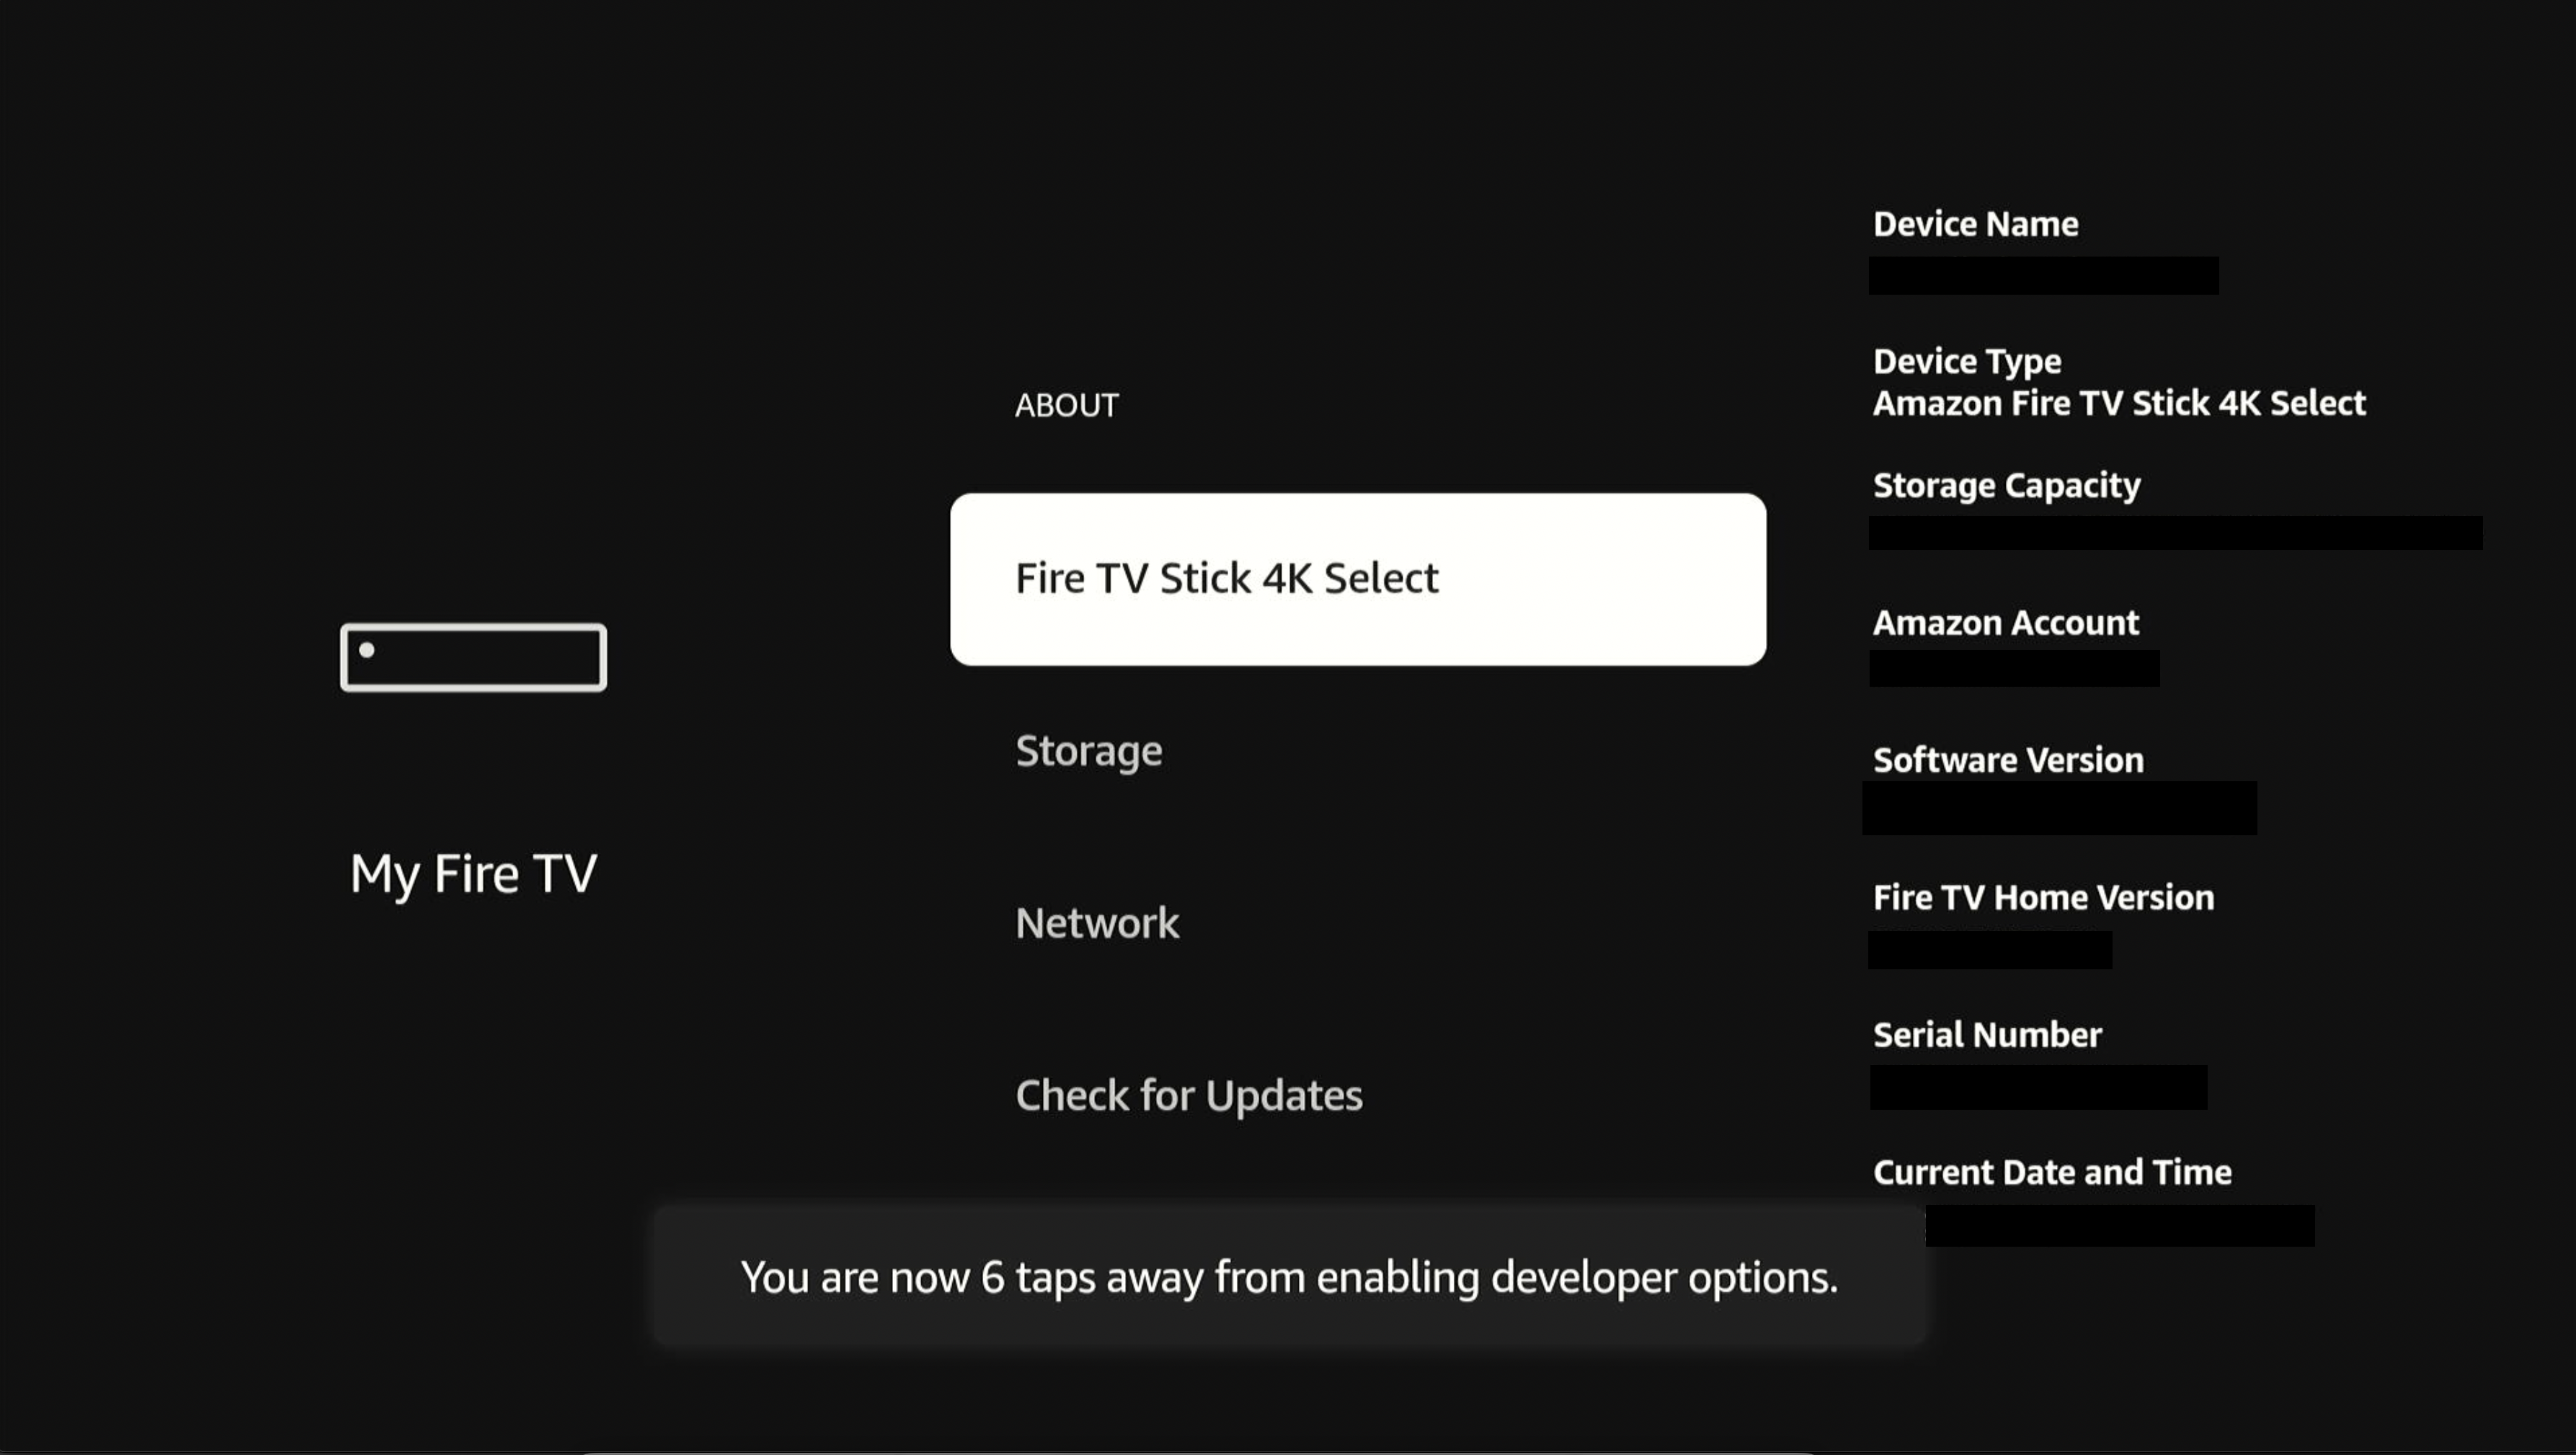
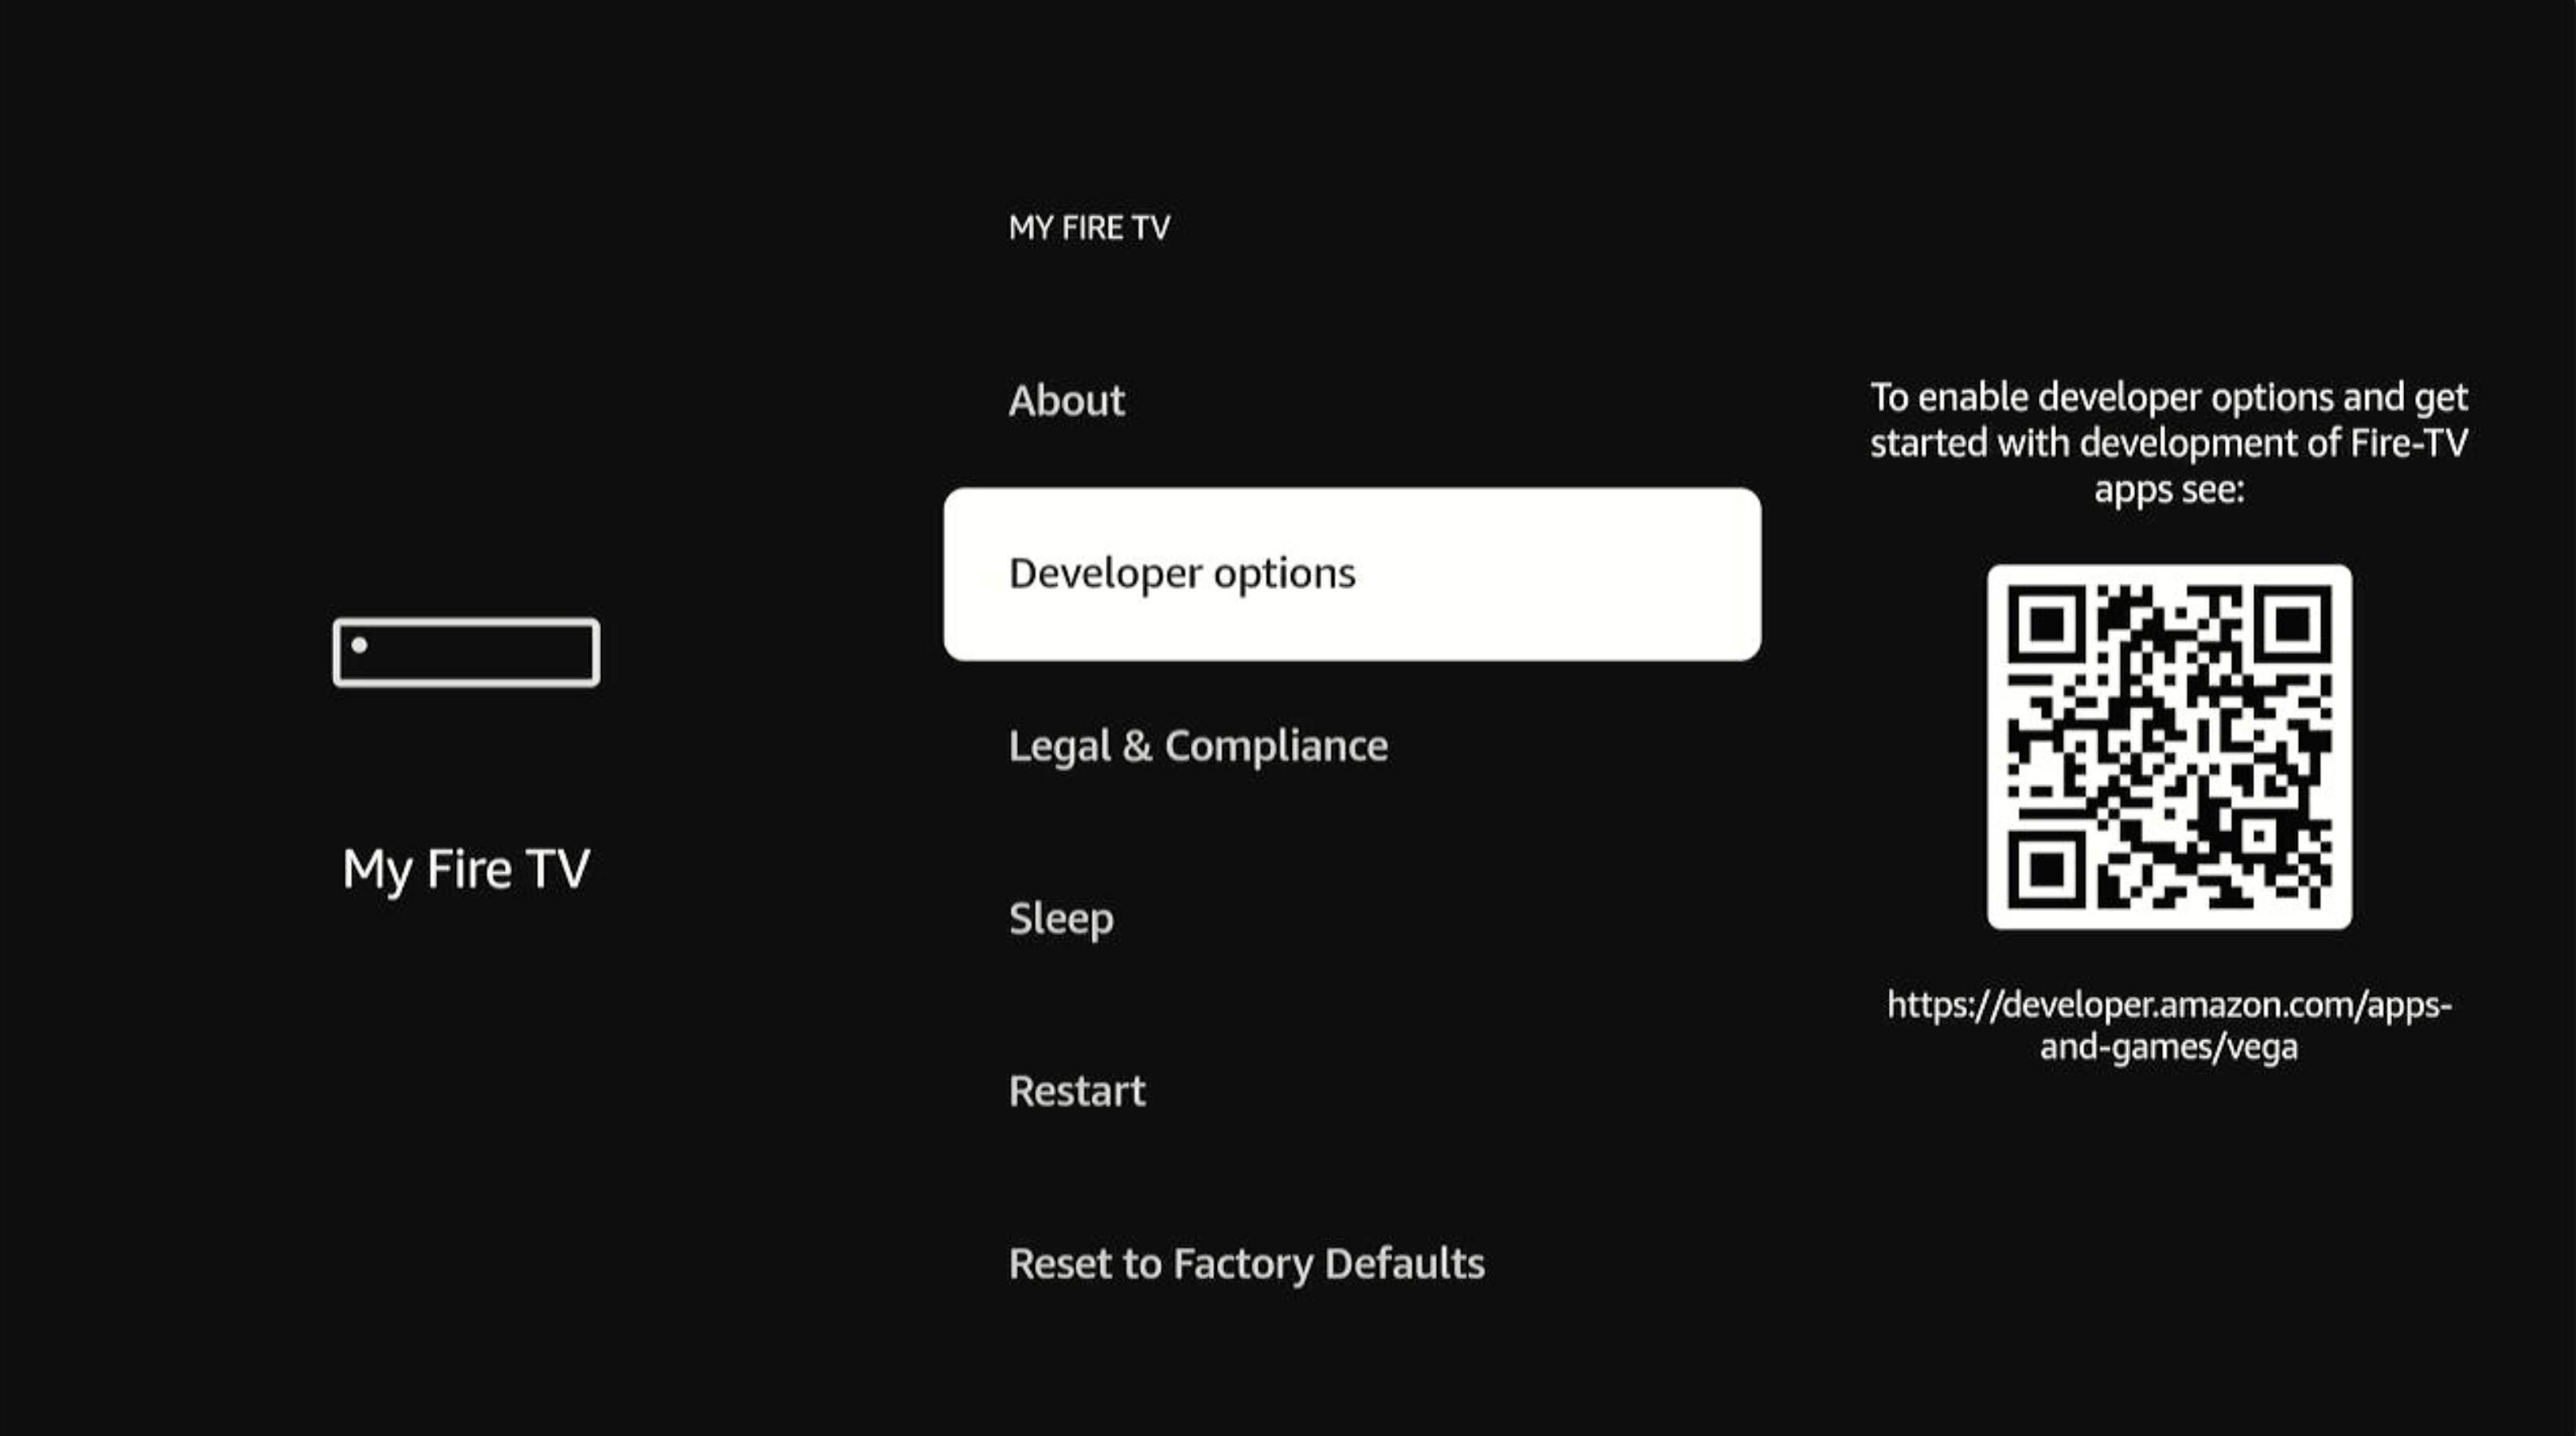
前往Settings(设置)> My Fire TV(我的Fire TV)> About(关于)。
-
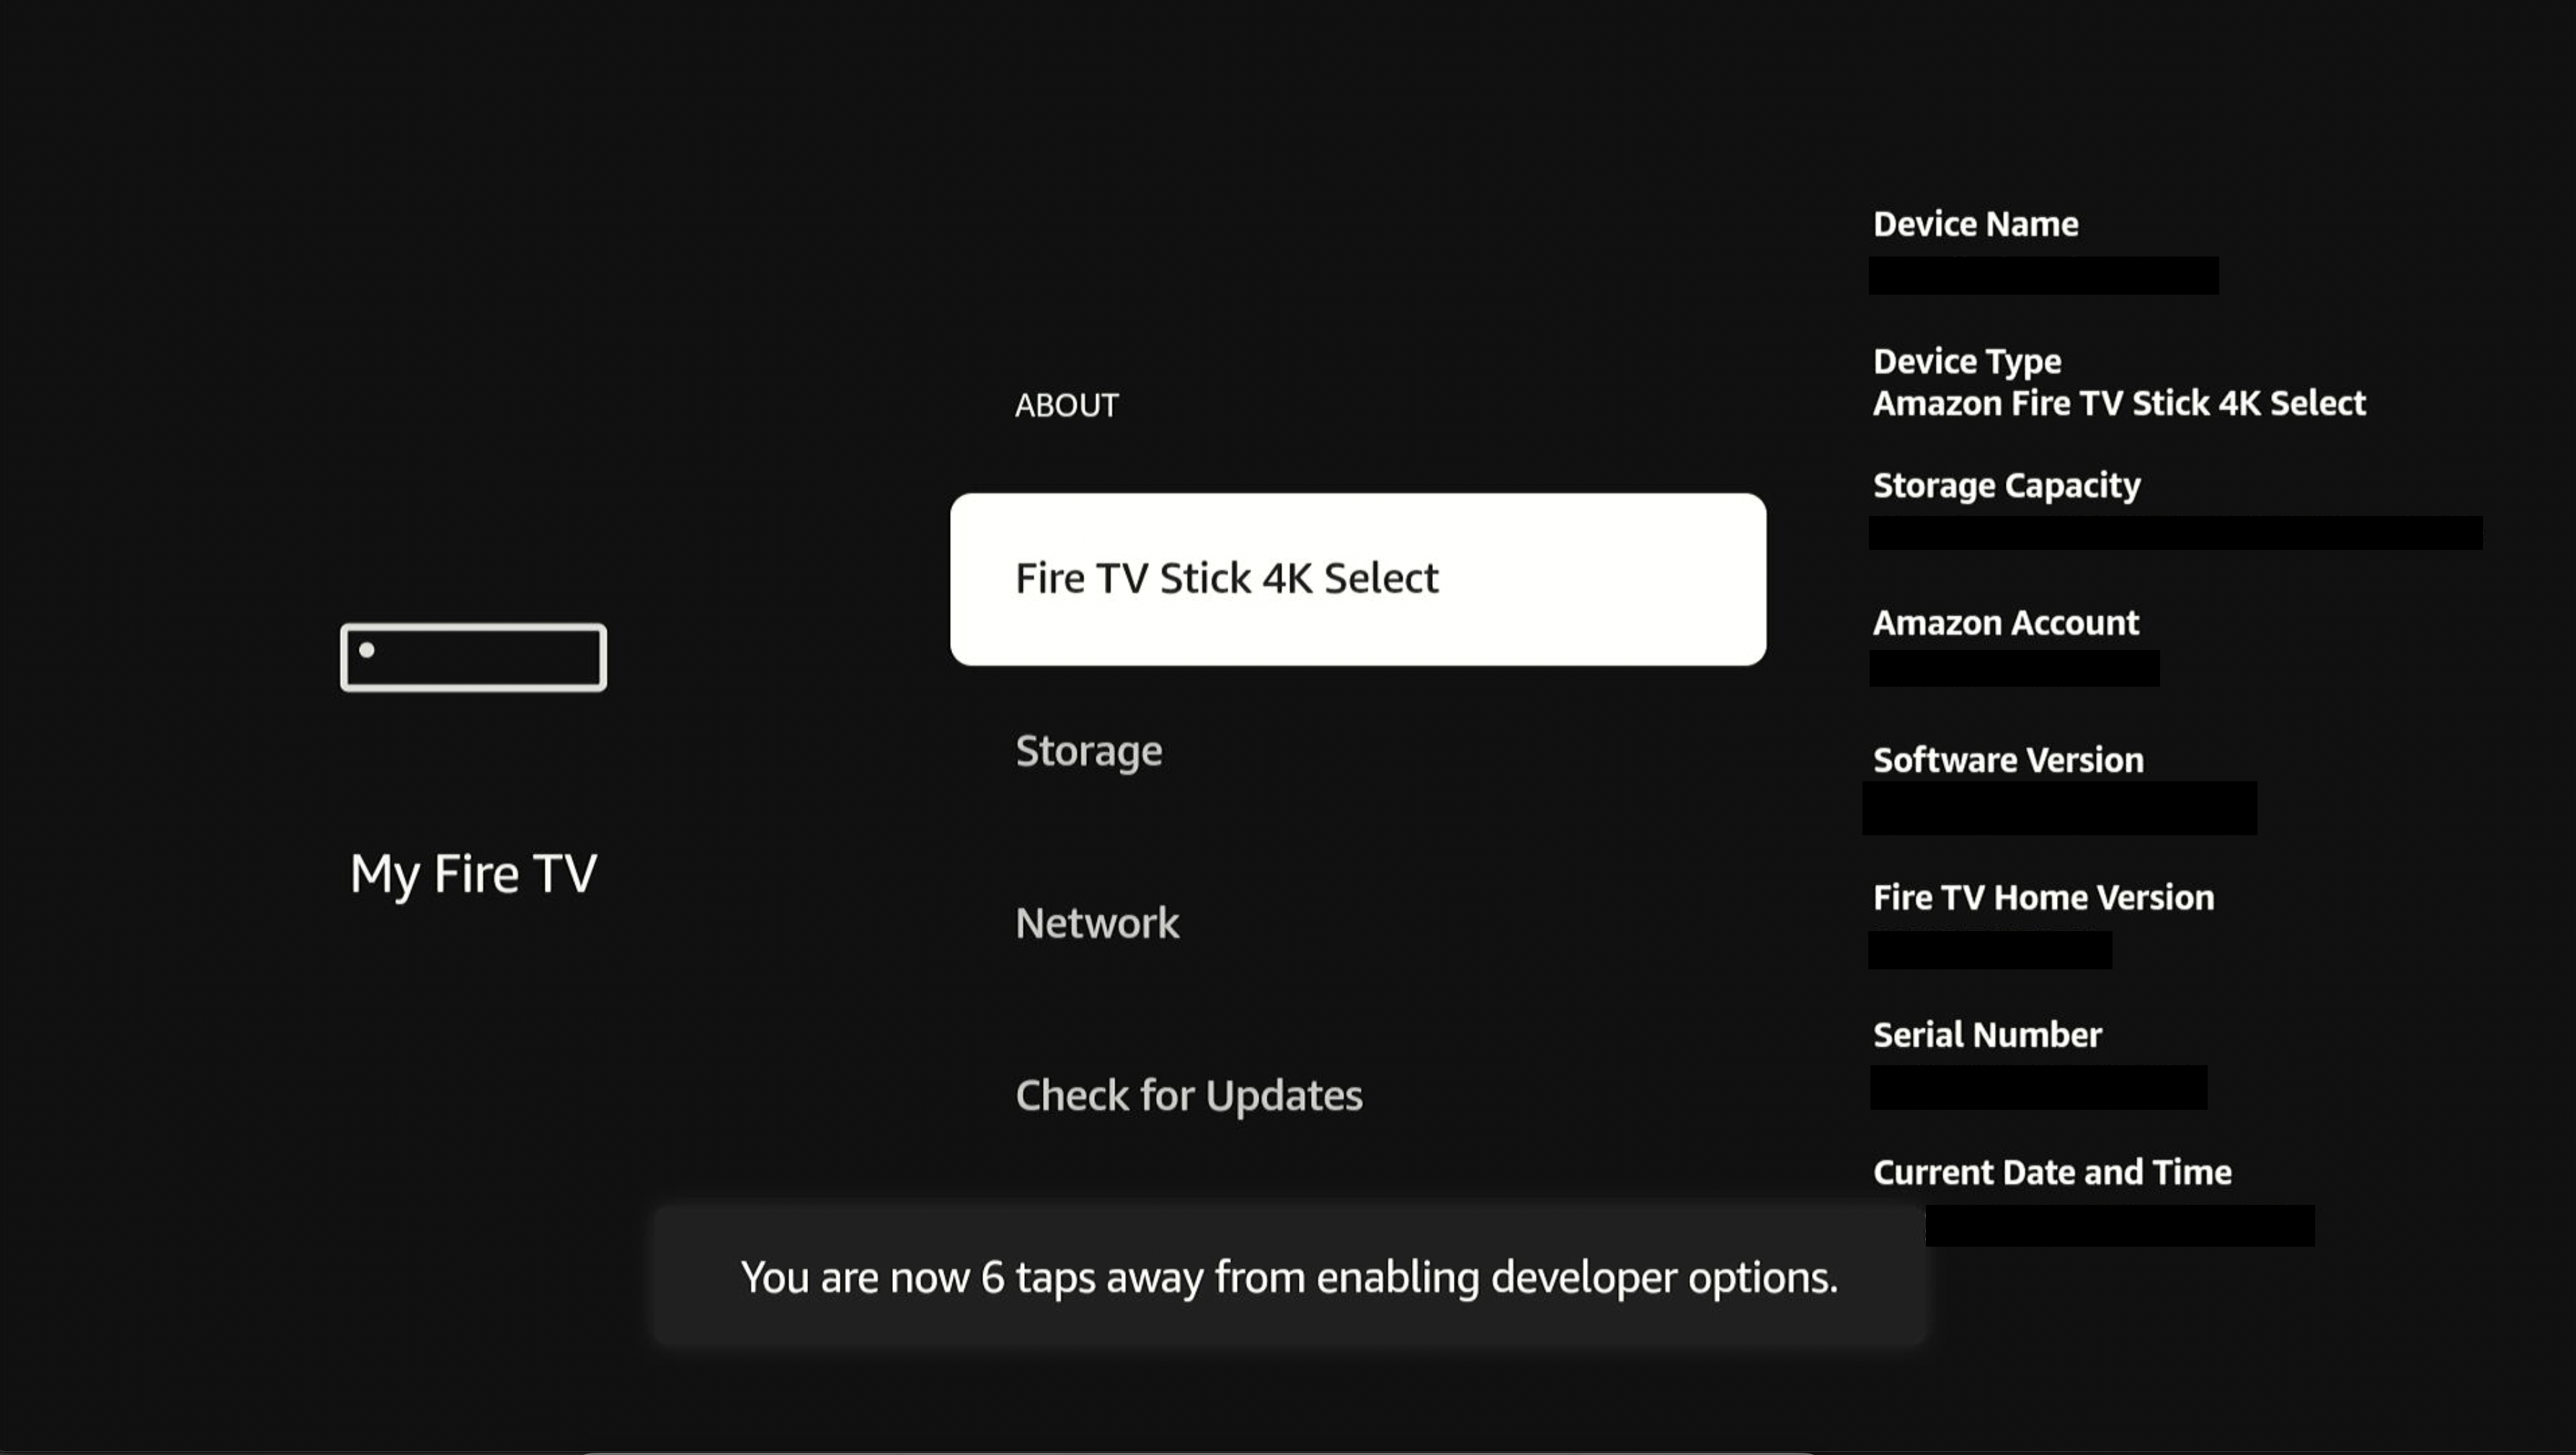
选择您的设备名称(例如Fire TV Stick HD、Fire TV Stick 4K Select或Fire TV流媒体播放器)。
-
连按遥控器上的中心按钮七次。
按完七次后,屏幕上显示简短通知,内容为“You are now a developer”(您已成为开发者)。
-
按返回按钮,返回My Fire TV(我的Fire TV)。
Developer Options(开发者选项)出现在列表中。
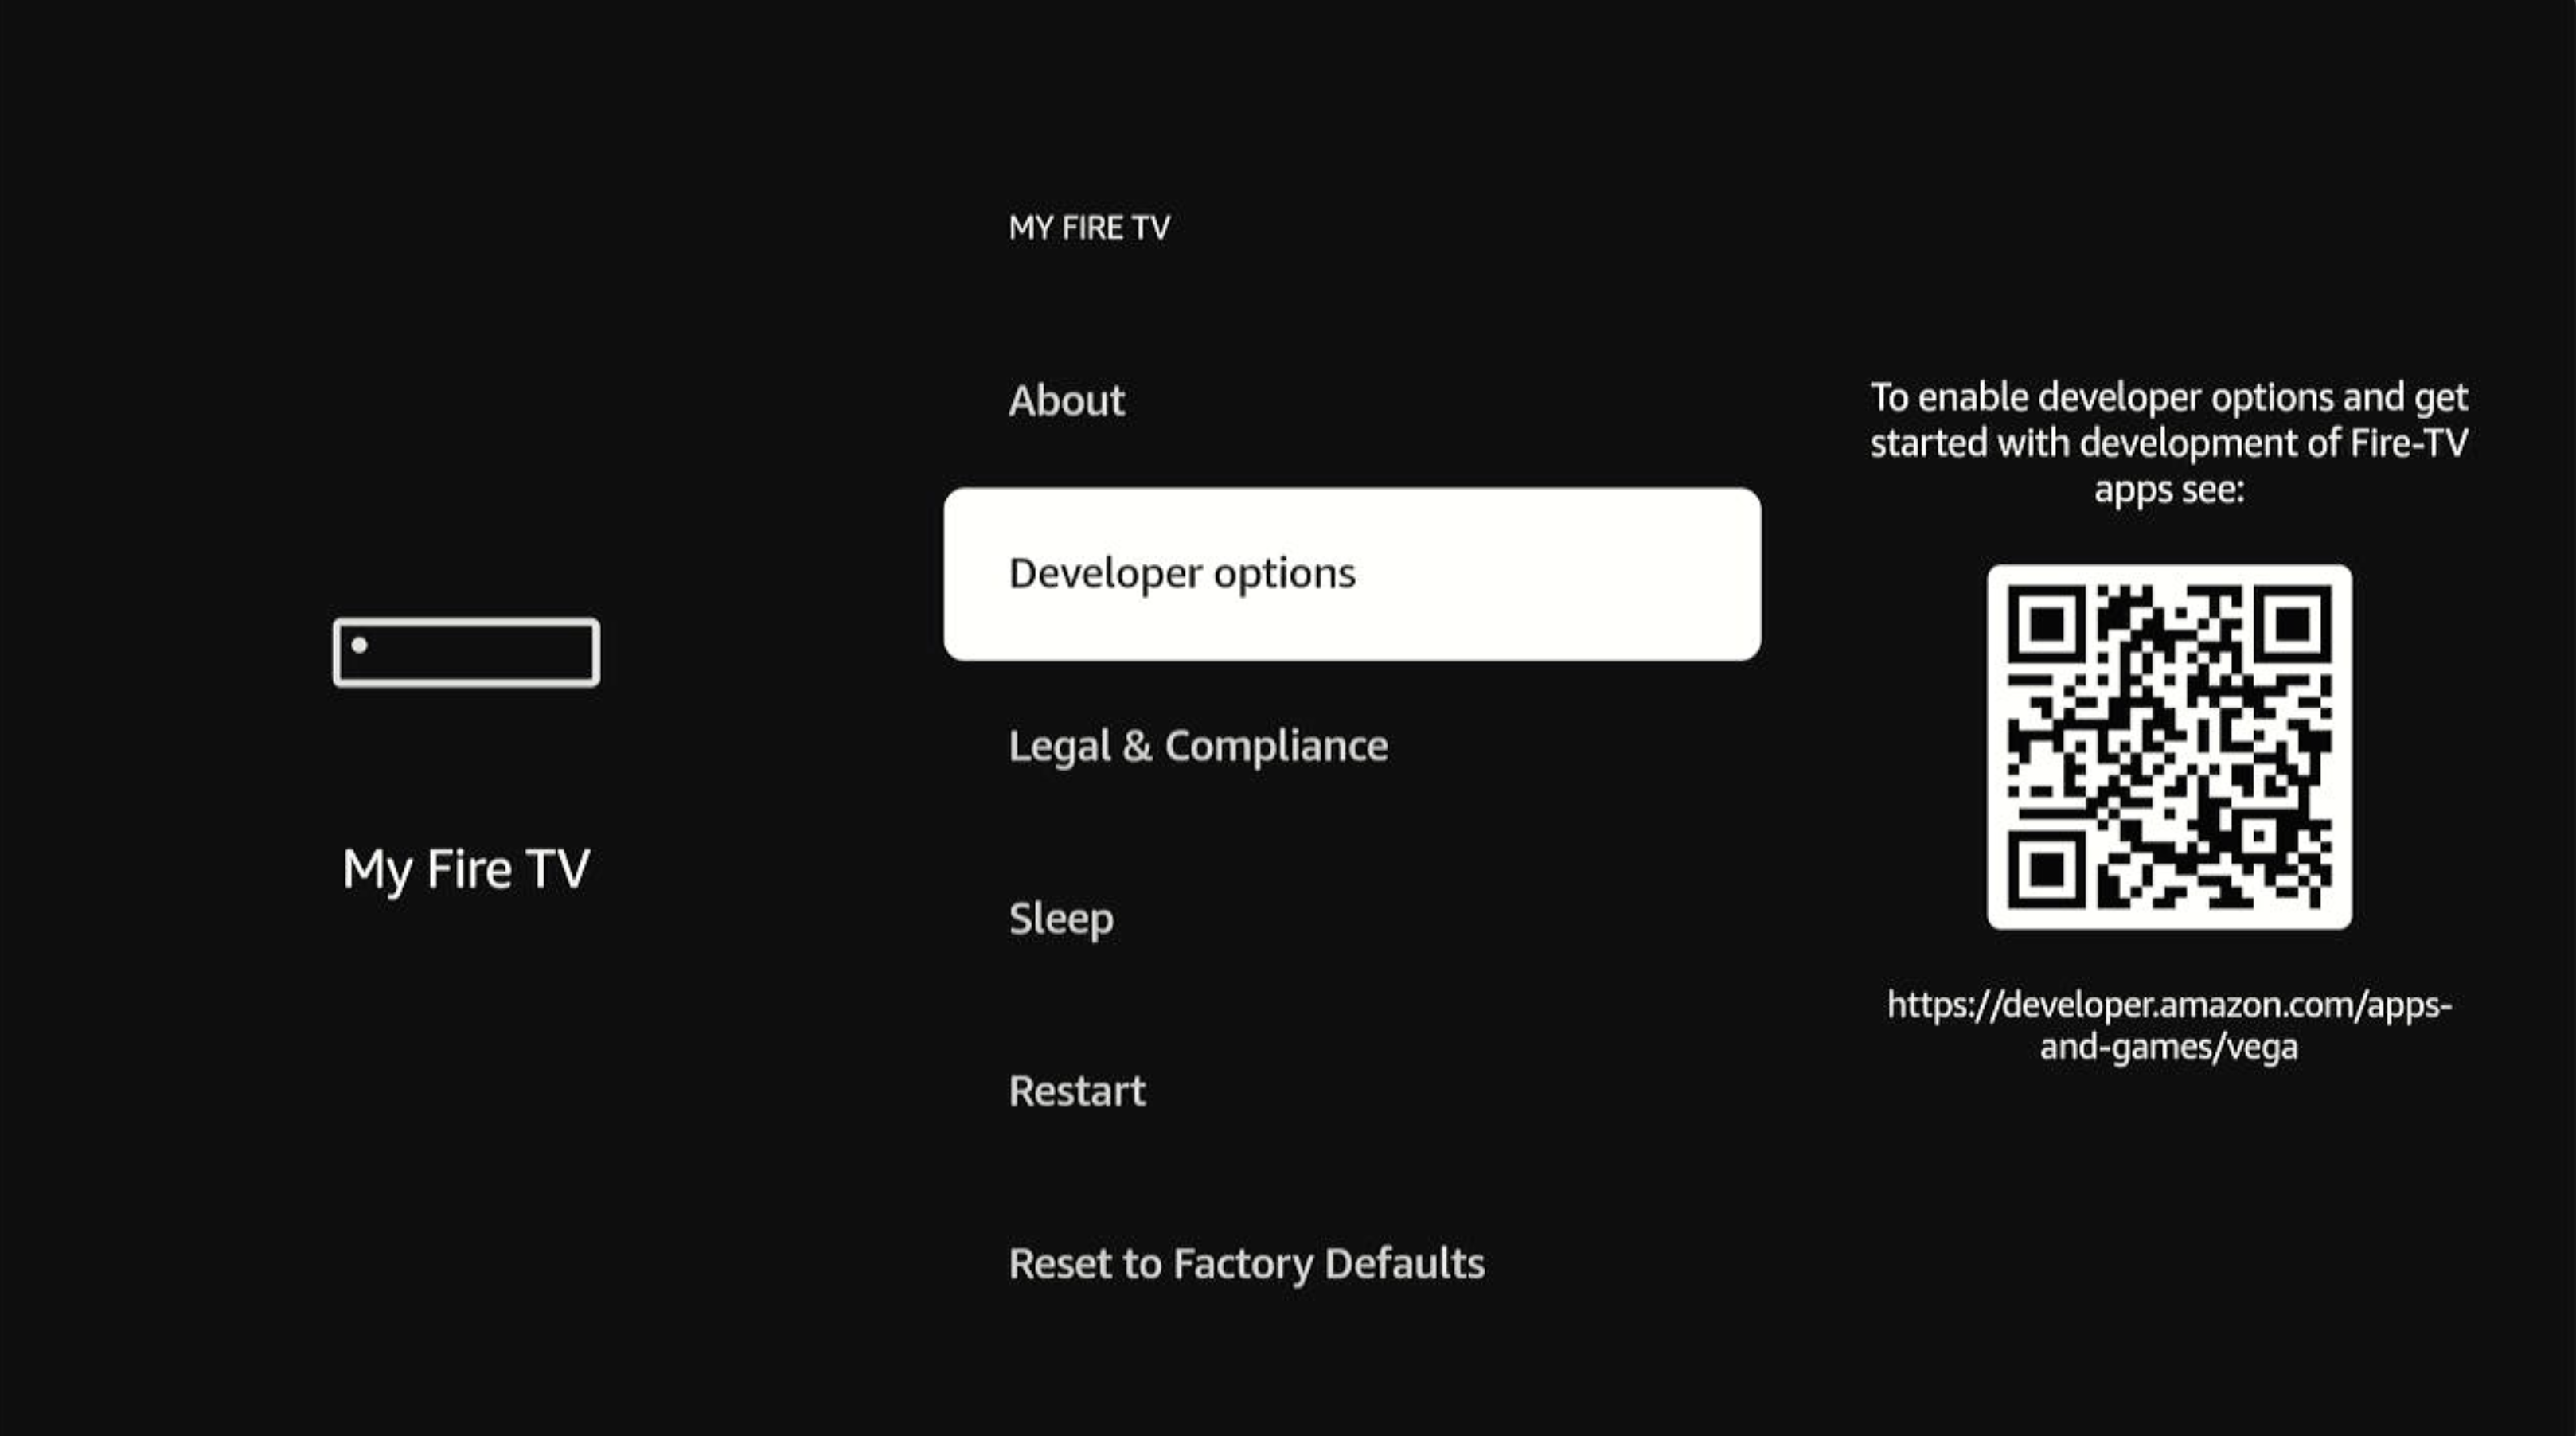
-
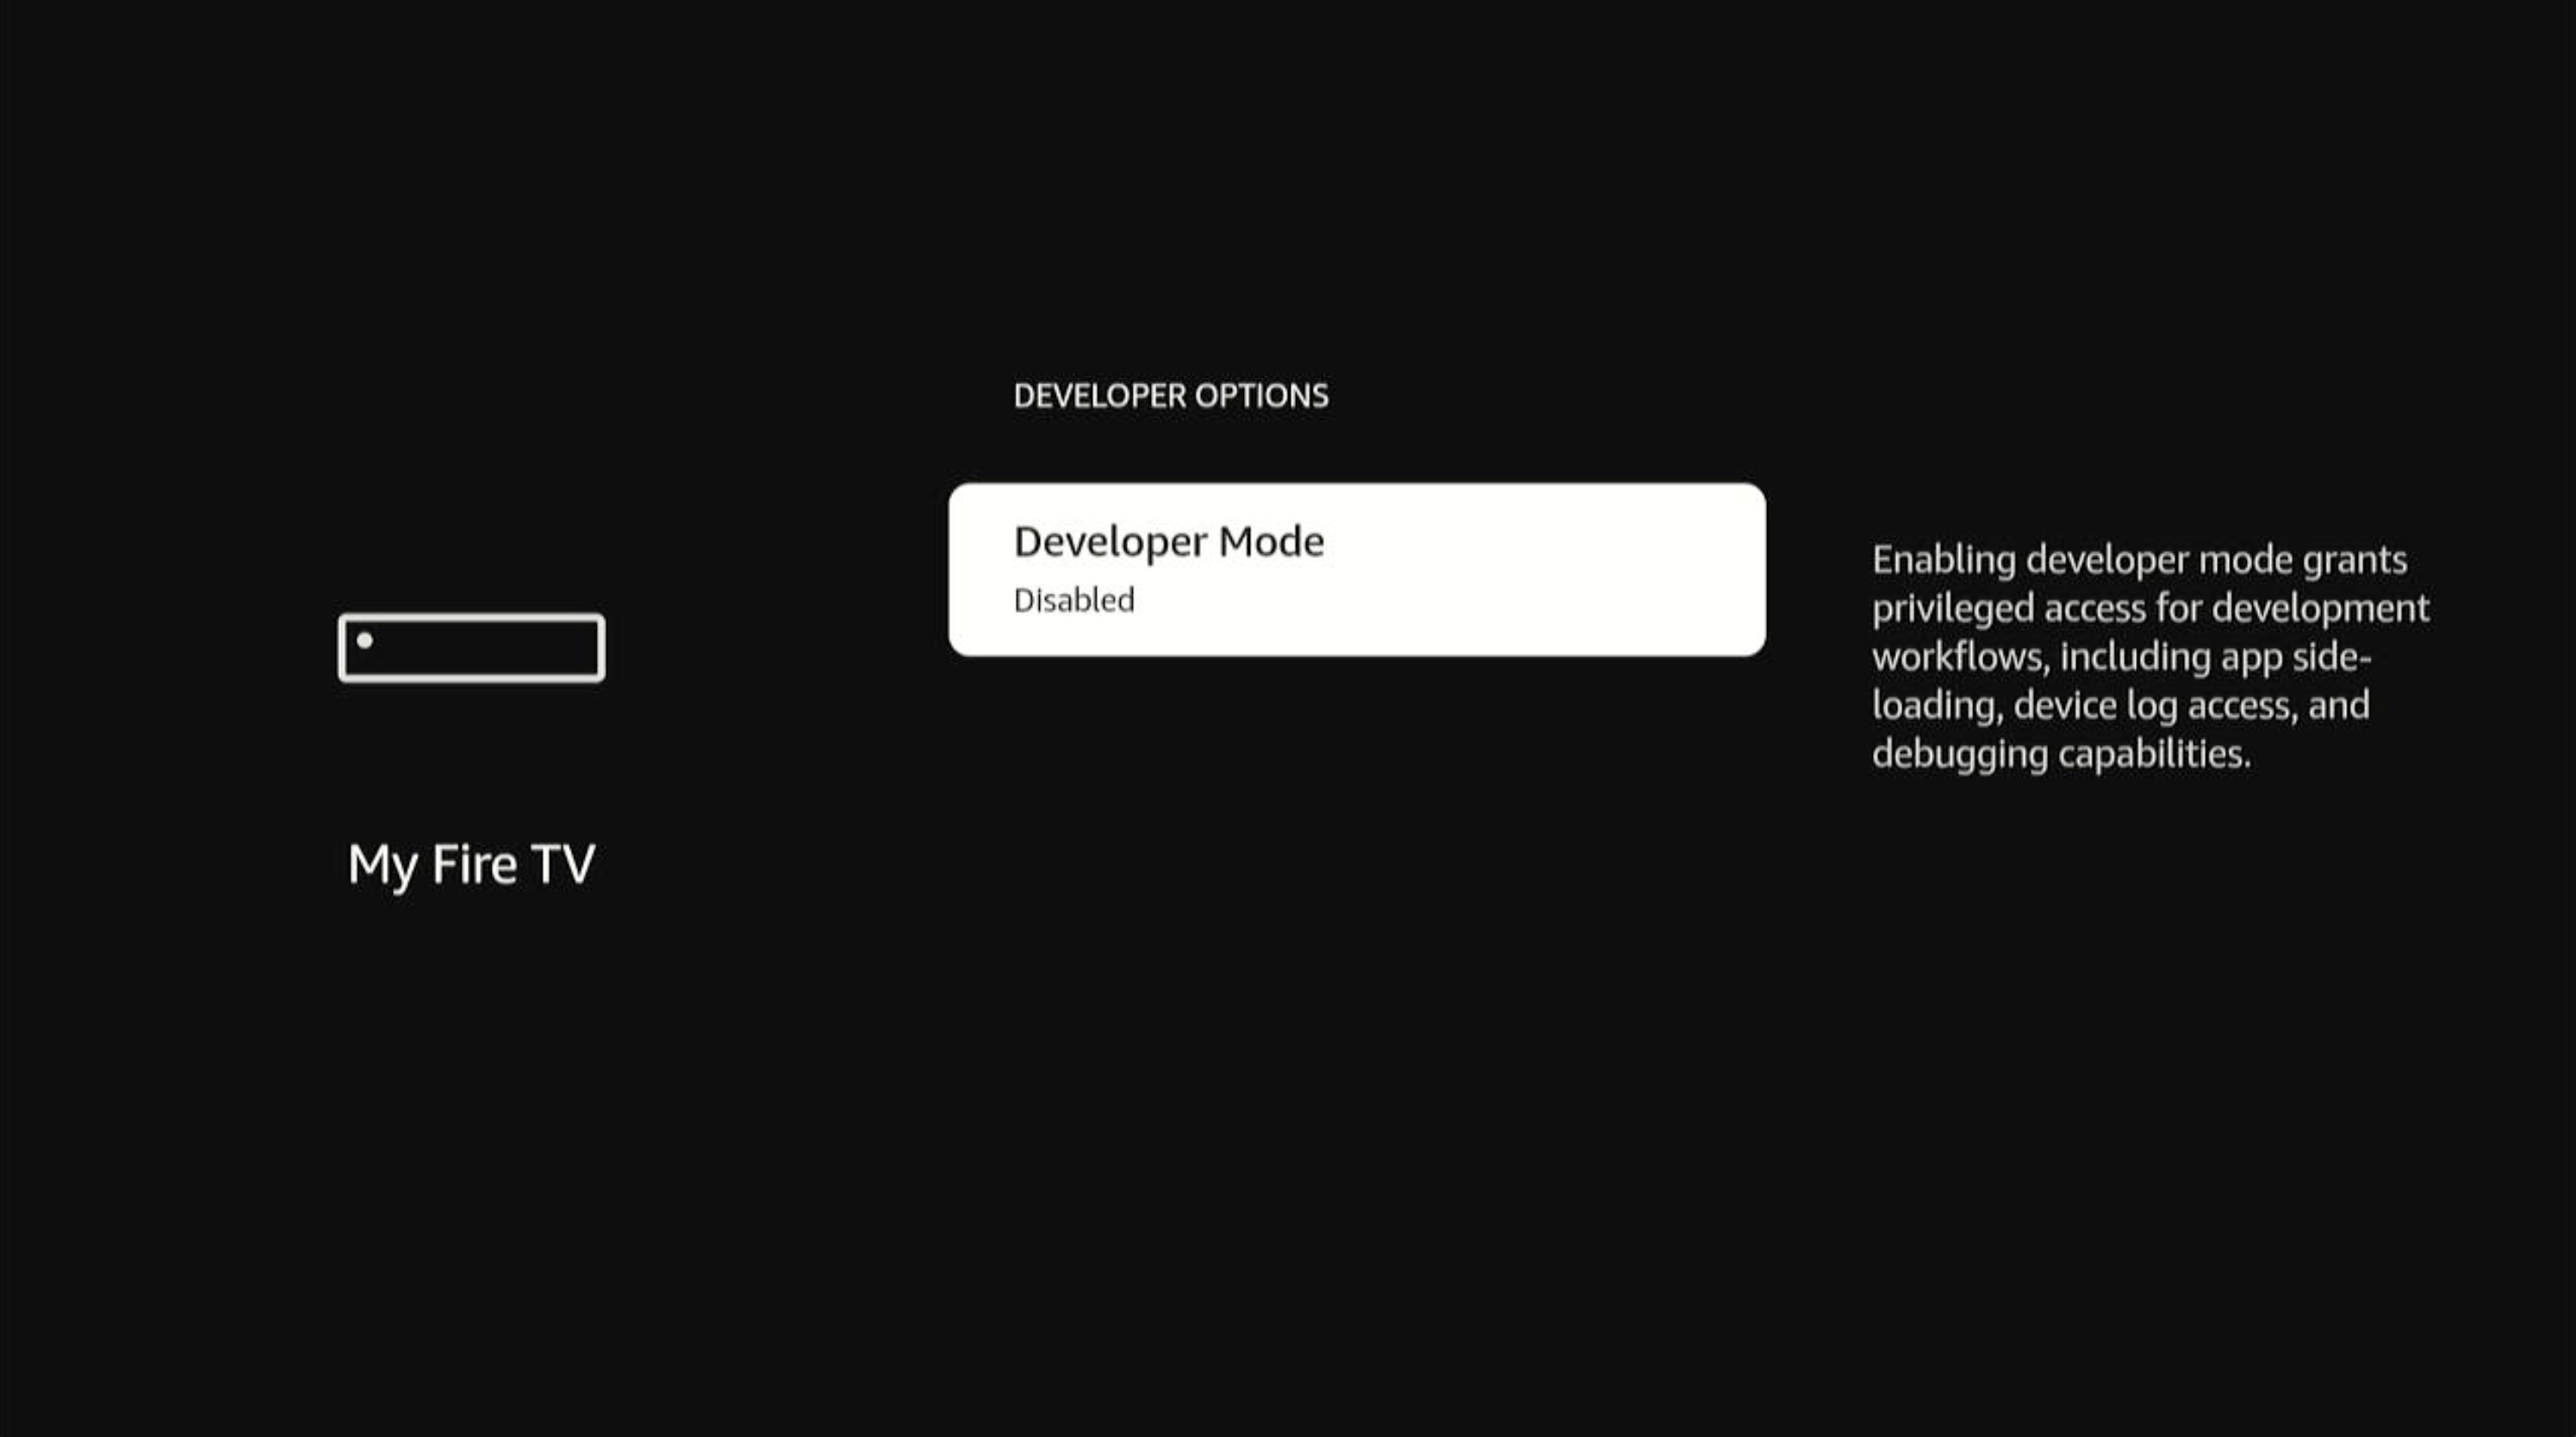
选择Developer Options(开发者选项)。
Developer Mode(开发者模式)(默认禁用)出现在菜单列表中。
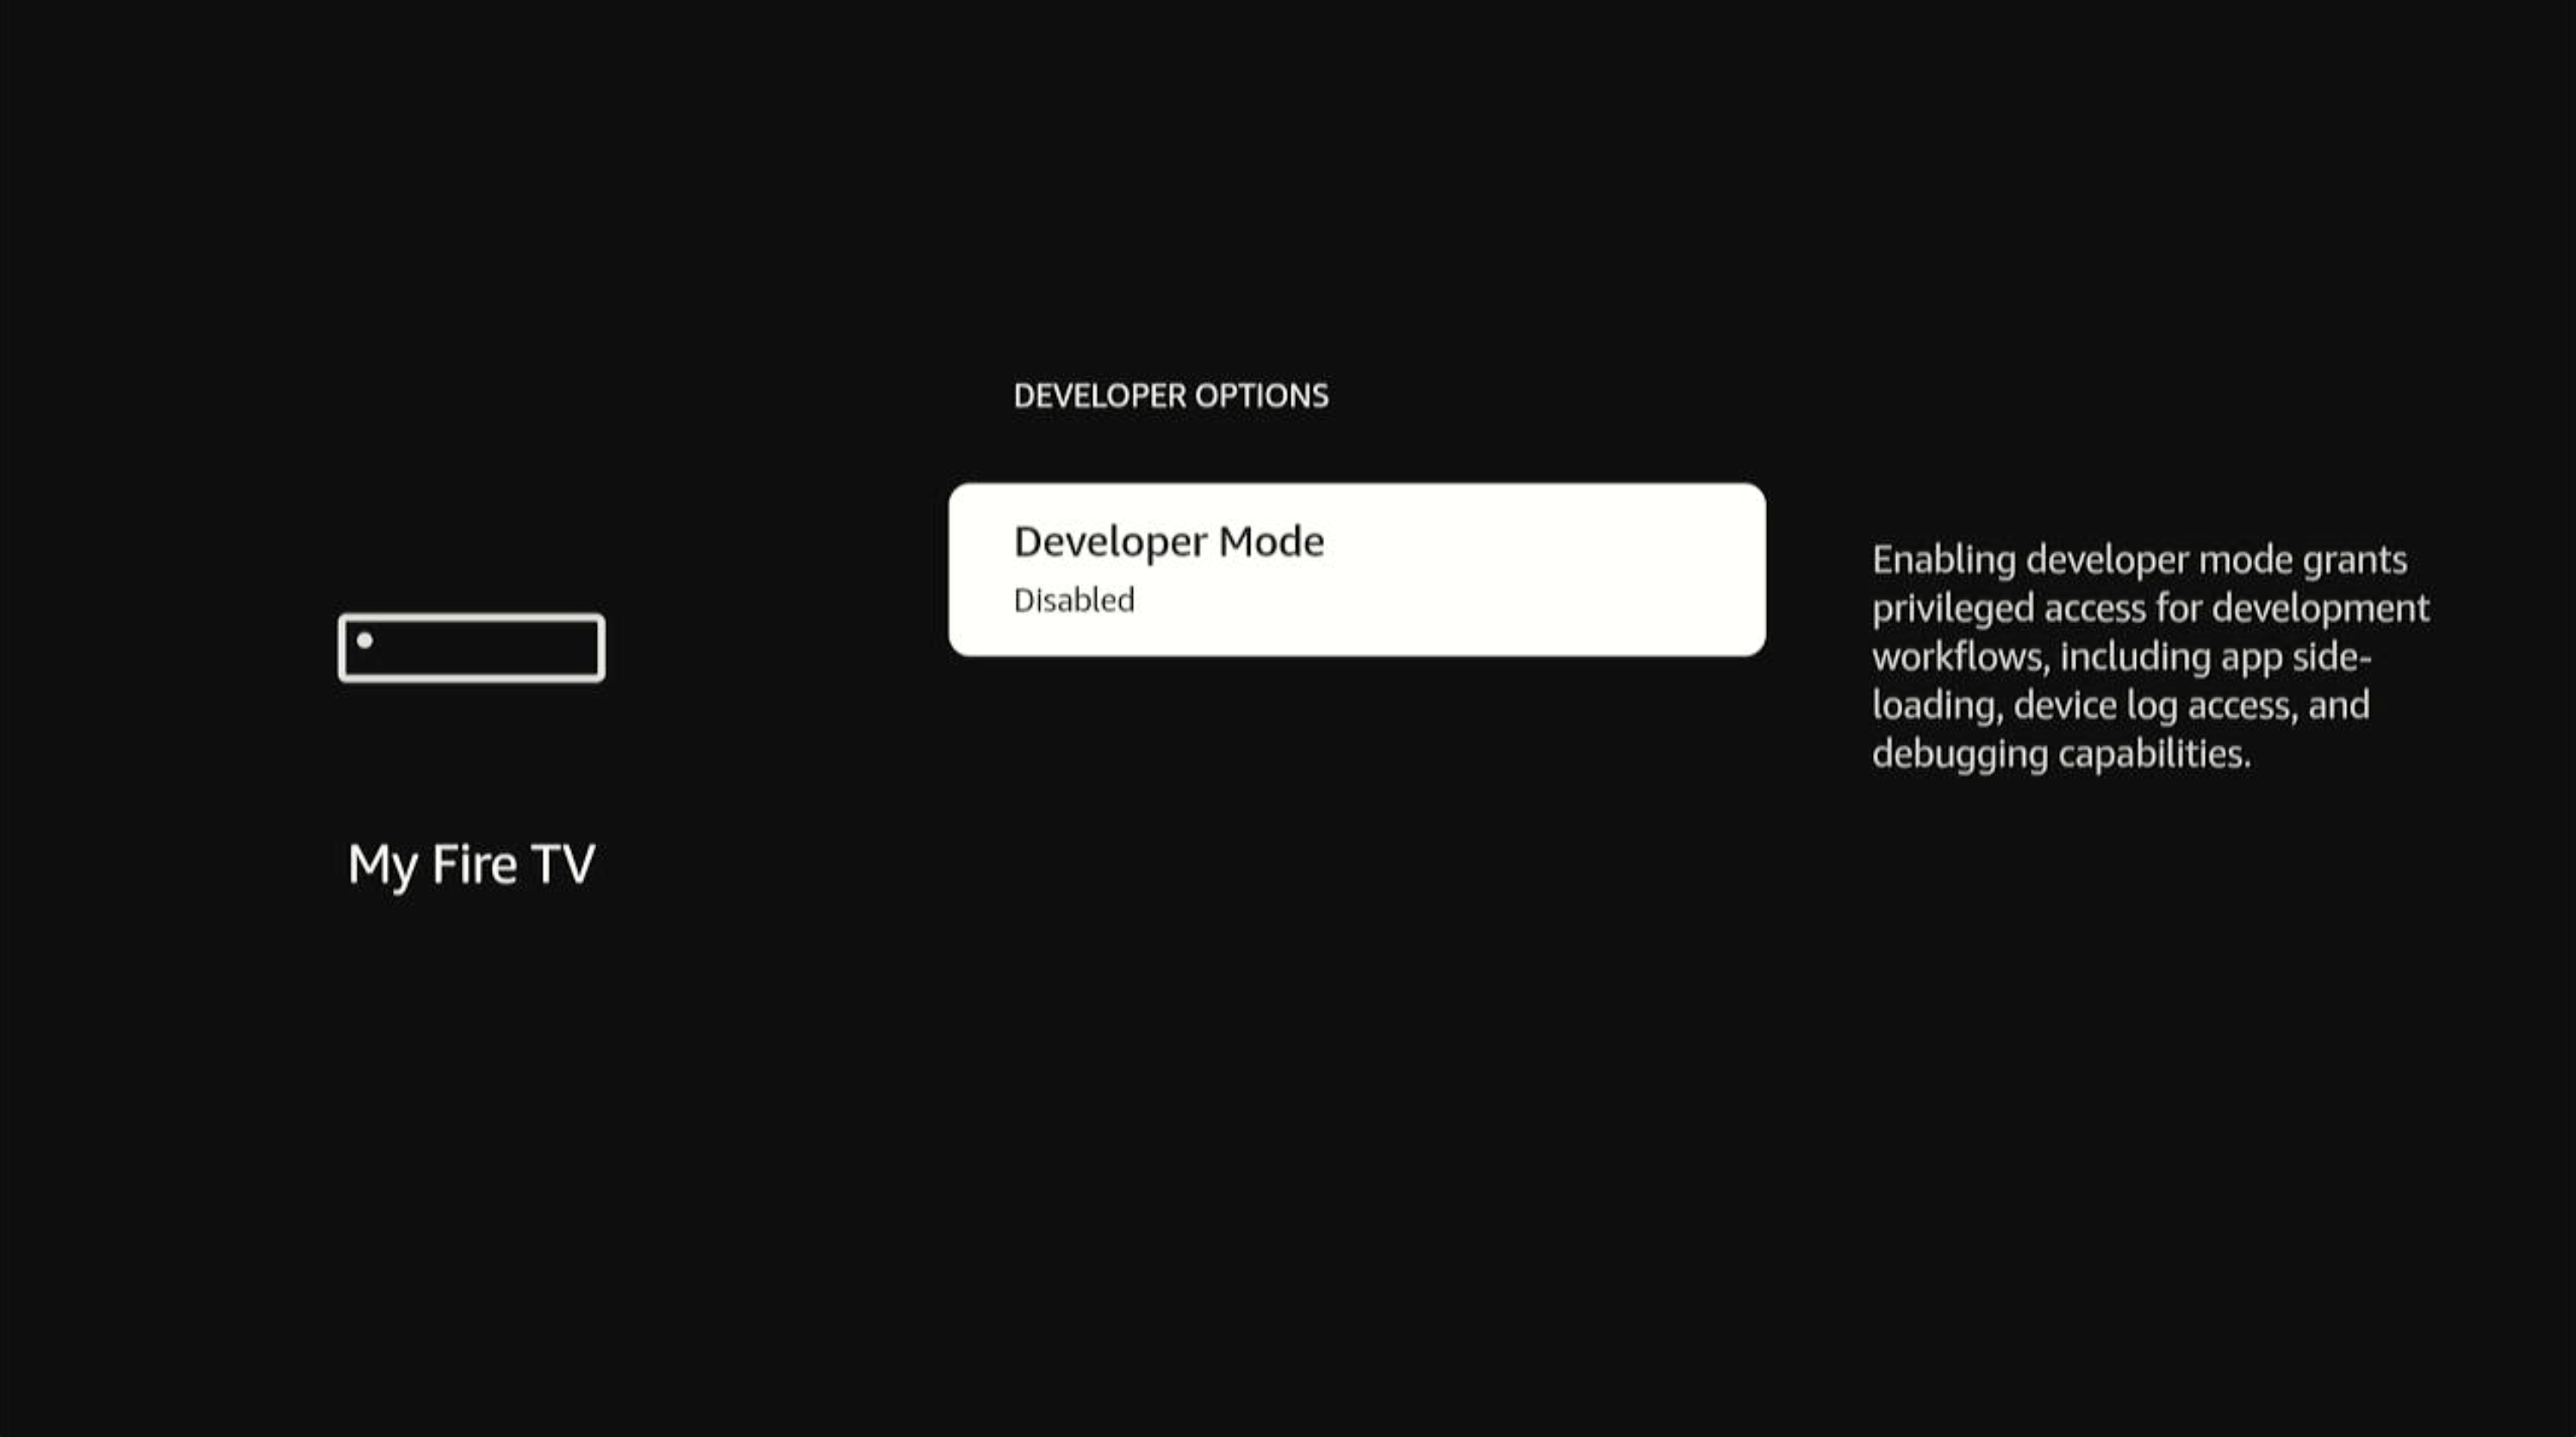
-
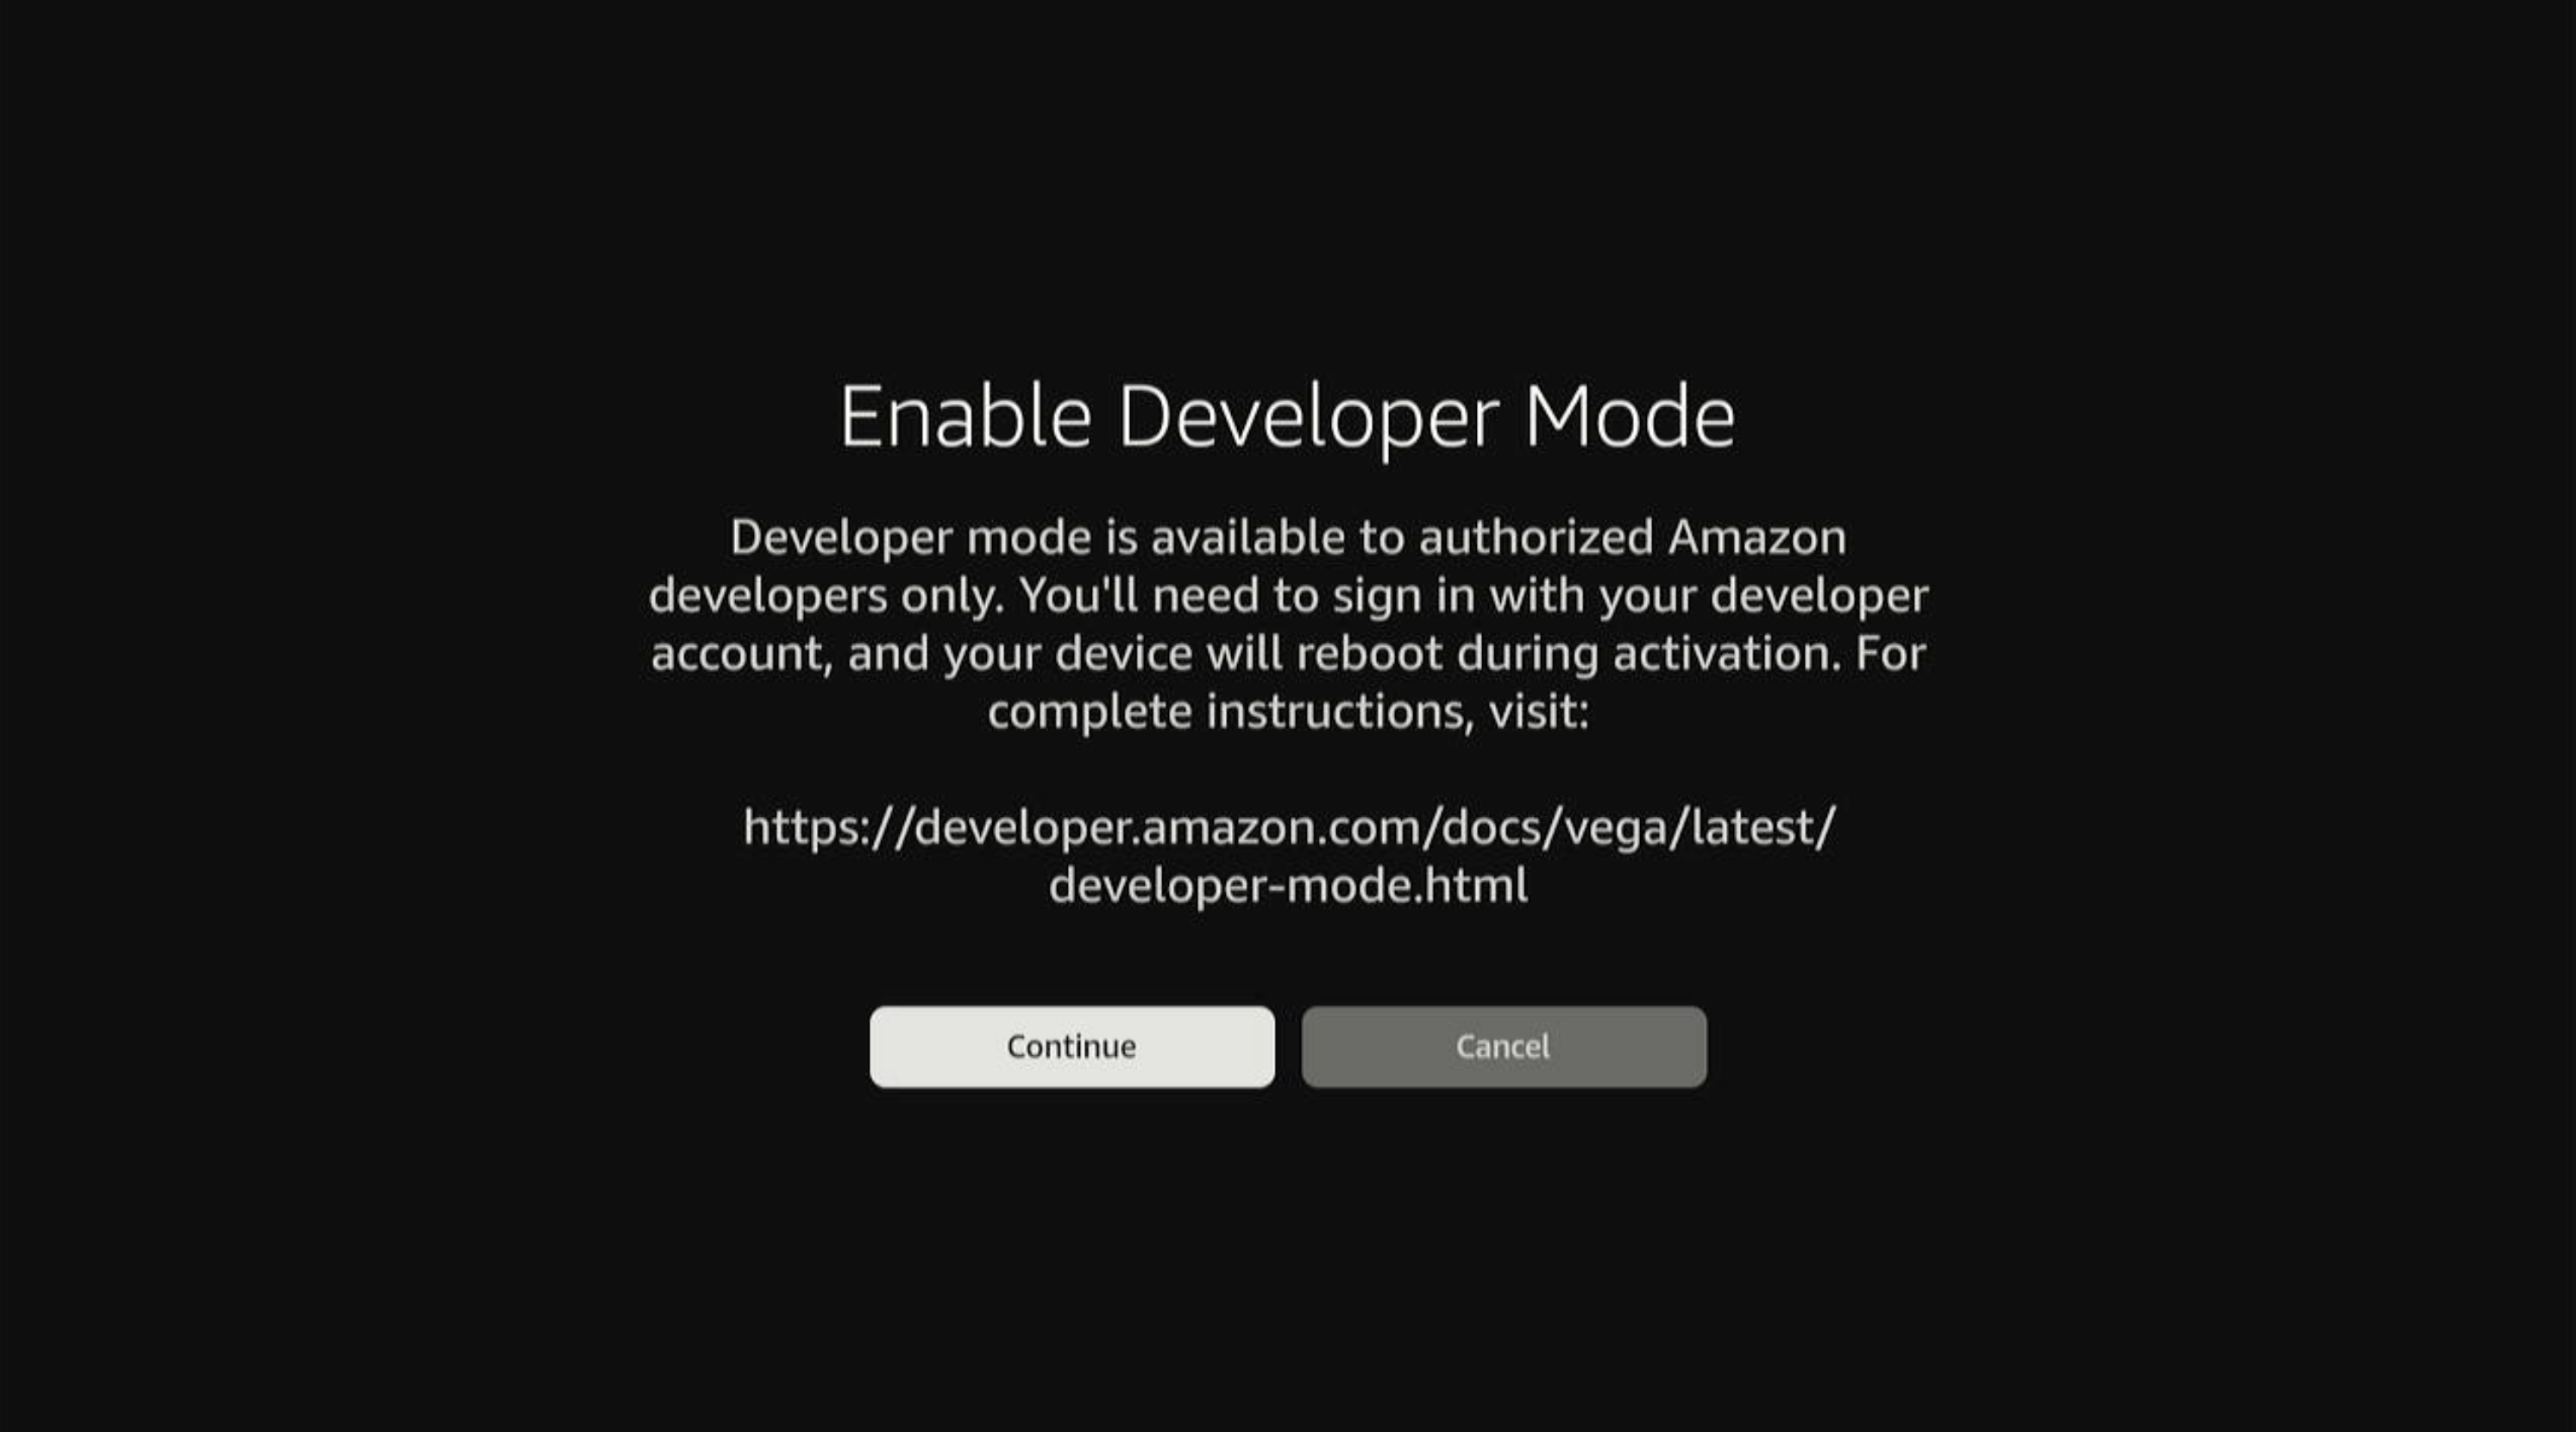
选择Developer Mode(开发者模式),继续操作。
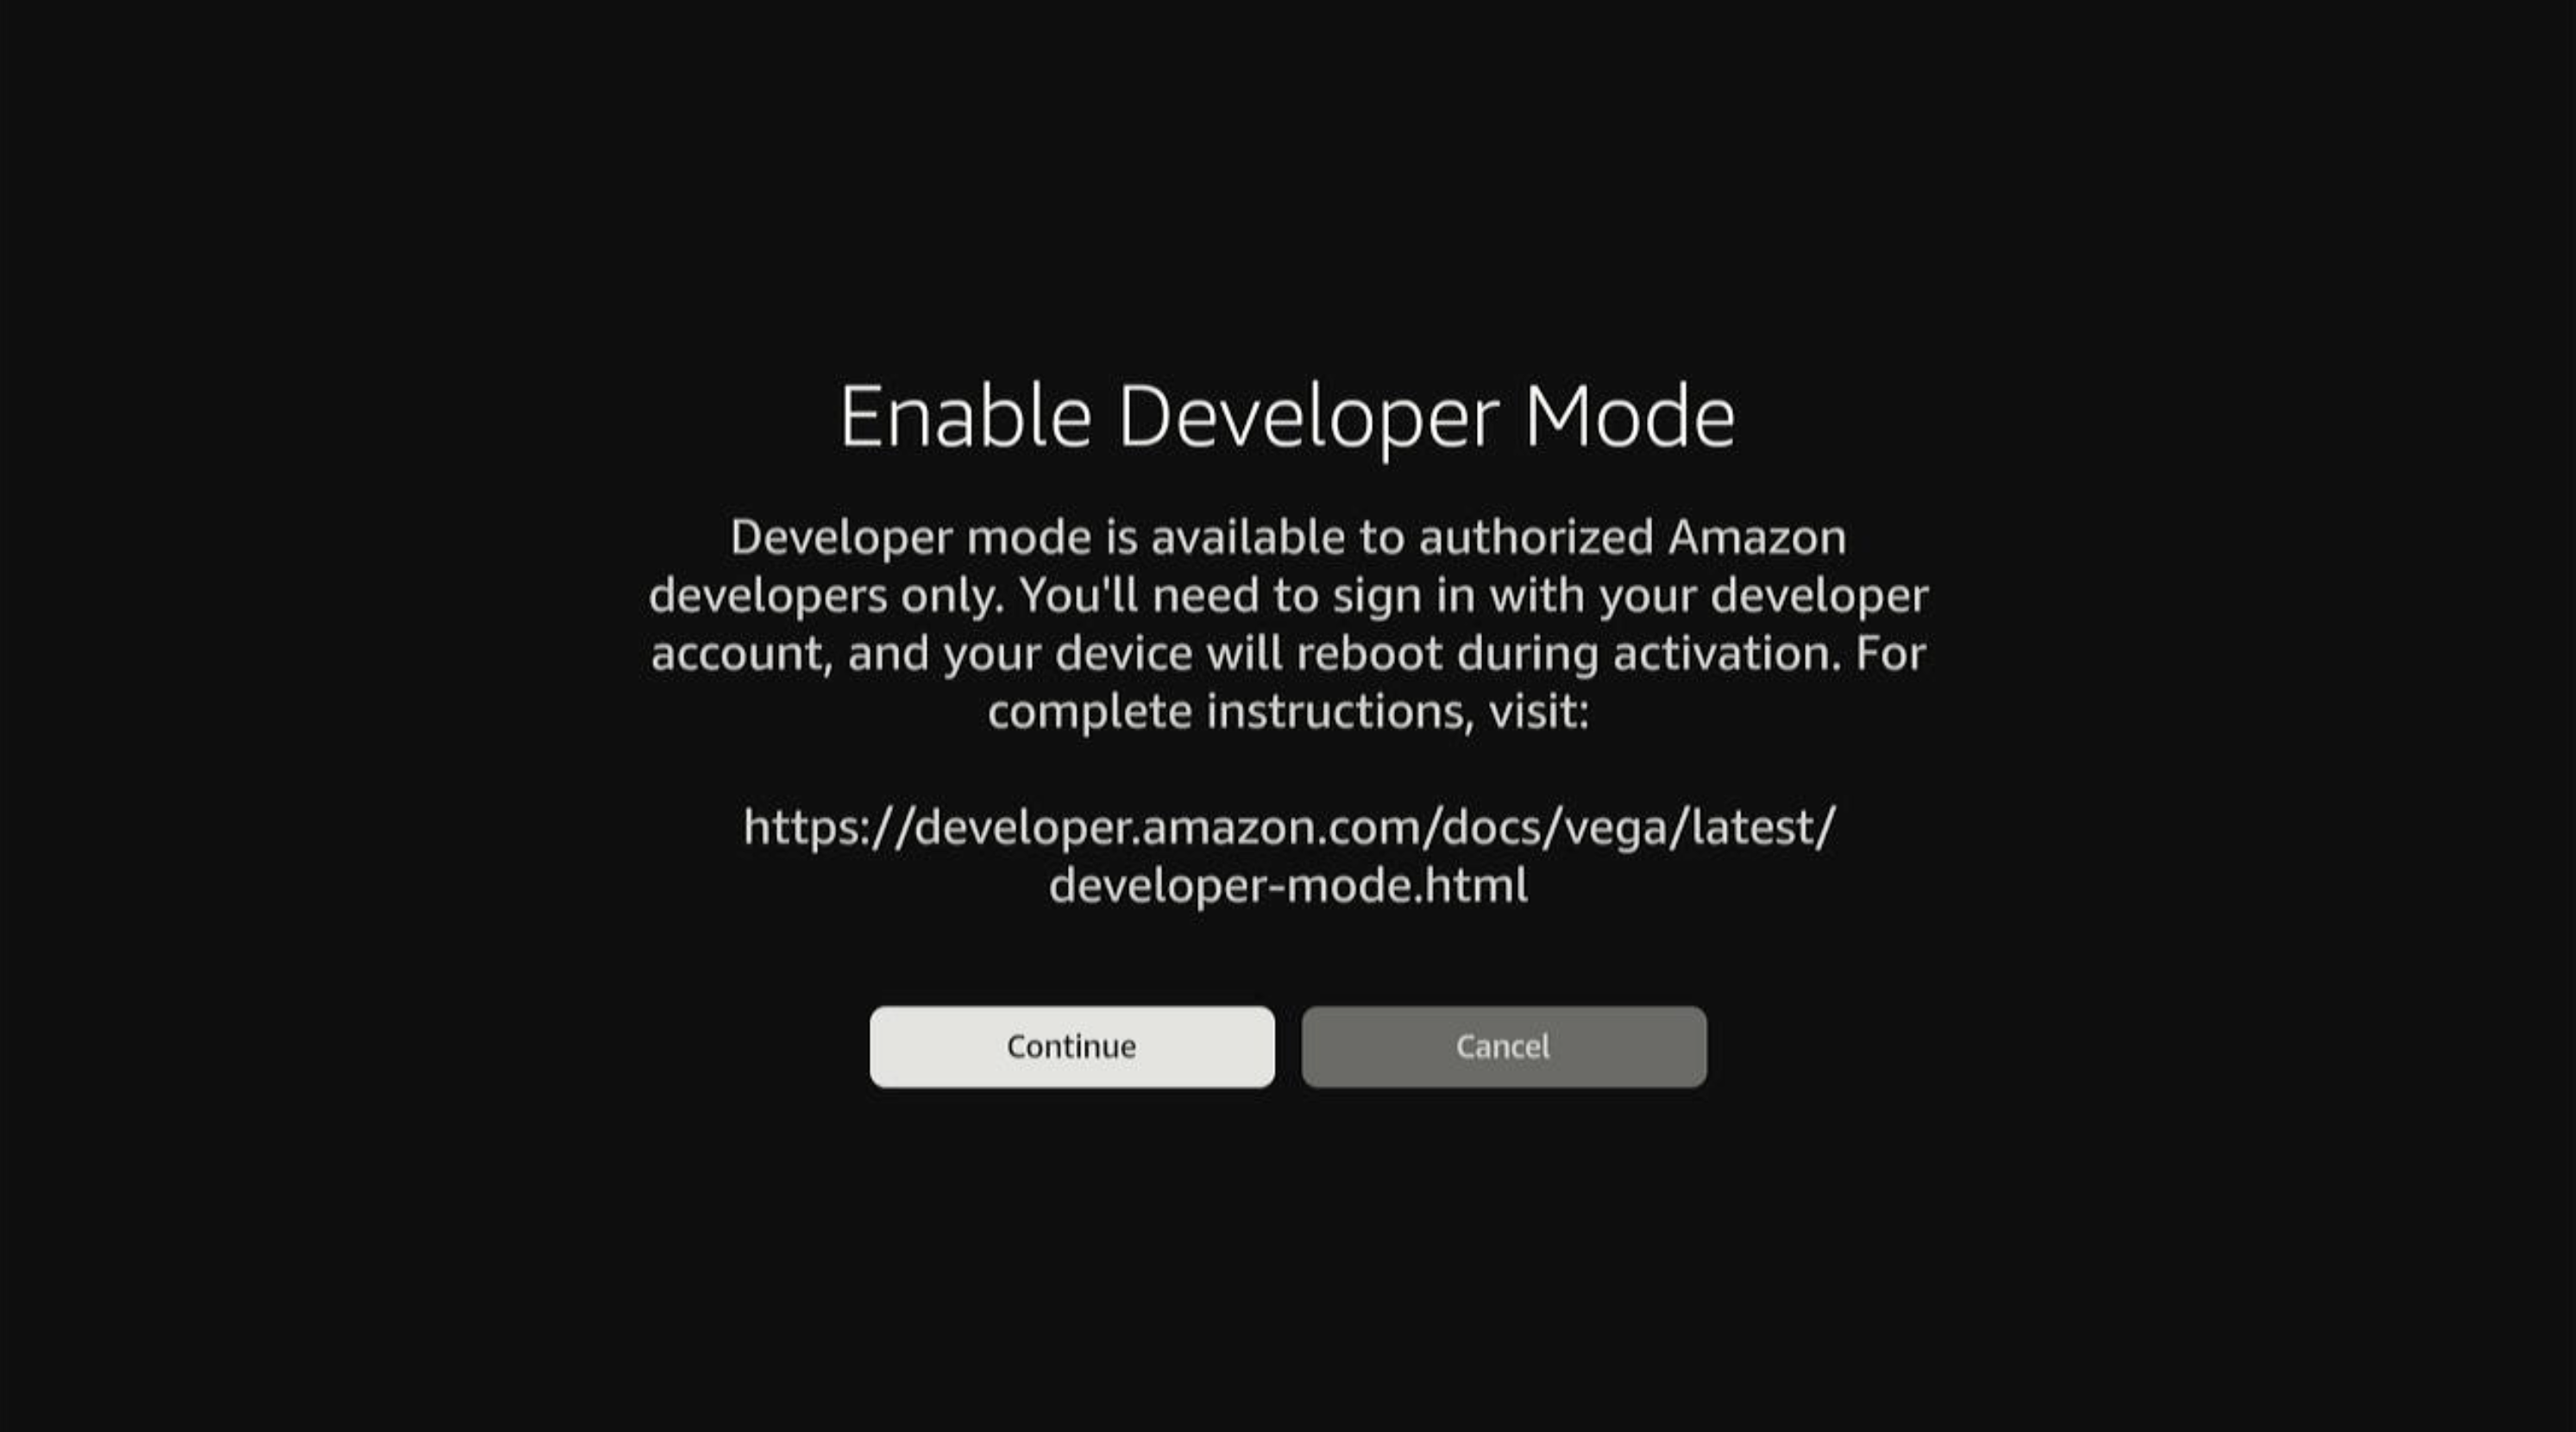
-
选择Continue(继续),继续操作(或选择Cancel(取消),中止操作)。
如果选择Cancel(取消),则对话框关闭,您将返回Developer Options(开发者选项)屏幕,不作任何更改。
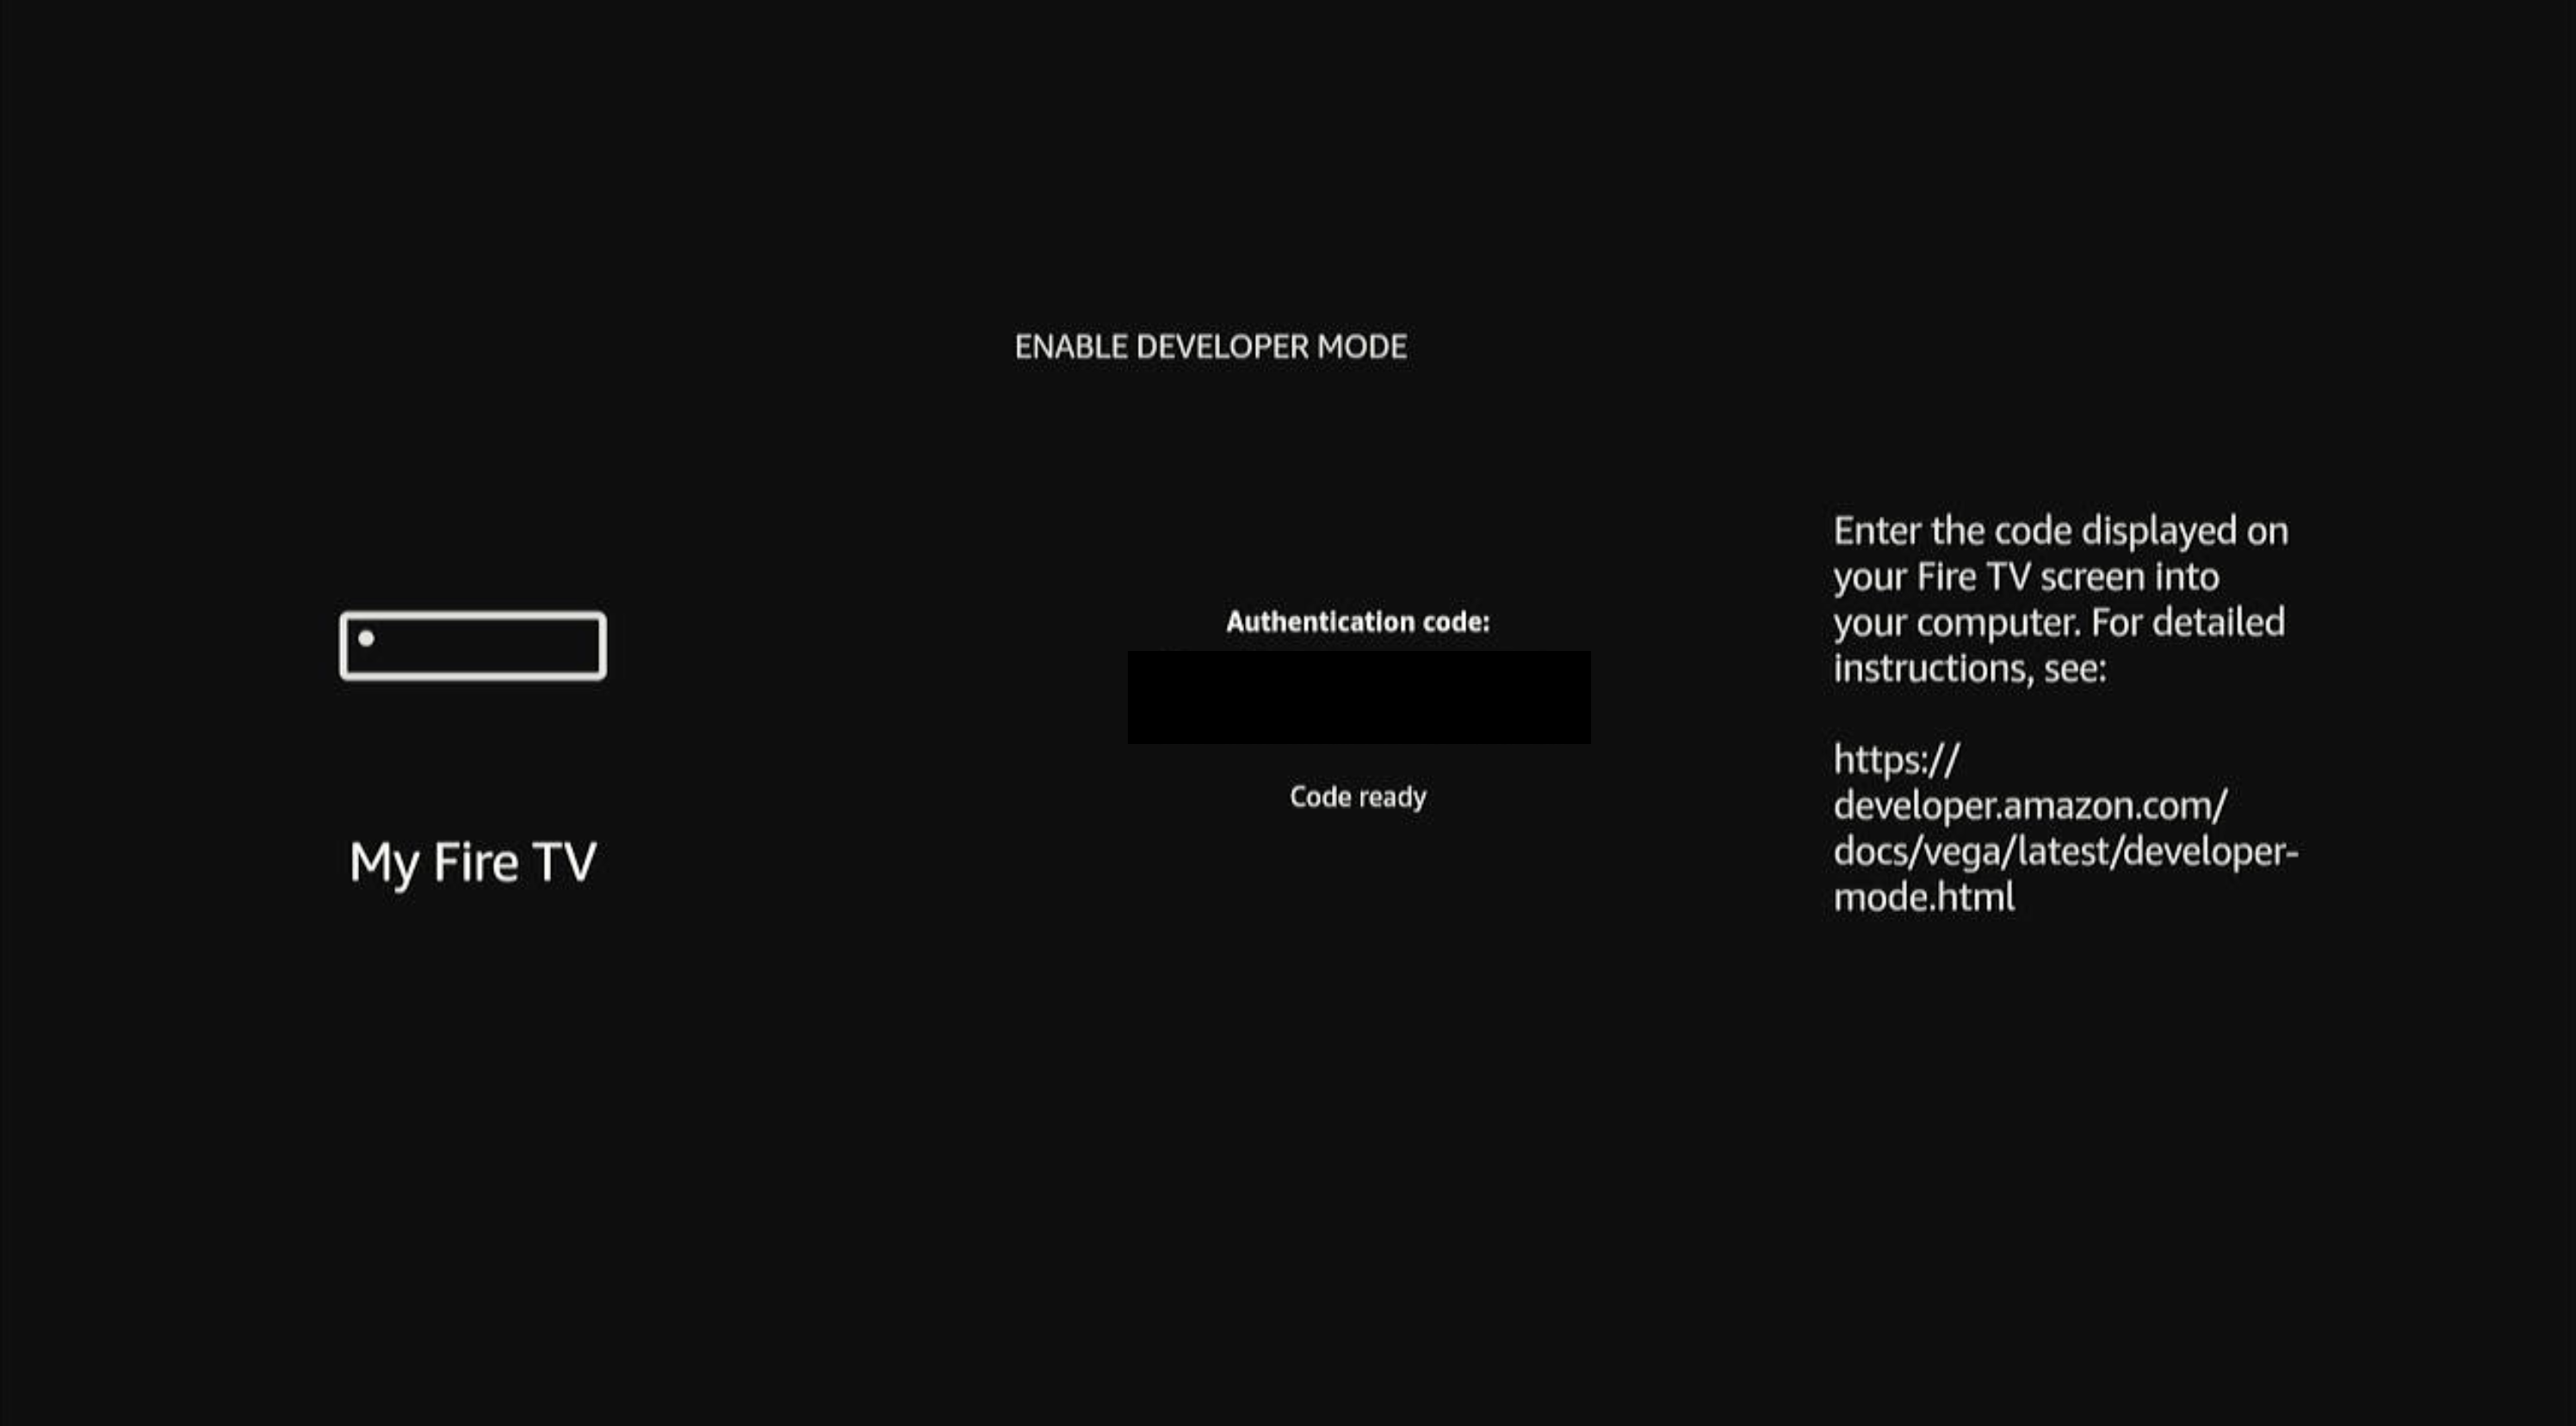
选择Continue(继续)后,Fire TV屏幕上会显示一个6位验证码。第11步会用到此验证码。
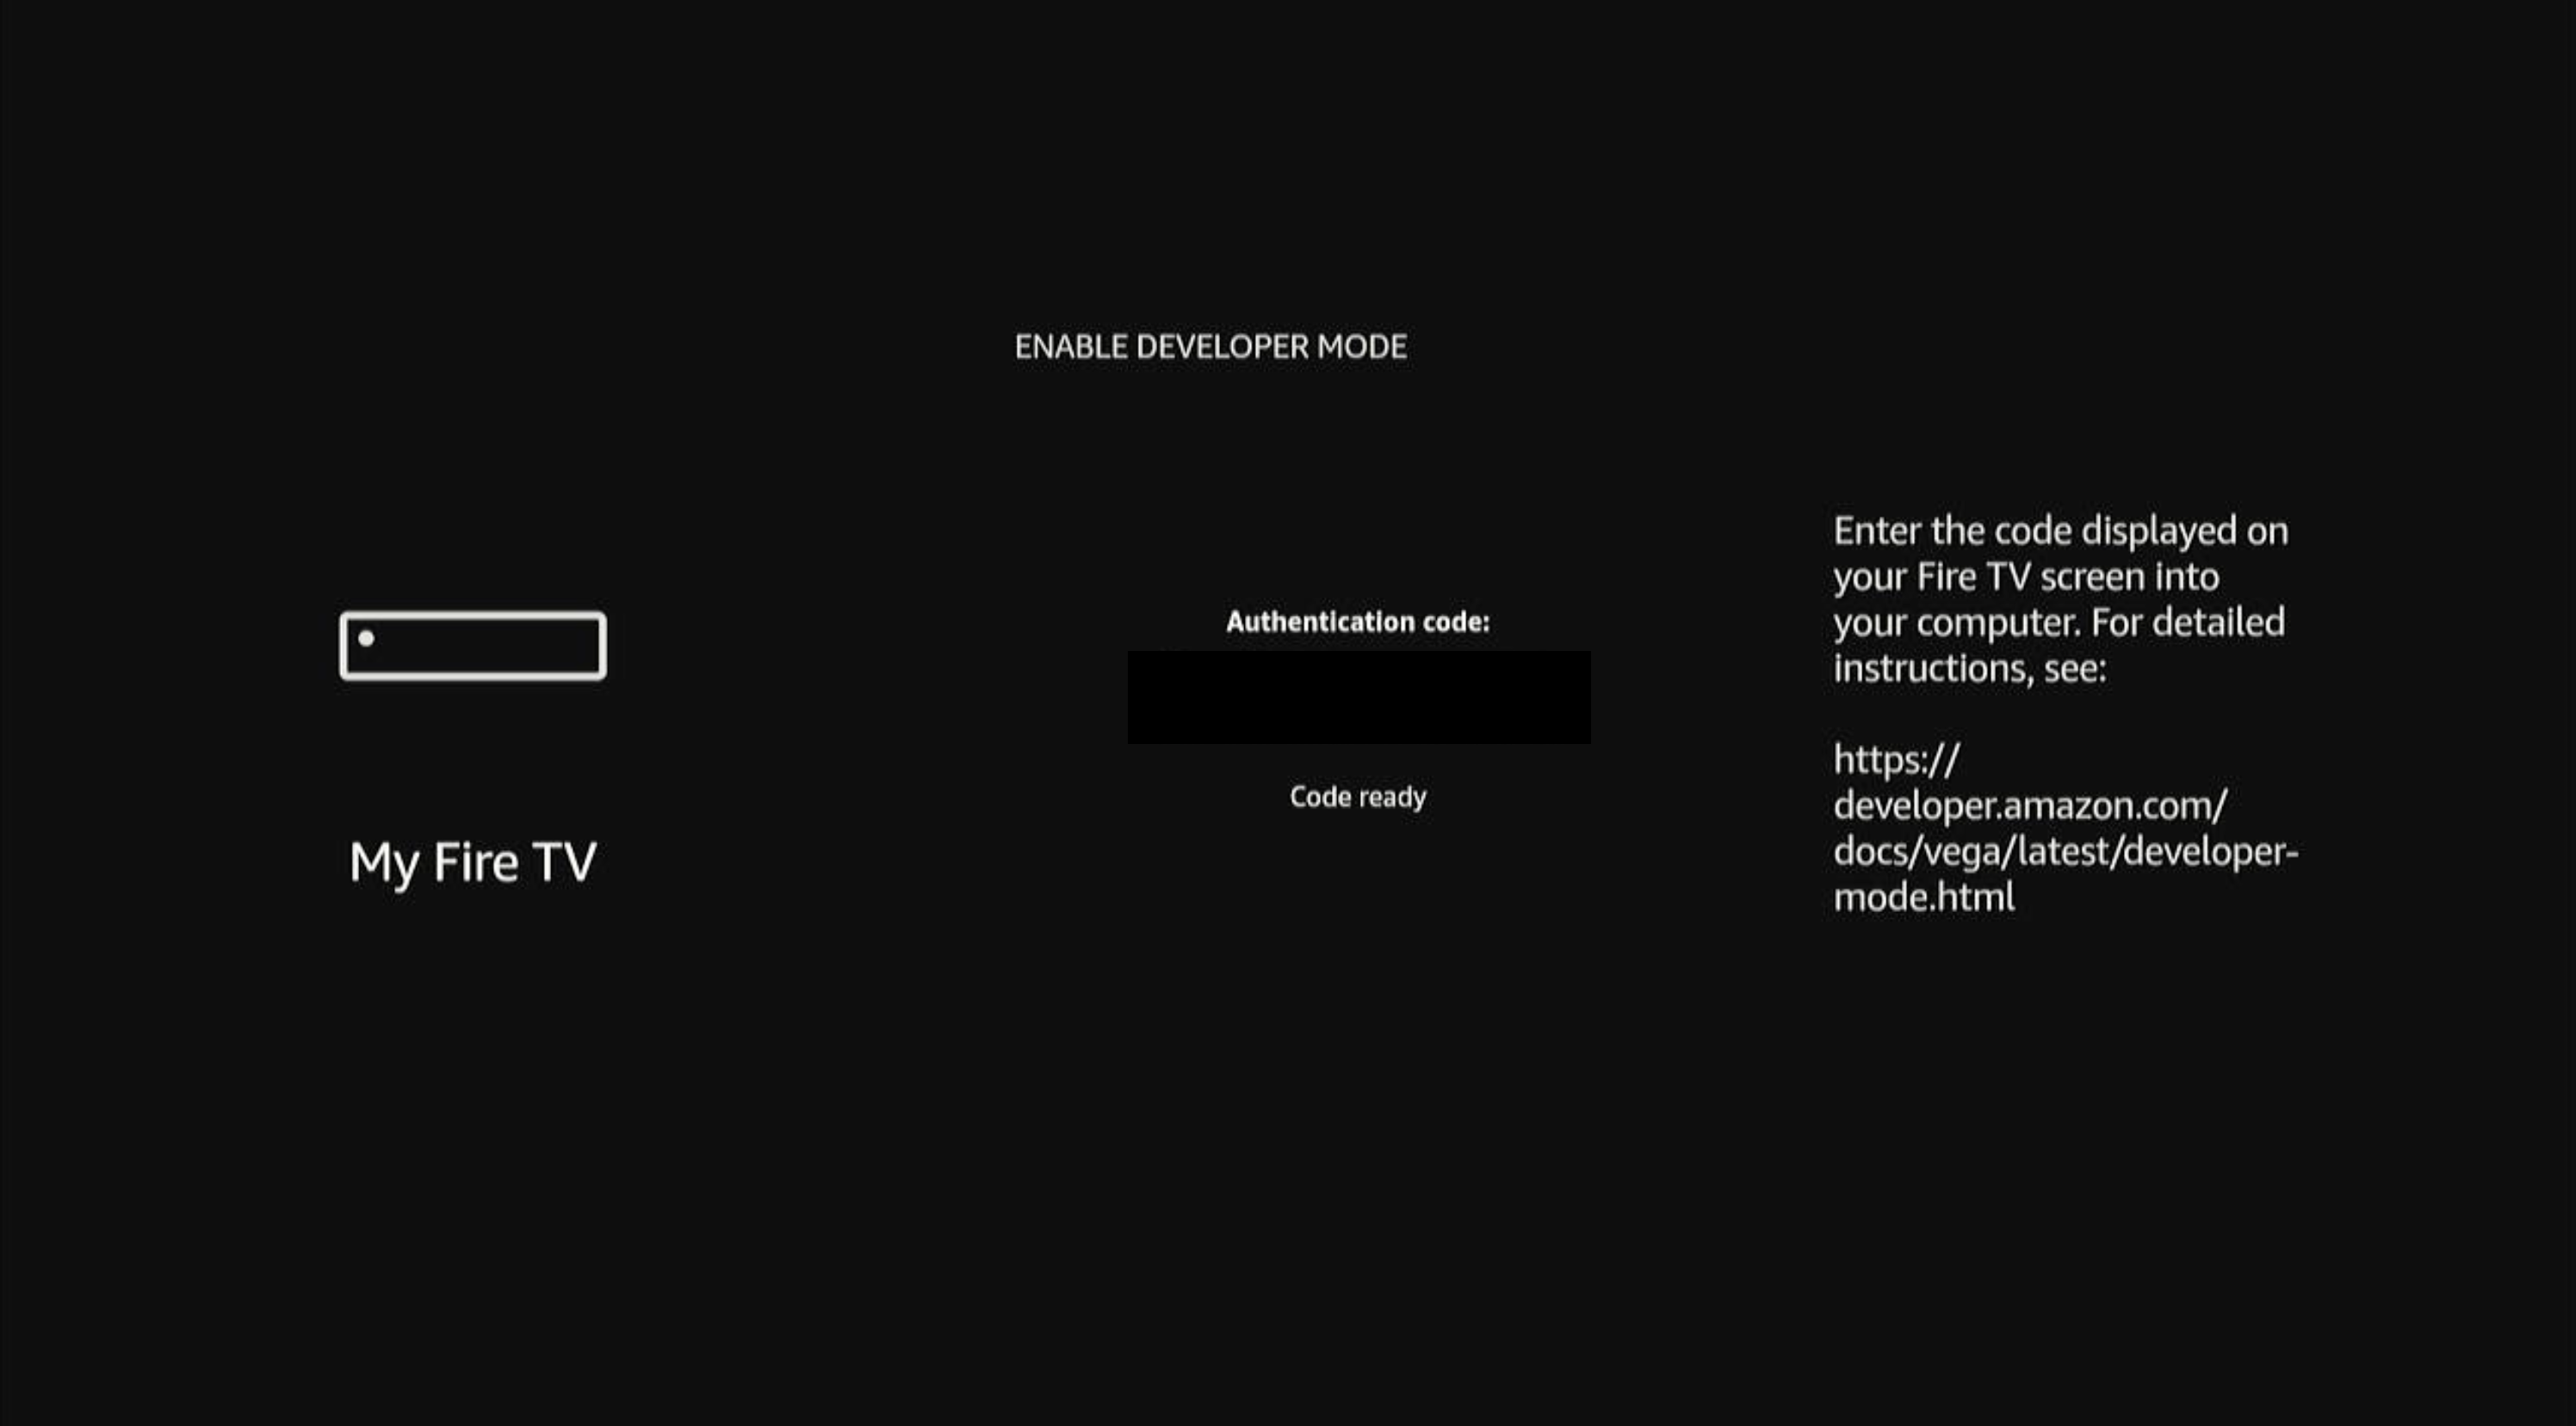 注意: 验证码有效期为5分钟。如未在指定时间内输入代码,请在同一屏幕上选择Request a New Code(申请新验证码),或返回Developer Options(开发者选项),重新执行该流程。
 -
要通过亚马逊开发者账户进行身份验证,请运行登录命令:
vega devmode login按照CLI操作说明完成身份验证。CLI会自动打开默认的网页浏览器,并导航至亚马逊身份验证页面。如果浏览器未自动打开,则手动导航至终端所提供的URL。
-
在浏览器中授权Vega CLI访问。
亚马逊OAuth同意屏幕上显示“Vega Authentication Test would like access to:”(Vega身份验证测试想要访问以下内容:),同时列出您的基本个人资料信息和姓名。
a.查看请求的权限。
b. 选择Allow(允许),授权Vega身份验证测试(或选择Cancel(取消),拒绝授权)。
如果选择Cancel(取消),CLI会拒绝授权并提示身份验证错误。请重新运行
vega devmode login命令,再试一次。选择Allow(允许)后,屏幕上会显示带有勾号图标的确认页面,以及内容为“Device connected to your account”(设备已连接至您的账户)的消息。 您可以关闭此页面。
返回终端。CLI会显示:
Login successful! You are now authenticated with Amazon Developer Services. -
输入Fire TV屏幕上显示的6位验证码以启用设备:
vega devmode enable-device --code <6位验证码>如果亚马逊开发者账户只有一个供应商,CLI会显示:
Using vendor: Amazon
✓ Device enabled successfully
如果账户有多个供应商,CLI会提示您从中选择一个:
Select a vendor:
1.Amazon (XXXXXXXXXX)
2.Amazon (XXXXXXXXXX)
输入供应商对应编号。随后,CLI会显示
✓ Device enabled successfully(✓设备已成功启用)。注意: 供应商即开发者账户,通过亚马逊开发者服务进行内容管理与发布。该身份验证流程可能需要数秒时间,才能同步到设备端。 -
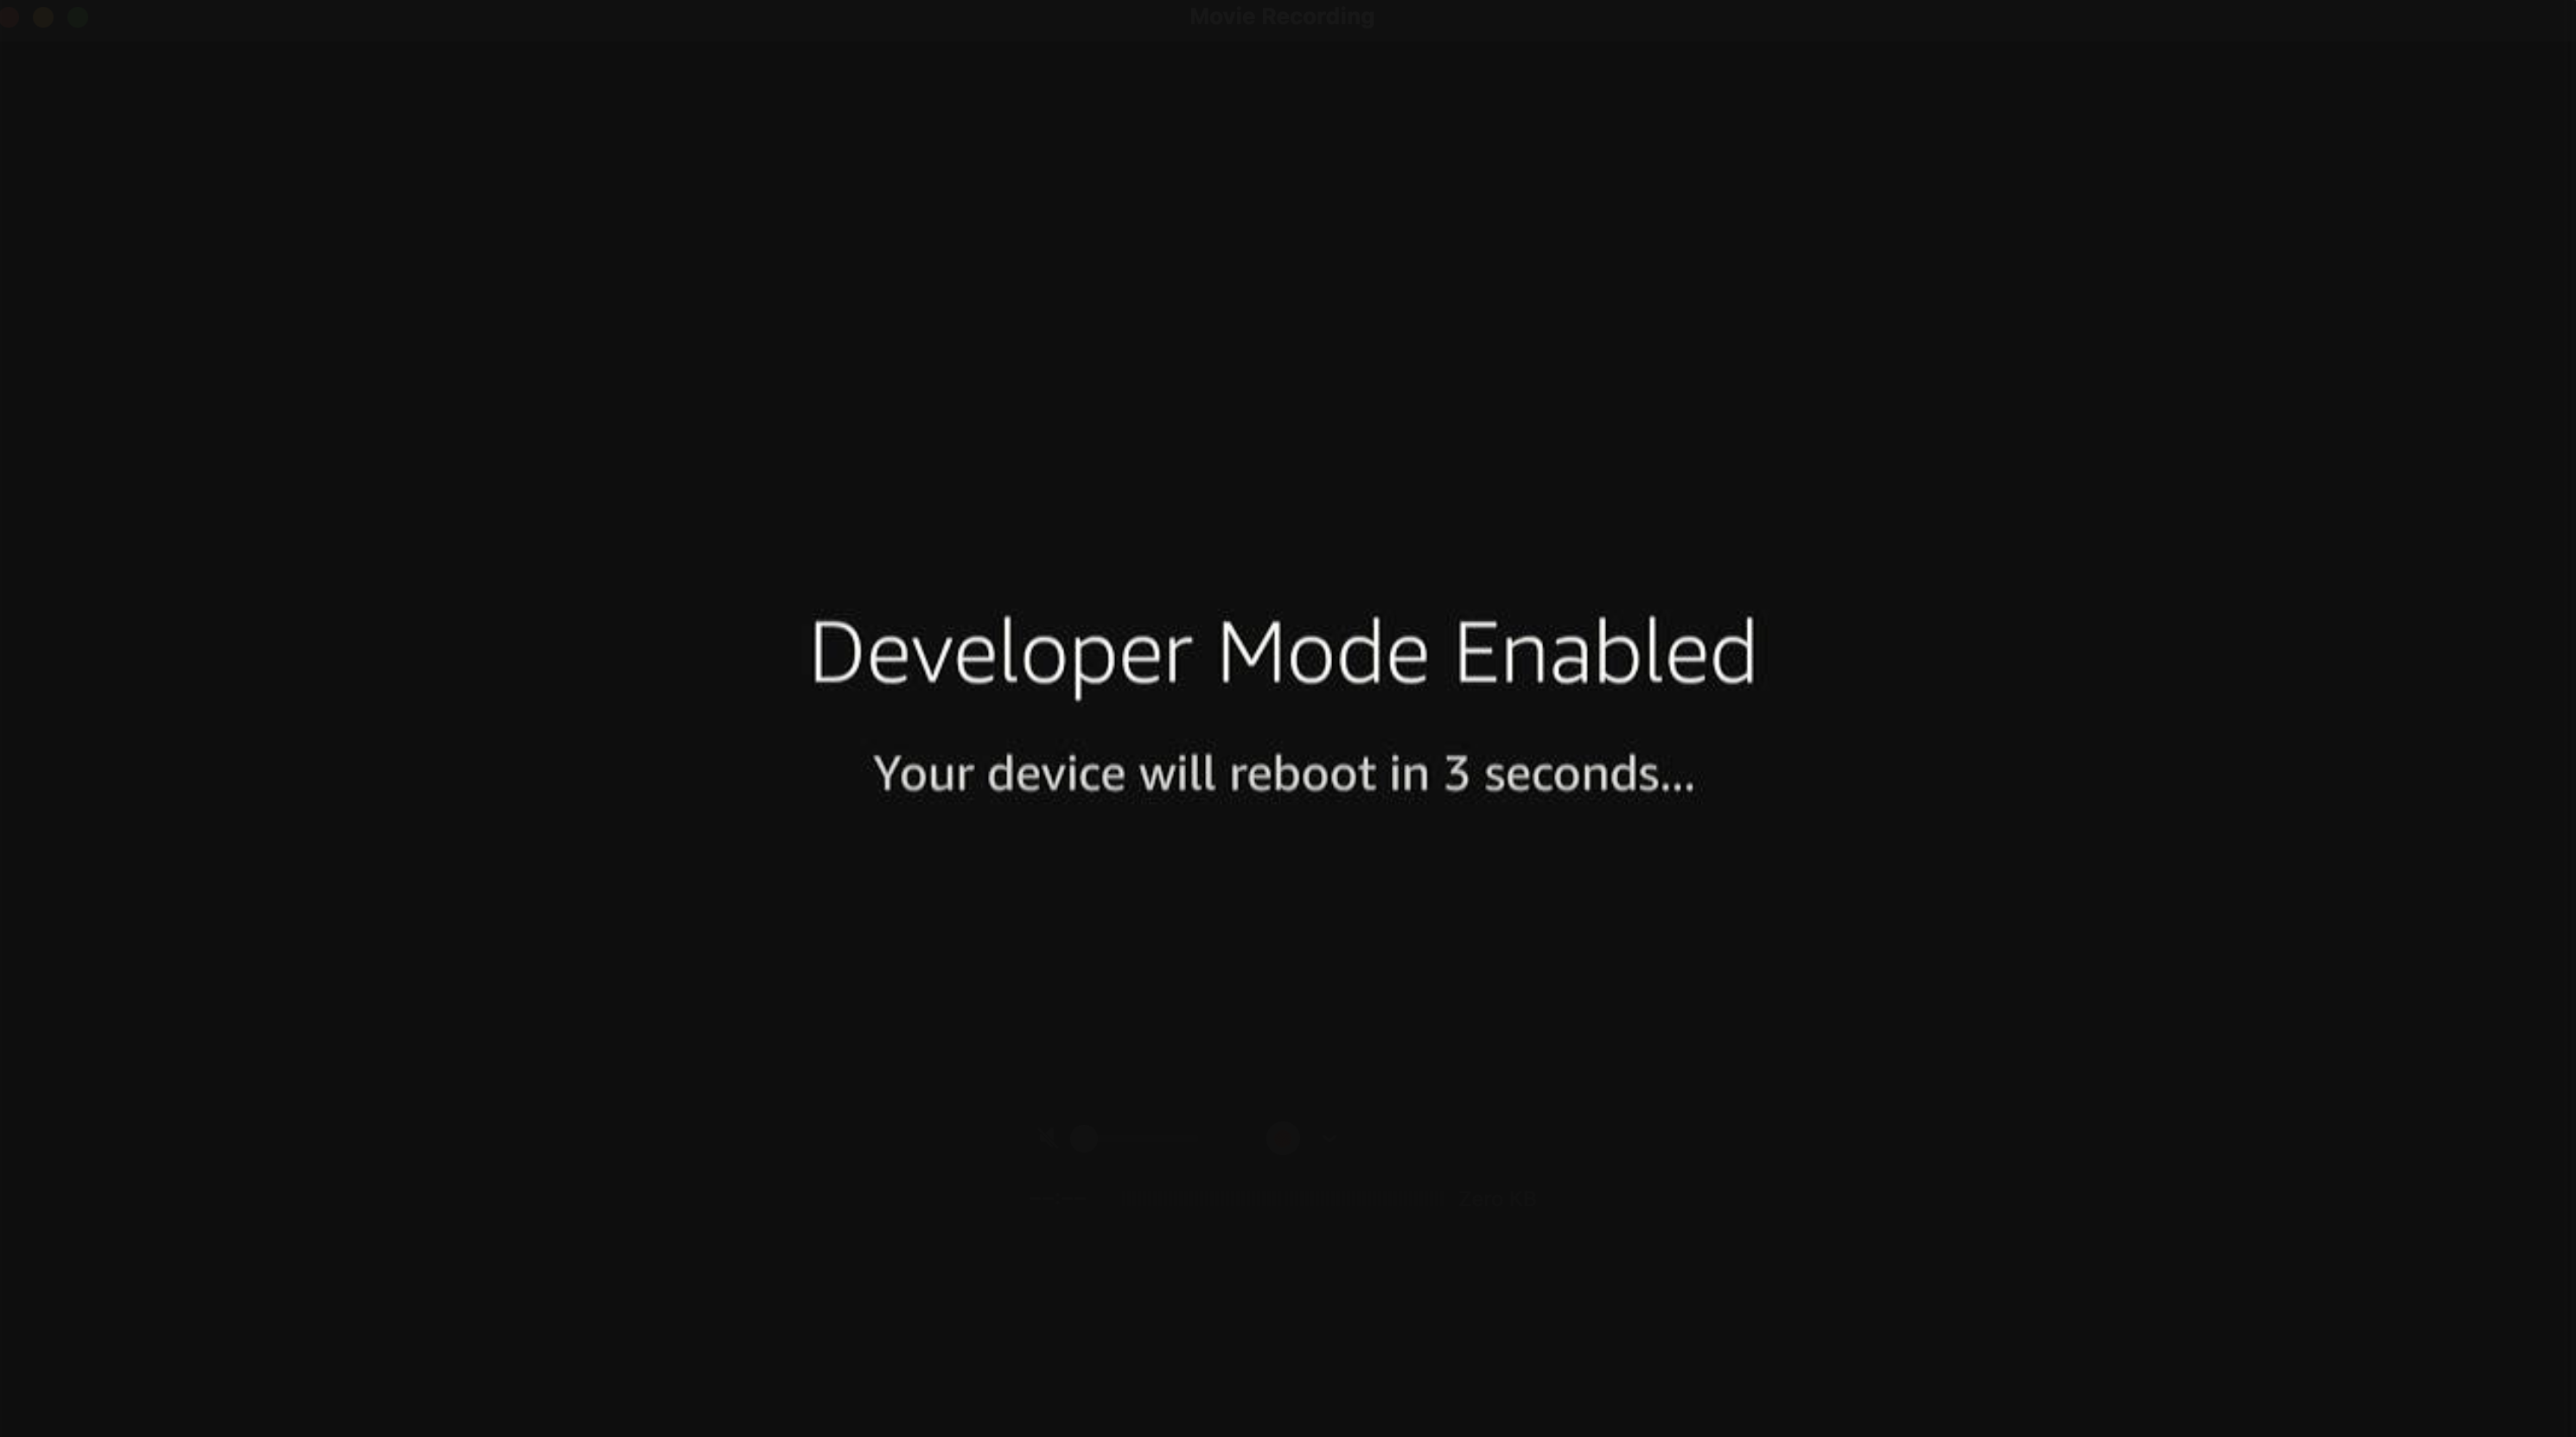
等待设备重启。
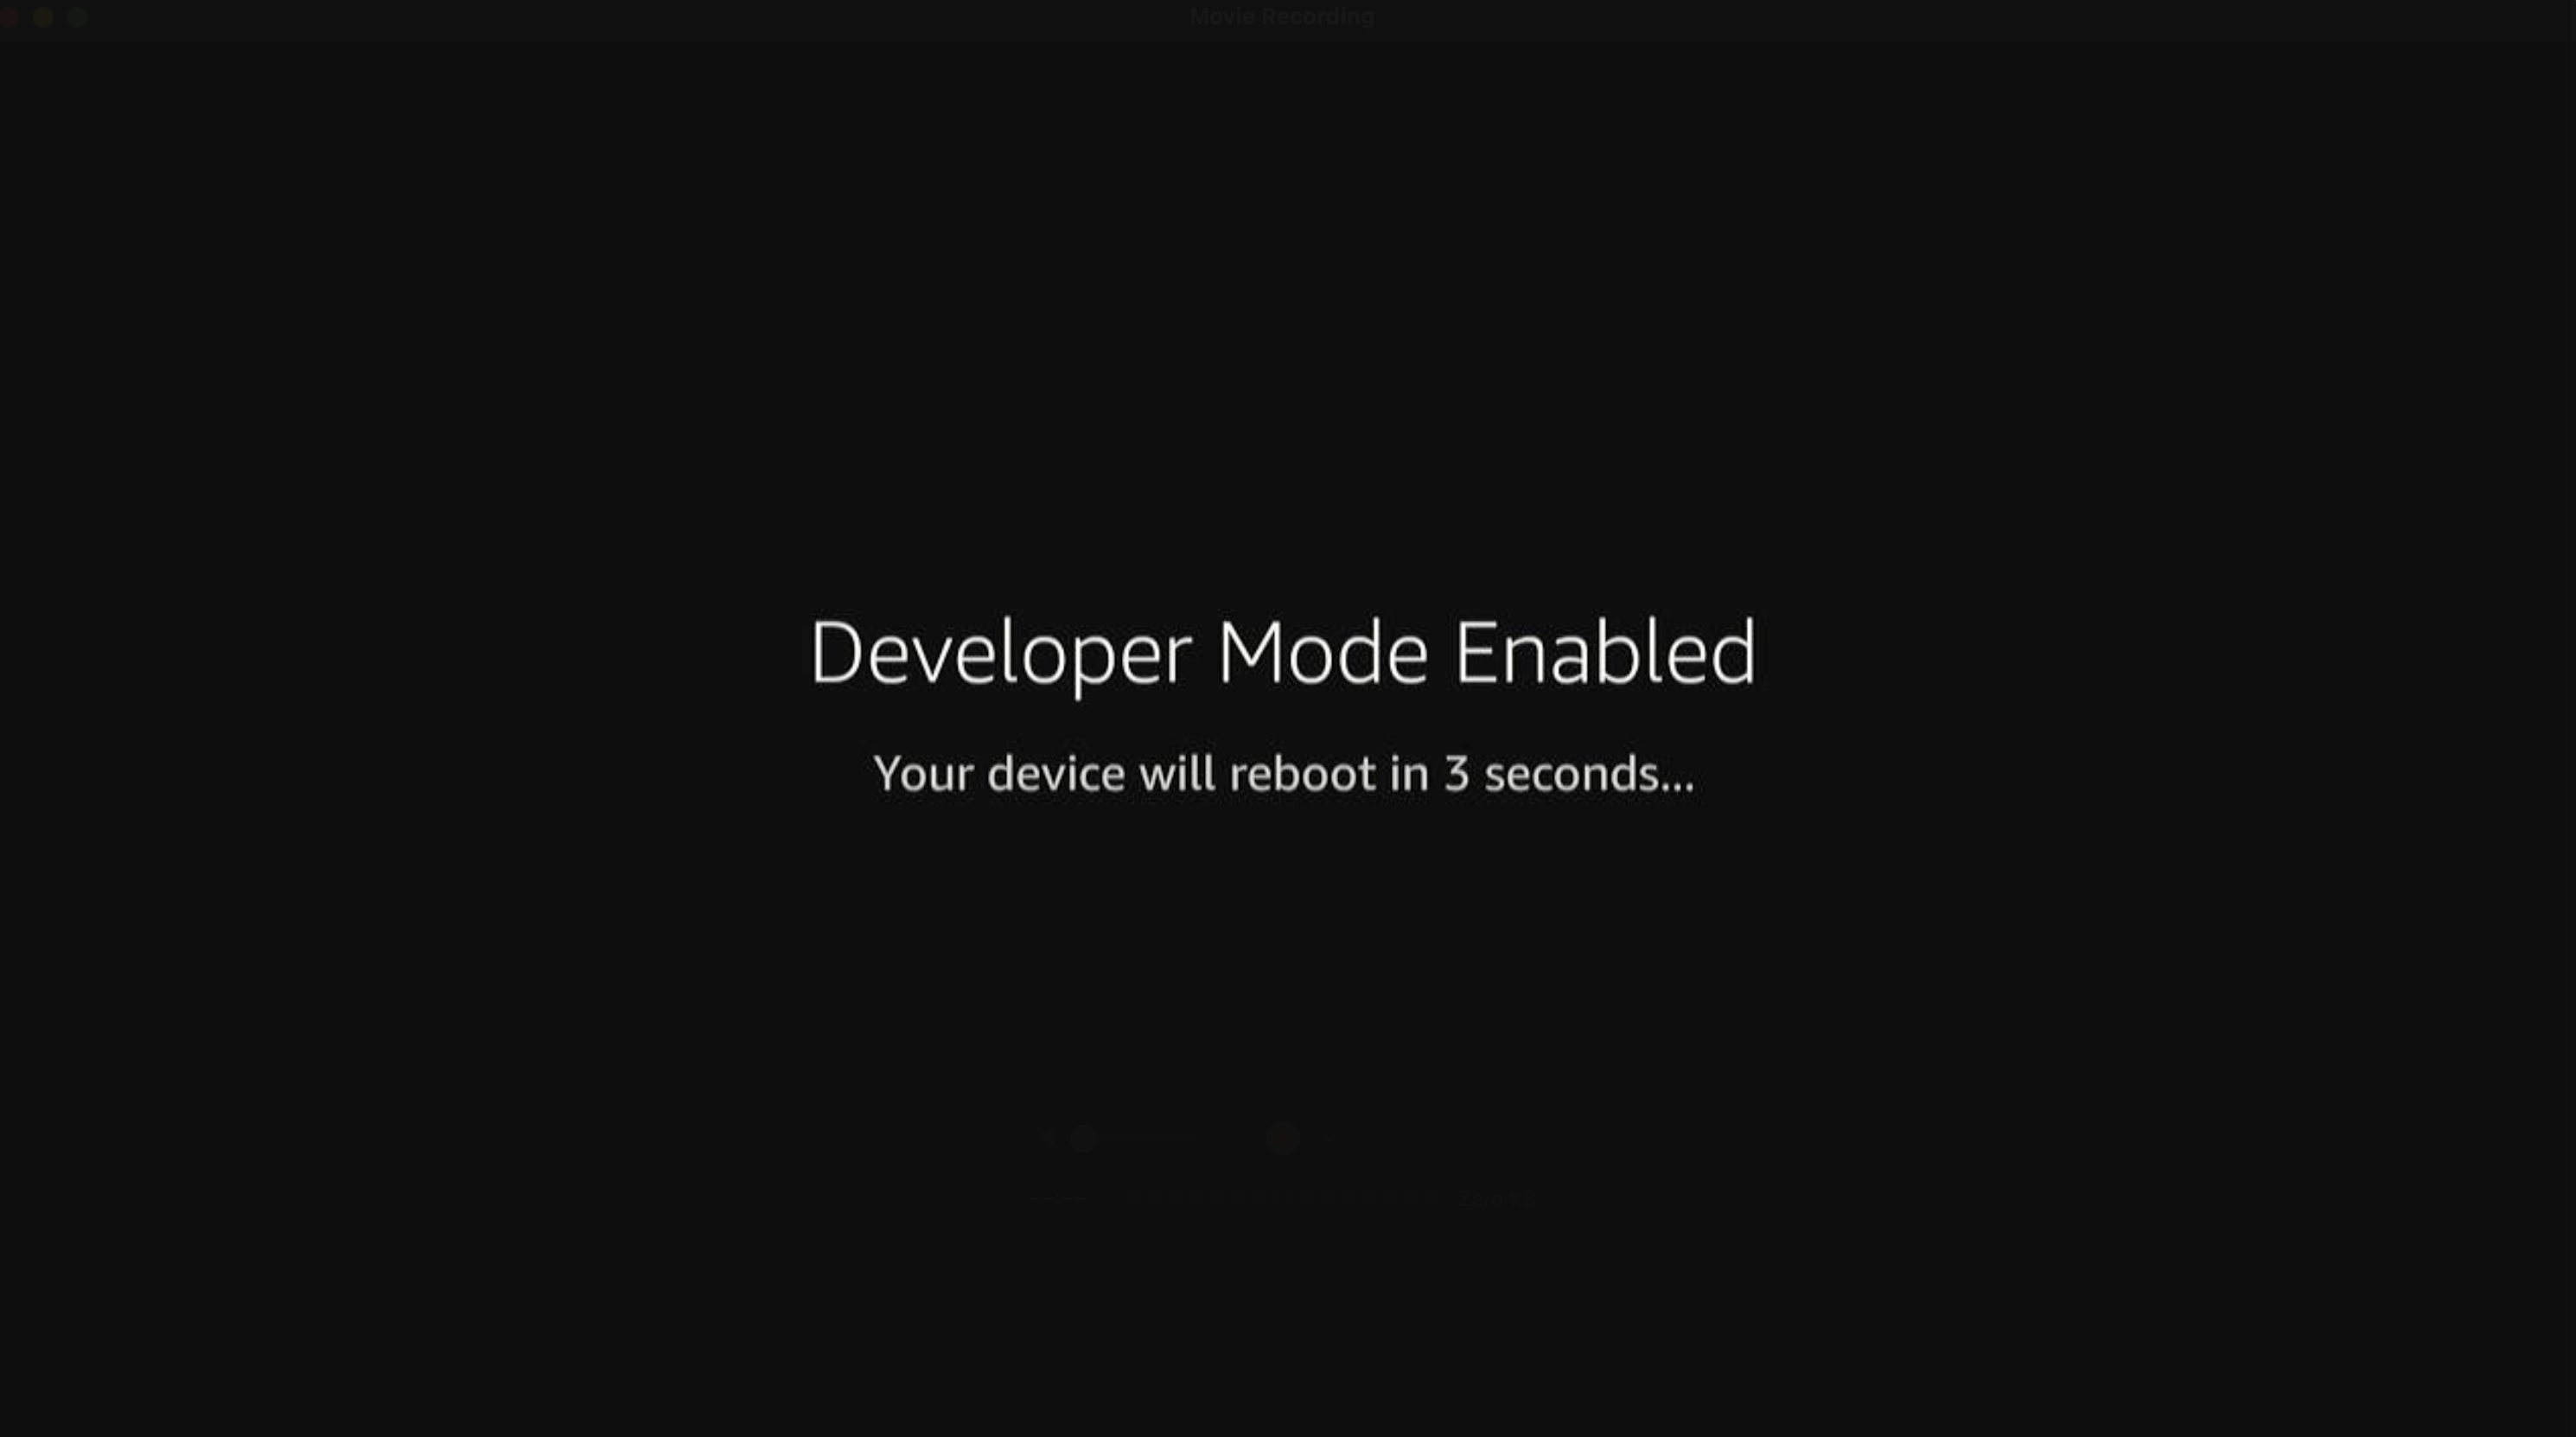
-
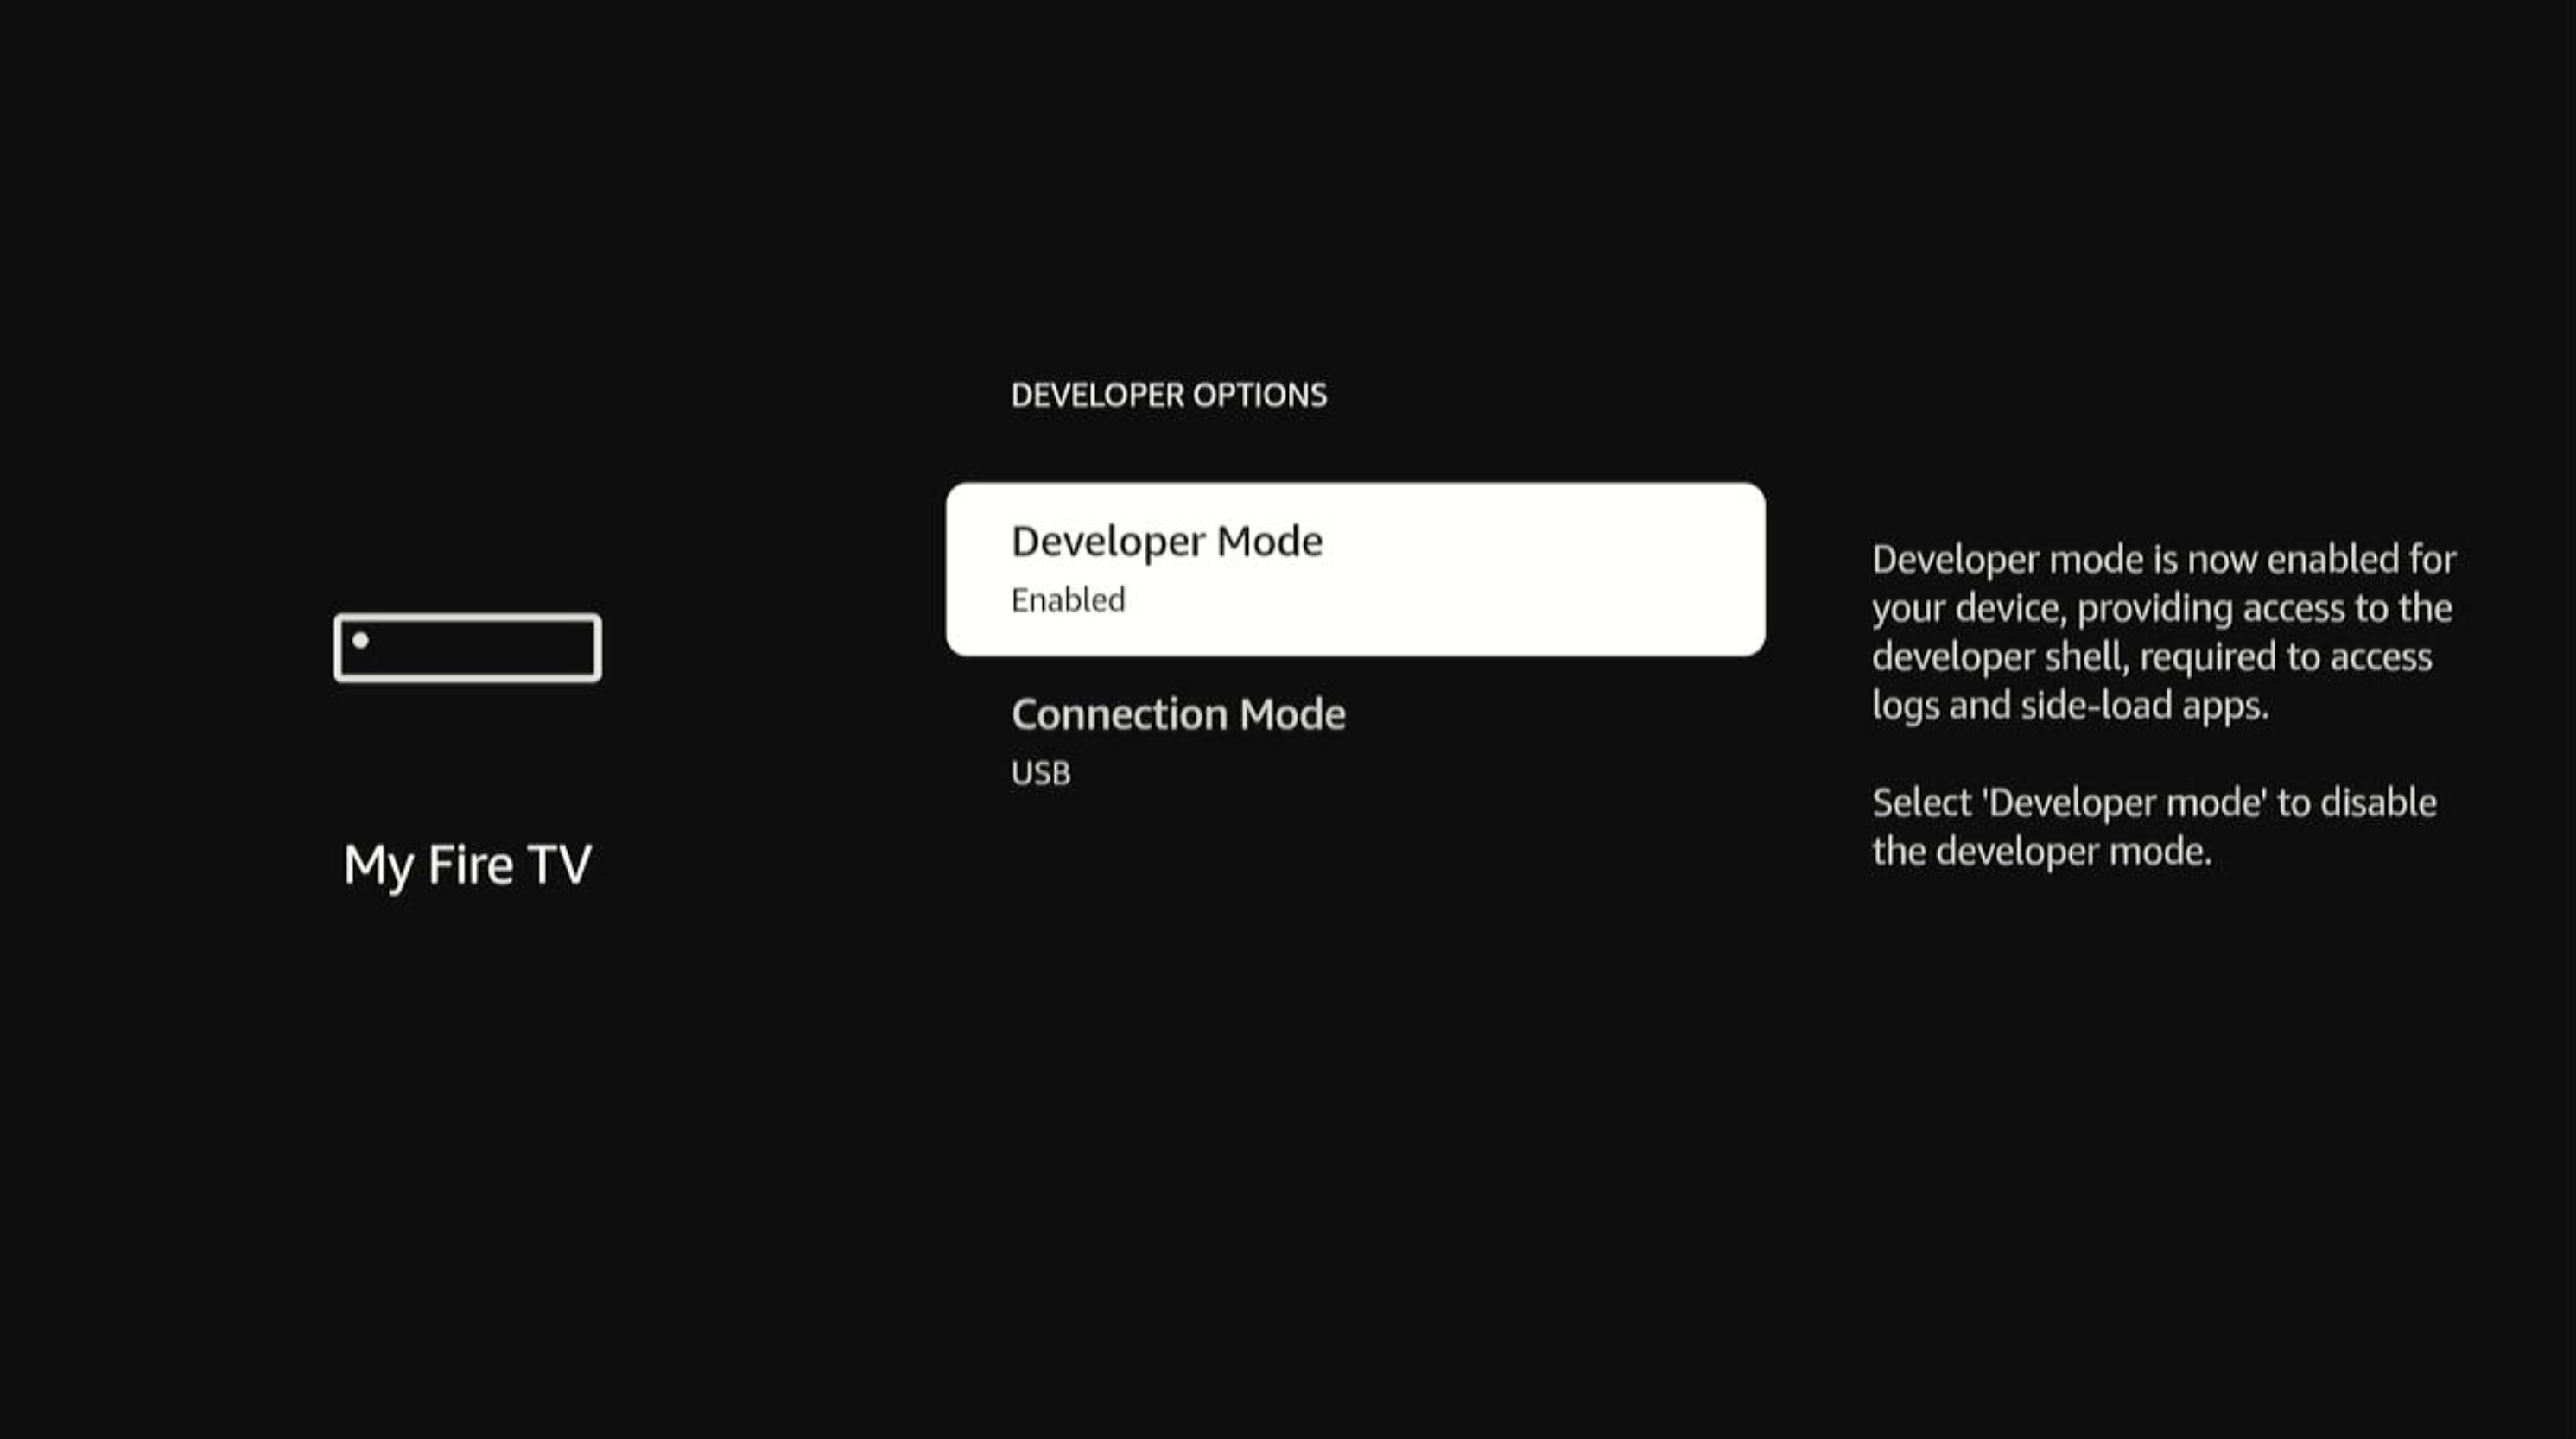
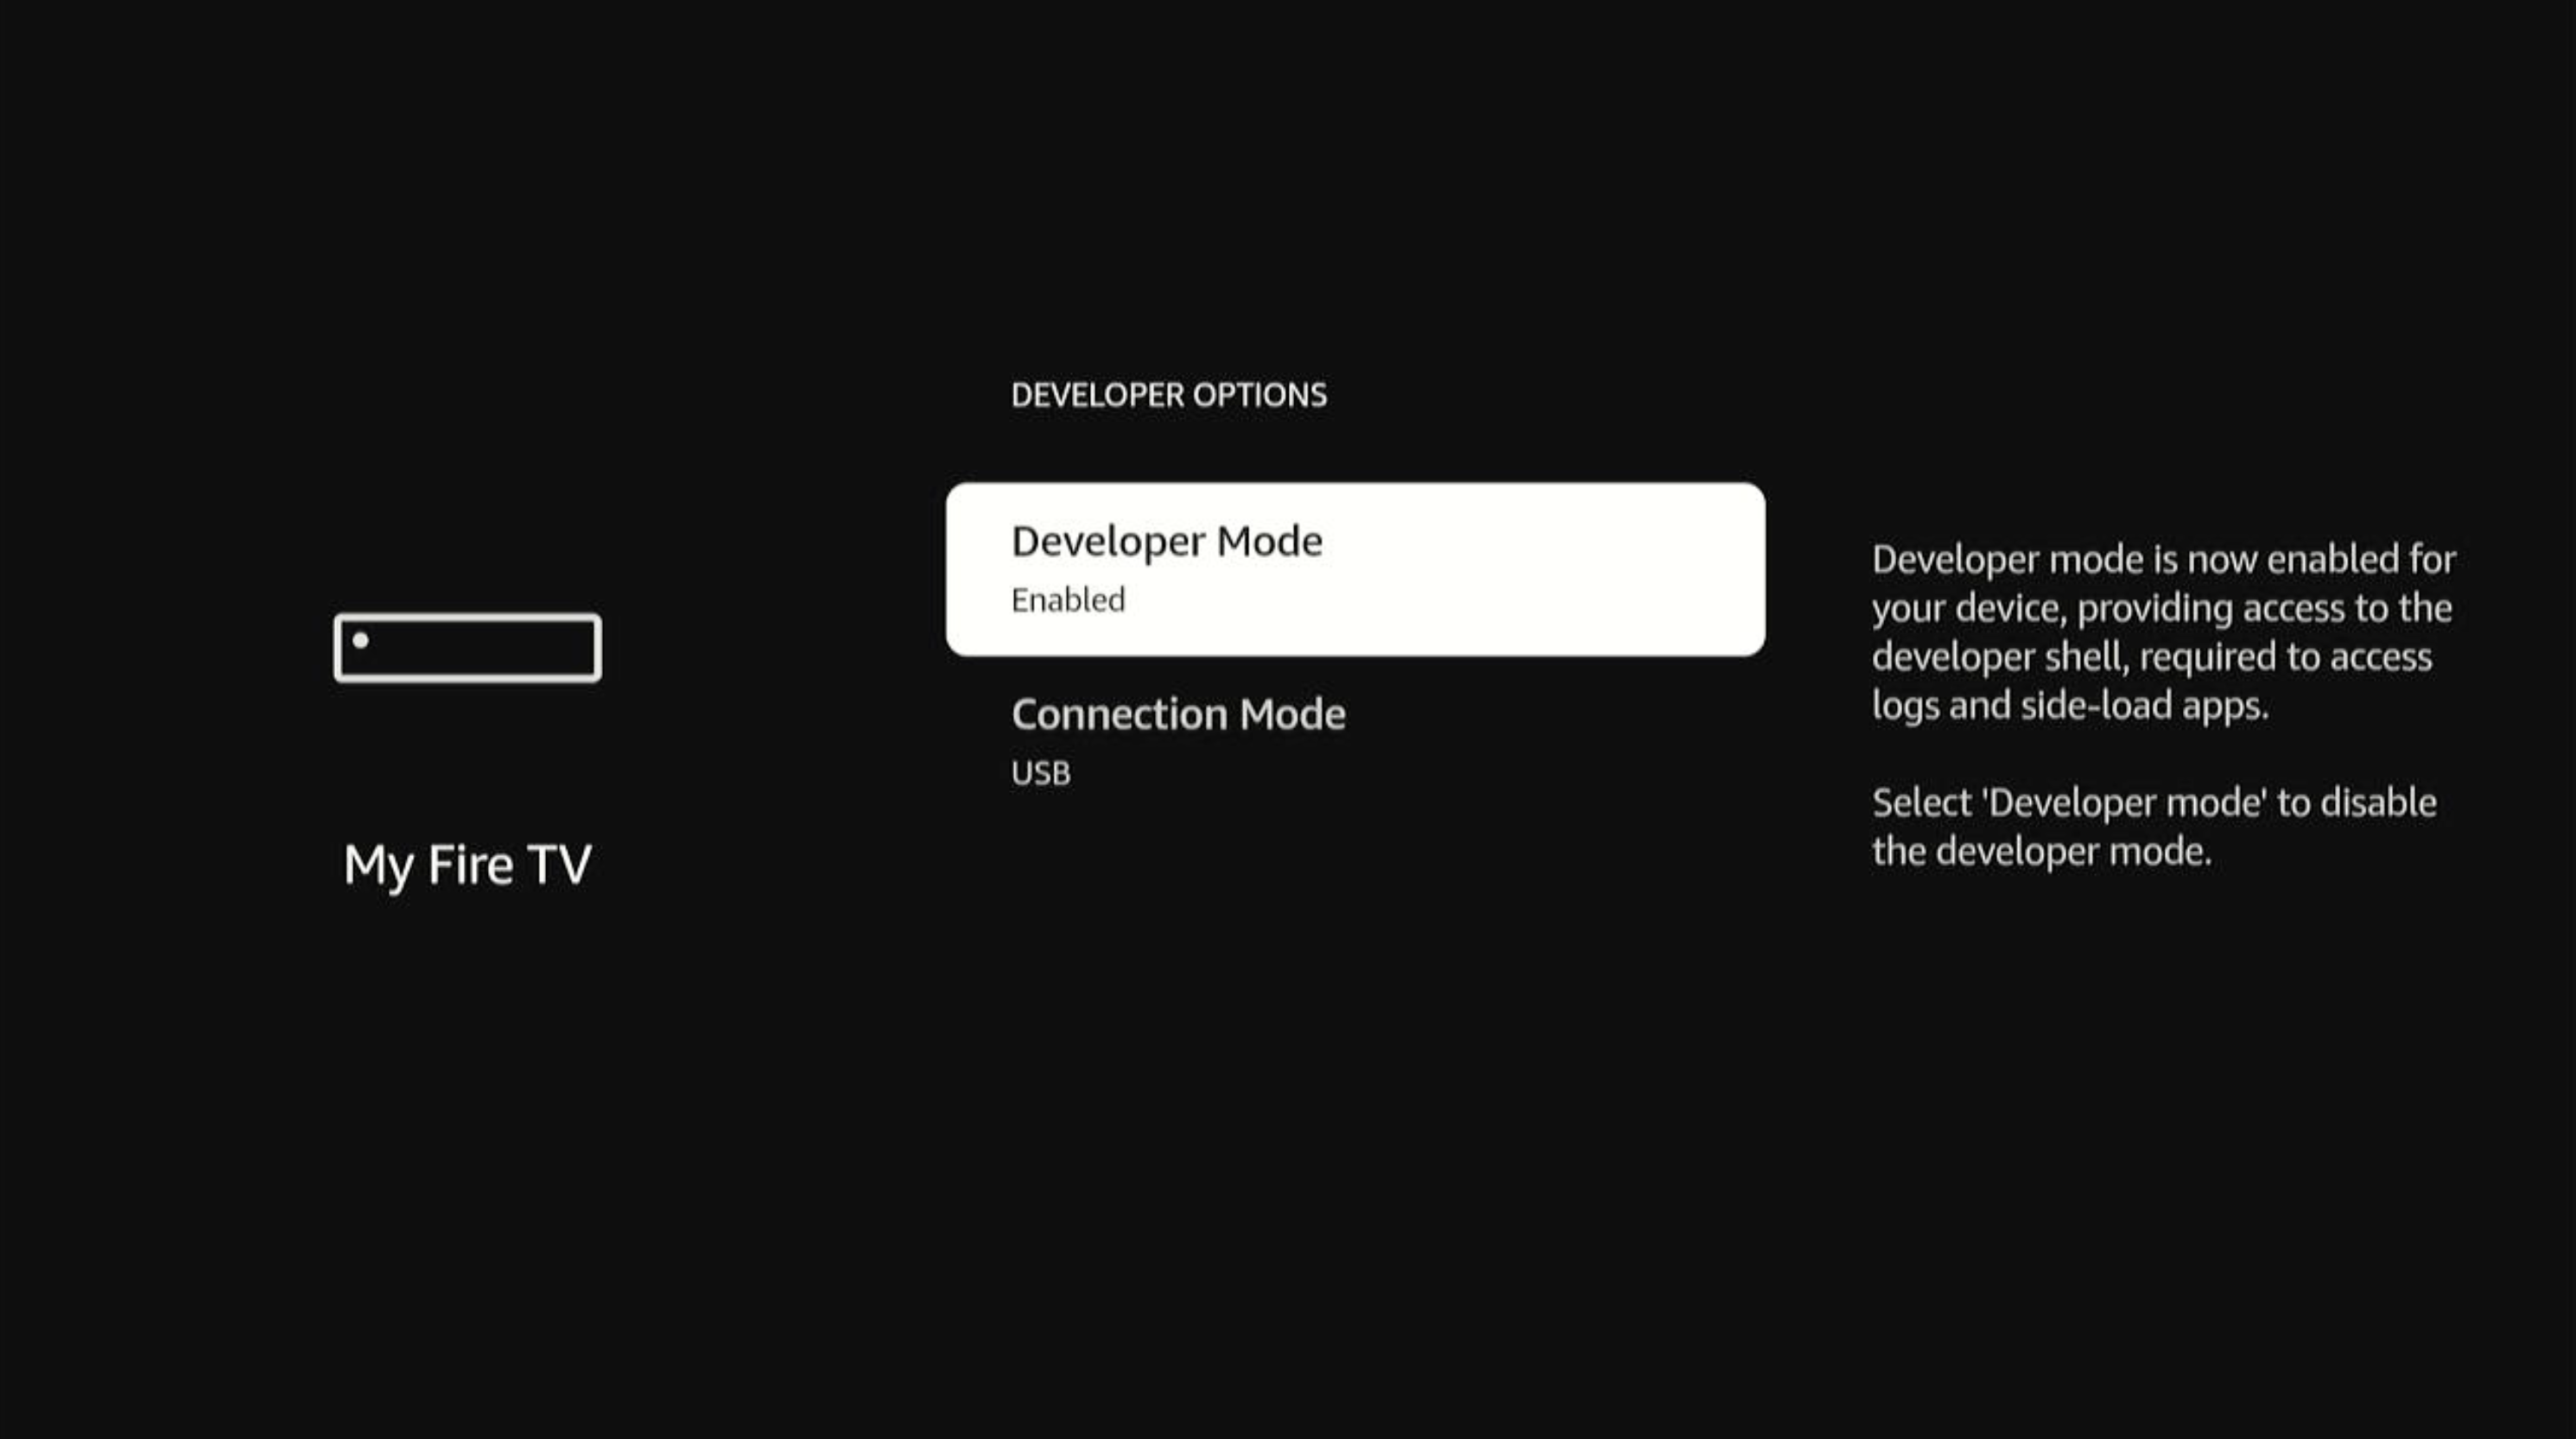
设备重启后,导航至Settings(设置)> My Fire TV(我的Fire TV)> Developer Options(开发者选项)> Developer Mode(开发者模式)。
Developer Mode(开发者模式)的状态显示为Enabled(已启用)。
-
检查设备识别。
vega device list连接一台设备时的输出示例:
Found the following device:
[序列号] : [设备号]
连接多台设备时的输出示例:
Found the following devices: [序列号] : [设备号] [序列号] : [设备号] -
连接到设备。
-
如果您连接了一台设备:
vega device shell -
如果您连接了多台设备,请指定设备序列号:
vega device -d <设备序列号> shell输出示例:
 (hostmachine)% vega device -d <设备序列号> shell

 ##################################################

 ##### Welcome to Developer Mode Shell #####

 ##################################################

 sh(com.amazon.dev.shell):/$
-
步骤3: 在Fire TV设备上加载应用
在Fire TV设备上配置开发者模式后,要加载应用,请打开新终端并使用以下命令:
找到您的.vpkg文件
在使用vega build构建应用的过程中,项目的build/目录中会生成.vpkg文件。路径遵循以下模式:
build/<ARCH>-<BUILD_TYPE>/<APP_NAME>_<ARCH>.vpkg
对于Fire TV设备,使用armv7架构。例如,如果您的应用程序名为sampleapp,并且您构建了发布变体版本:
build/armv7-release/sampleapp_armv7.vpkg
一台设备已连接到您的计算机
将<my-package.vpkg>替换为您.vpkg文件的路径。
vega device install-app --packagePath build/armv7-release/sampleapp_armv7.vpkg
多台设备已连接到您的计算机
使用以下命令指定目标设备。将<设备序列号>替换为您设备的序列号并将<my-package.vpkg>替换为您.vpkg文件的路径。
vega device -d <Device Serial Number> install-app --packagePath build/armv7-release/sampleapp_armv7.vpkg
输出示例:
安装/更新 “/tmp/sampleapp_armv7.vpkg”... 成功
.vpkg文件的路径可能会因您的项目结构和构建配置而异。步骤4: 在Fire TV上运行应用
在Fire TV设备上加载应用后,使用以下命令运行应用。
manifest.toml文件,且遵循<程序包ID>.<组件名称>格式(例如com.amazondeveloper.sampleapp.main)。一台设备已连接到您的计算机
vega device launch-app --appName <组件ID>
多台设备已连接到您的计算机
使用以下命令指定目标设备。将<设备序列号>替换为您设备的序列号并将<组件ID>替换为您应用的组件ID。
vega device -d <设备序列号> launch-app --appName <组件ID>
输出示例:
(hostmachine)% vega device -d <设备序列号> launch-app --appName com.amazondeveloper.sampleapp
Launching app 'com.amazondeveloper.sampleapp' .. success
应用启动并出现在所连接的Fire TV屏幕上。
相关主题
Last updated: 2026年8月7日
