

- App launch
- Transitions between foreground and background
- Memory-intensive operations
- UI interactions
- Video playback quality
- Complete the prerequisites section
- Record a UI interaction with your app
- Generate a test scenario script
- Create a test scenario
- Measure the fluidity of your app
Prerequisites
Before you measure the UI and video streaming fluidity of your app, complete the following:-
Download, build, and install the Vega video app.
Follow the instructions in the Vega video app documentation.
After you download the app, check the
samplesdirectory for sample test scenarios. Follow the guidance according to your app specific requirements. - Install Appium Server and Appium Vega Driver. Follow steps 1-4 in Install Appium for Vega integration. You need Appium, an automation tool, to write scripts and measure the fluidity of your app.
- Download Appium Inspector.
Record a UI interaction
-
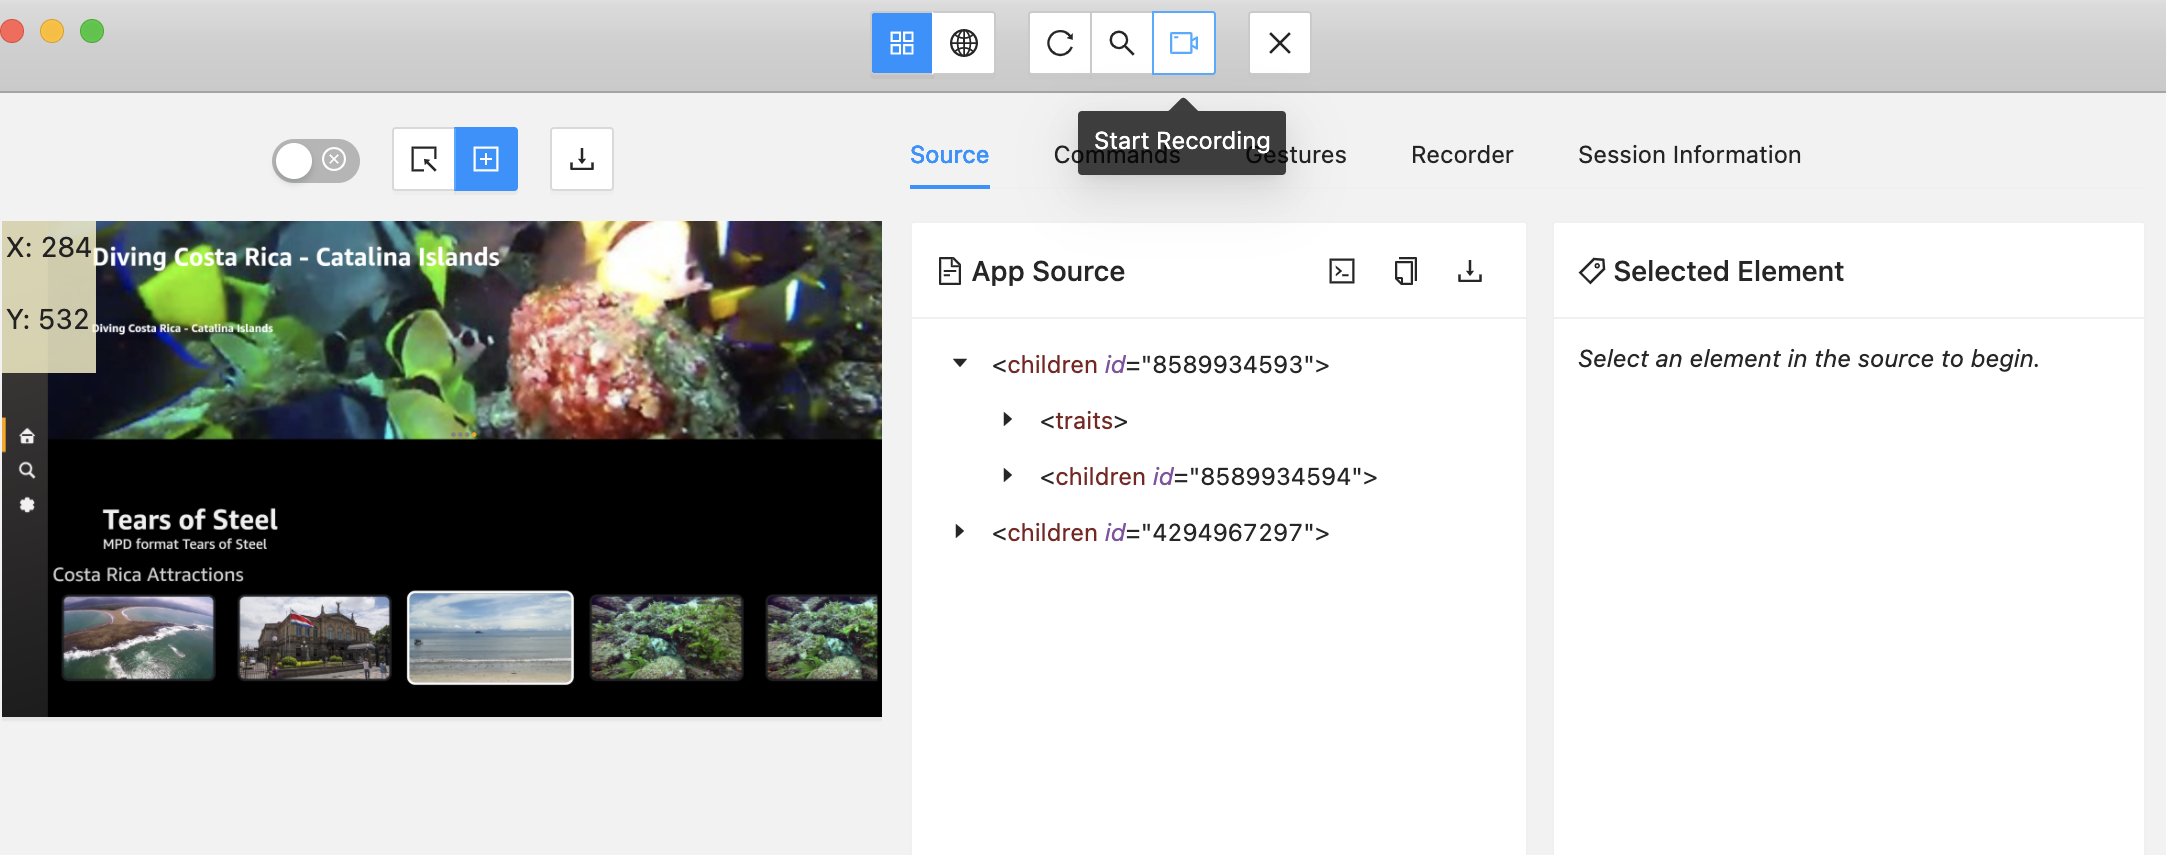
Follow steps 1-6 in Inspect Your App in Appium Inspector.
-
Select the Start Recording icon to start the UI interactions with your app.

- Select the Tap/Swipe by Coordinate ([+]) icon on the left panel of the screen.
Generate a test scenario script
To measure KPIs accurately, create a test scenario that defines expected UI interactions for:- Foreground memory monitoring
- UI fluidity assessment
- Video fluidity evaluation
Generate the script
-
In VS Code, open the command palette.
Mac: Shift+Command ⌘+P
Linux: Shift+Ctrl+P

-
Enter Vega: Generate test scenario template.

-
Create a filename for the test scenario script.
After you generate the template, VS Code displays a message.
 Python is the language for this template. Inside the template, you can find TestRunner class, which contains two members:
prep(in blue box)run(in red box)
 During the test, each member performs a function:
-
prep- Performs all necessary preparations before running the actual test scenario. For example, to play video, define the navigation and playback code inside this member function. An example of theprepis in Create a test scenario. -
run- Defines the UI interactions and actions for your test case. For example, to measure video playback fluidity over time, call the sleep function to wait for that duration.
Create a test scenario
Each tab presents a test scenario that simulates UI interactions and video streaming within your app.- Record D-pad key events
- Record video streaming
The Amazon Fire TV Stick includes a remote control with a black circular directional pad (D-pad).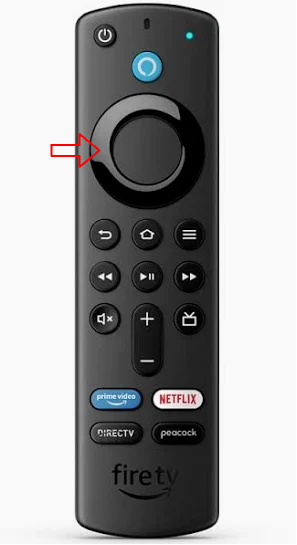 In this section, you create a test scenario to switch the UI component in your app by simulating the D-pad input. You write code that replicates a remote control’s D-pad functionality. By pressing the D-pad, your app users can cycle through options or move a selection in a specific direction they choose. Your code should enable the same navigation experience within your app’s UI.To simulate D-pad input, follow these steps: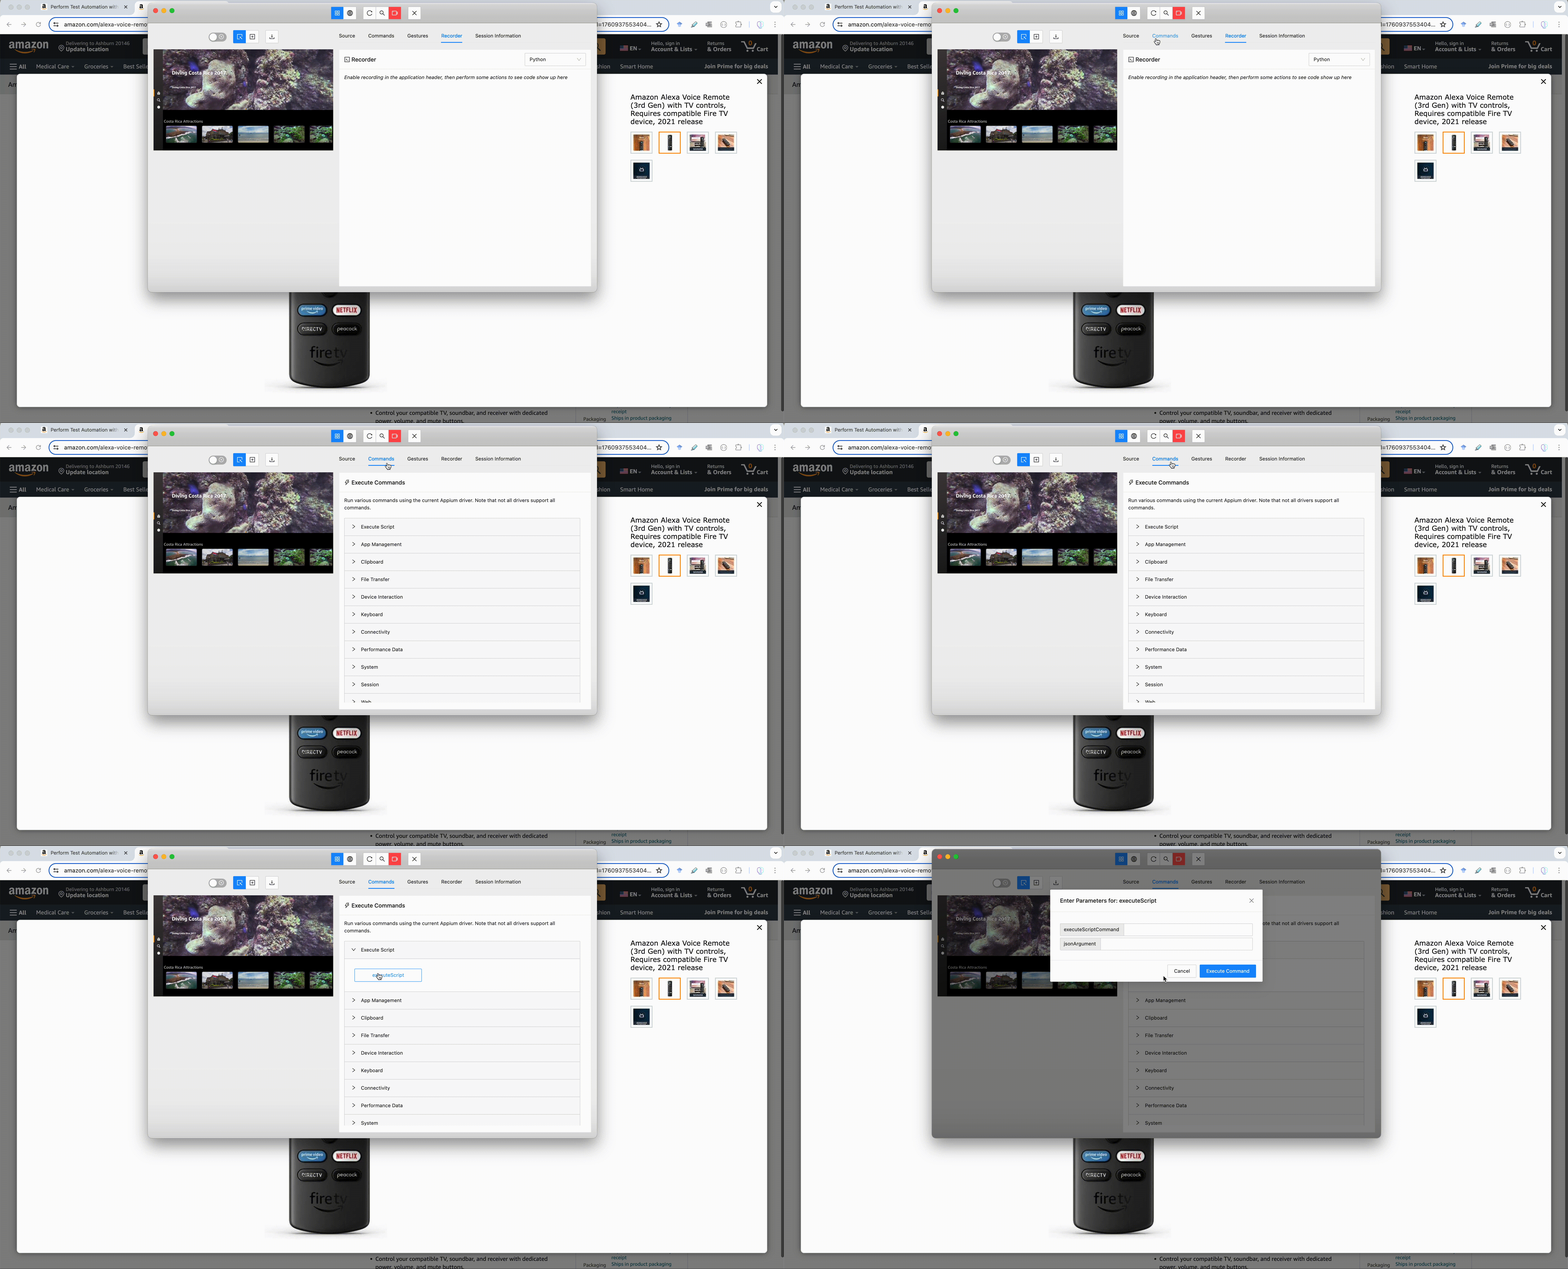
In this section, you create a test scenario to switch the UI component in your app by simulating the D-pad input. You write code that replicates a remote control’s D-pad functionality. By pressing the D-pad, your app users can cycle through options or move a selection in a specific direction they choose. Your code should enable the same navigation experience within your app’s UI.To simulate D-pad input, follow these steps:- In the Appium Inspector, go to the Commands tab and select Execute Script > executeScript. This action sends the UI interaction command from the Appium Inspector to the Vega device.
-
To simulate pressing the D-pad keys on a remote control, use the
executeScriptmethod with the following arguments:-
executeScriptCommand - Use
jsonrpc: injectInputKeyEventto send key events representing D-pad key presses. -
jsonArgument - A JSON object with the following properties:
- inputKeyEvent (string) - The key event value for the D-pad direction. To find the codes for D-pad, see the D-pad navigation section in Appium commands.
- holdDuration (number) - The duration in milliseconds to simulate holding the D-pad key pressed. Use 0 for a single press.
Example:
-
executeScriptCommand - Use
- Generate a test scenario template and copy the UI interactions recorded from the Appium Inspector to the template. Follow the steps in Generate a test scenario script.
- Go back to Appium Inspector.
- Select the Recorder tab to see the recorded code.
Test scenario goal
- Launch an app in ready-state without UI interactions.
- Measure the UI fluidity of an app while sending a D-pad key to move the UI focus on the page.
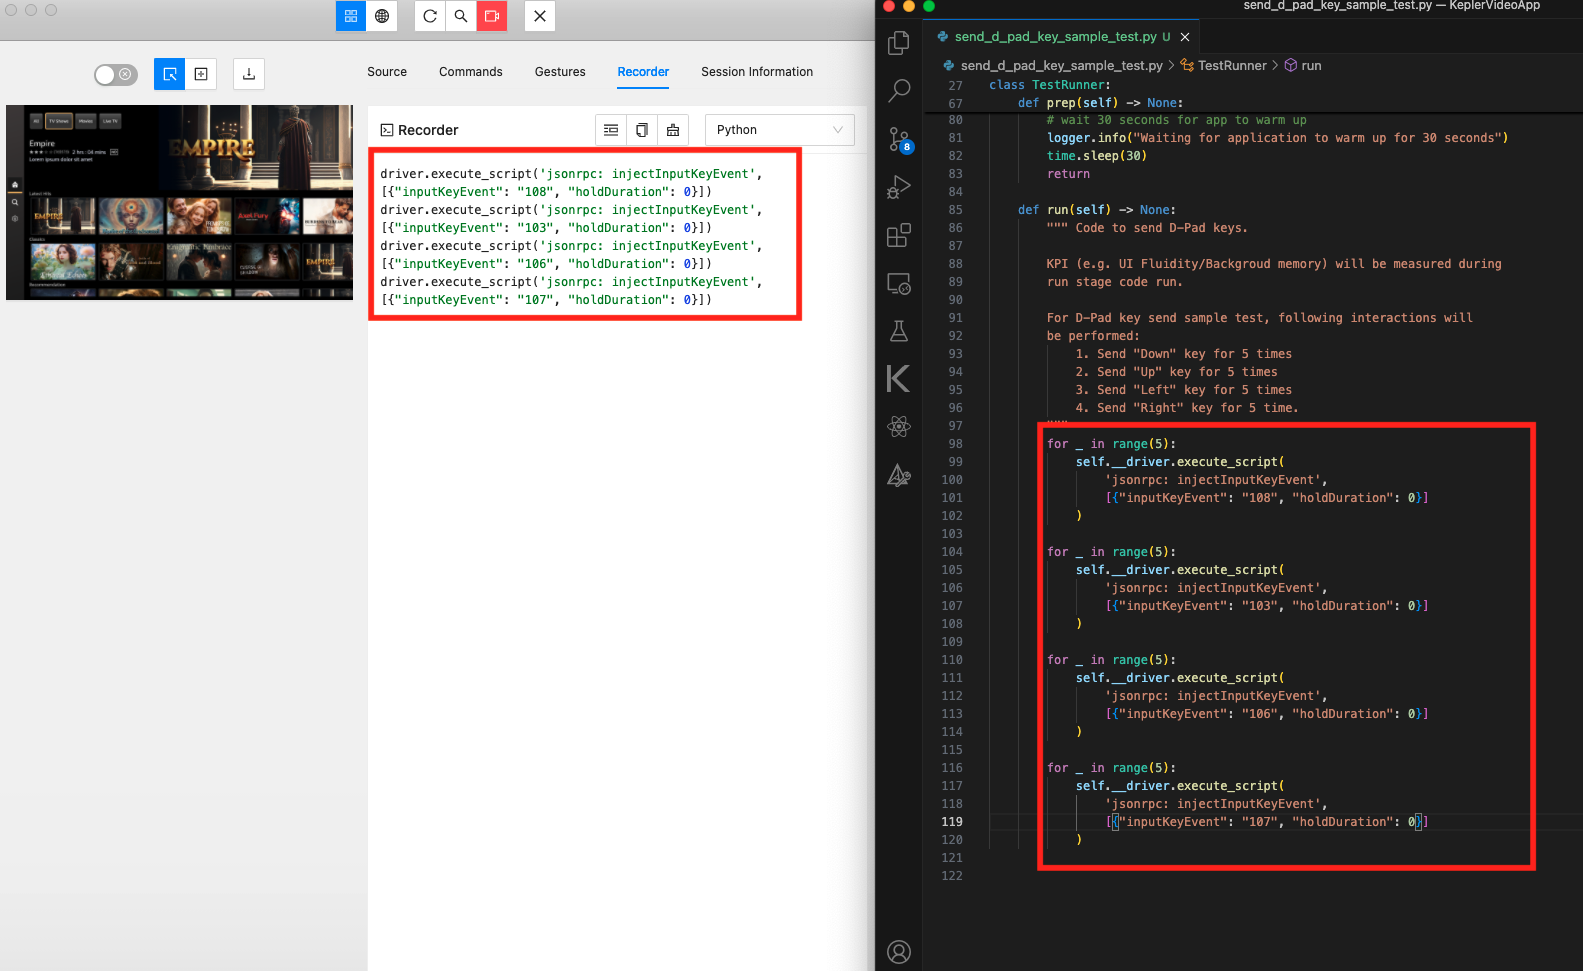
prep member function when copying code from the Appium Inspector’s Recorder box. The Recorder captures your interactions with the app’s UI during the recording session. Paste the code representing the recorded UI interactions into the run member function. The code executes the same UI interactions on the app during test execution.In the following image, the test simulates repeated user input by sending the same D-pad key press event five times in a loop.

Measure the fluidity of your app
- Open the command palette in VS Code. Mac: Shift+Command ⌘+P Linux: Shift+Ctrl+P
-
Enter Vega: Launch App KPI Visualizer.
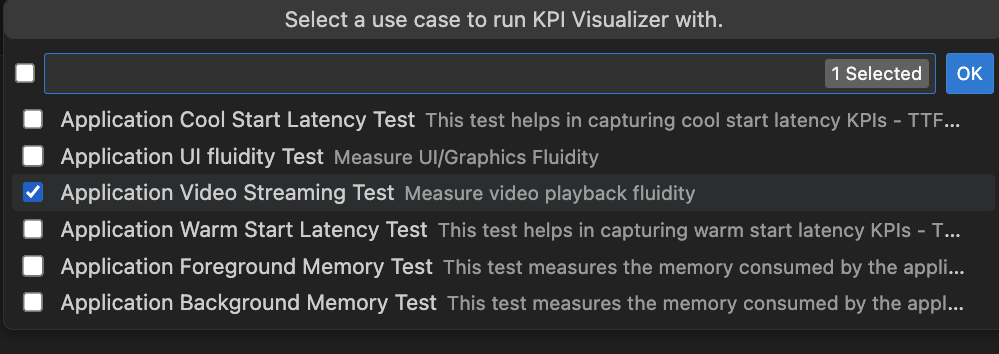
-
Select a use case from the command palette.

-
Make sure the checkbox for the Record CPU Profiler is empty, then press OK.
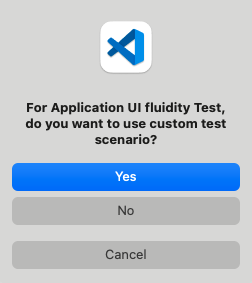
-
Select Yes in the Custom Test Scenario dialog box.
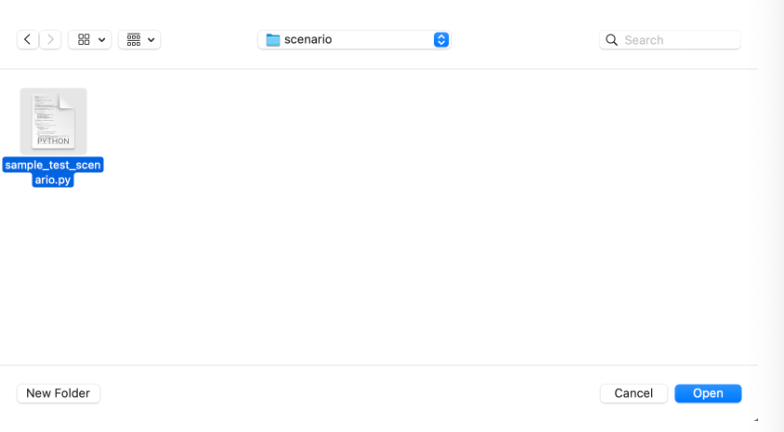
- Pass the test scenario you generated in Generate a test scenario script.
- Run the test.
Related topics
- App Performance Best Practices
- Measure App KPIs
- Identify UI Rendering Issues
- Detect Overdraw
- Investigate Component Re-rendering Issues
