- Vega Virtual Device
- Fire TV Device
Run your app on Vega Virtual Device
The Vega Developer Tools (VDT) features a Vega Virtual Device (VVD) that lets you test and run Vega apps without a physical device, giving you the following control options:- Mouse interaction directly on the virtual device
- Virtual remote control interface
- Keyboard shortcuts and commands
Prerequisites
- A Vega app ready to test. You can use an app you created from Vega SDK project templates, downloaded from a sample app, or built yourself.
- (Optional) Register your Vega Virtual Device to use Amazon Services for testing.
Options for running apps on Vega Virtual Device
You can run your Vega app using Vega Studio’s user interface (UI) or Vega CLI.Option 1: Using Vega Studio UI
-
Navigate to Vega Studio > Devices and select
VirtualDevice:Tv. - Select the play button to start the virtual device.
- Wait for the VVD window to open and the device to finish loading. The VirtualDevice:Tv status should show as ready, not “Loading…”
- Select the play button next to your project name. Your app launches and appears in the Vega Virtual Device window.
Option 2: Using Vega CLI
-
Start the Vega Virtual Device from the command prompt:
The command waits until the Vega Virtual Device has booted.
--timeout flag to extend the wait time if needed.Example:-
Load and run your app:
Example output:The
-dflag specifies that you’re running the app on the Vega Virtual Device. Architecture-specific commands The architecture of the virtual package (vpkg) must match the architecture of your development machine for proper execution. For example: Mac M-series devices:x86_64 devices:
Options for stopping apps on Vega Virtual Device
You can stop your Vega app using Vega Studio’s UI or the command line.Option 1: Using Vega Studio UI
-
Navigate to Vega Studio > Devices and select
VirtualDevice:Tv. - Select the stop button. The VirtualDevice:Tv status changes to stopped and the VVD window closes.
Option 2: Using Vega CLI
To stop the Vega Virtual Device, close your virtual device window, or run:Optional configurations
Register the Vega Virtual Device (only if you’re using Amazon services for testing)
To use Amazon Services for testing, register your Vega Virtual Device. After the Vega Virtual Device launches, follow these steps:
-
Select the Settings gear icon in the top-right corner of the Vega Virtual Device home screen.
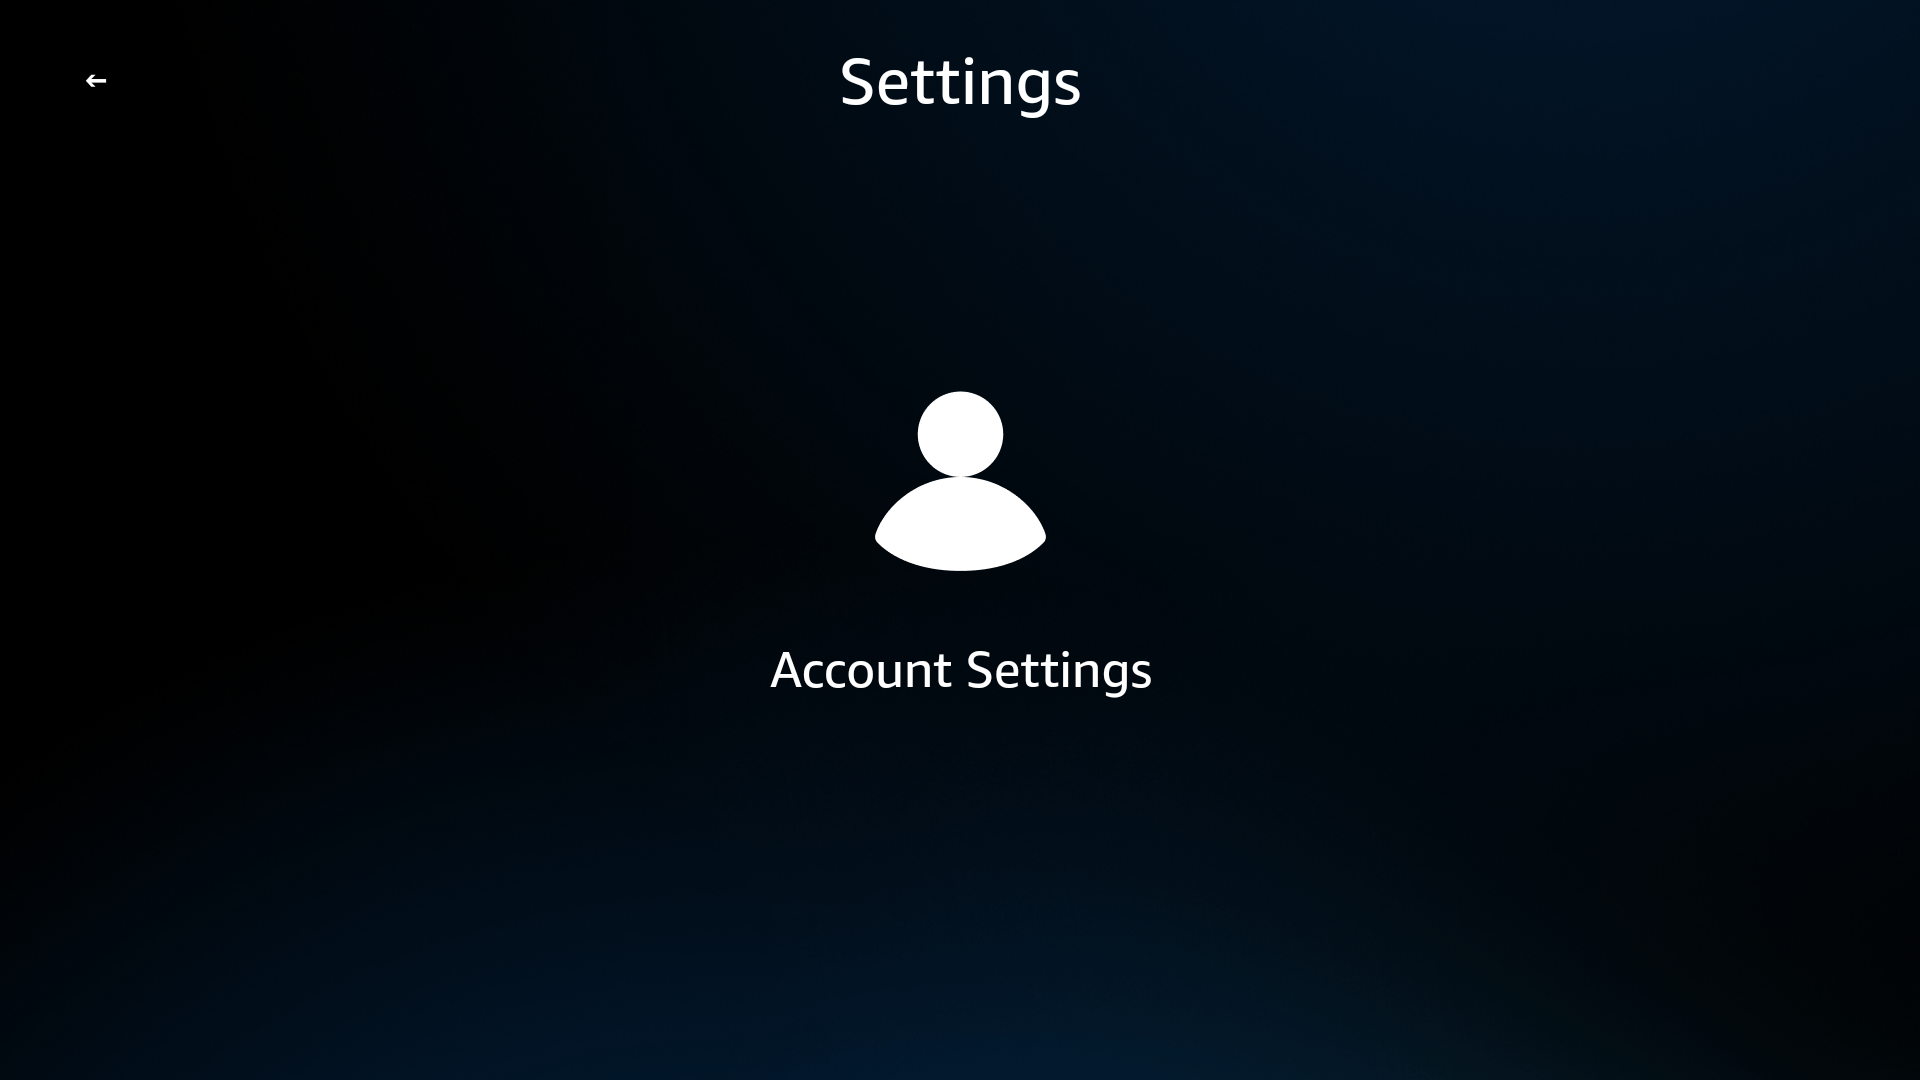
The Settings screen appears.

-
Select Account Settings.
Two options appear: Amazon Account and Parental Controls.

-
Select Amazon Account.
The Amazon Account screen appears with a Register Account button.

- Select Register Account. A registration code appears on screen.
- Open a browser.
- Go to www.amazon.com/code.
- Enter the registration code displayed on the Vega Virtual Device.
-
Back on your Vega Virtual Device screen, wait for the “Your device has successfully been registered” confirmation.

- Select OK.


Customize the Vega Virtual Device on launch
The Vega Virtual Device provides customization options on launch. When running the start command, you can use the following flags:-
Suppress the graphical user interface (GUI):
-
Turn off OpenGL acceleration (Ubuntu x86 only):
-
Modify the default display resolution:
Enable Developer Mode for full inputd-cli functionality
The Vega Virtual Device provides limitedinputd-clicommands by default. Enable Developer Mode to access the full command set for automation and testing:
-
Open the virtual device’s shell:
-
Enable Developer Mode:
The VVD reboots after this command. Repeat step 1 to reconnect to the virtual device’s shell.
-
Verify full functionality:
Dump rendered contents
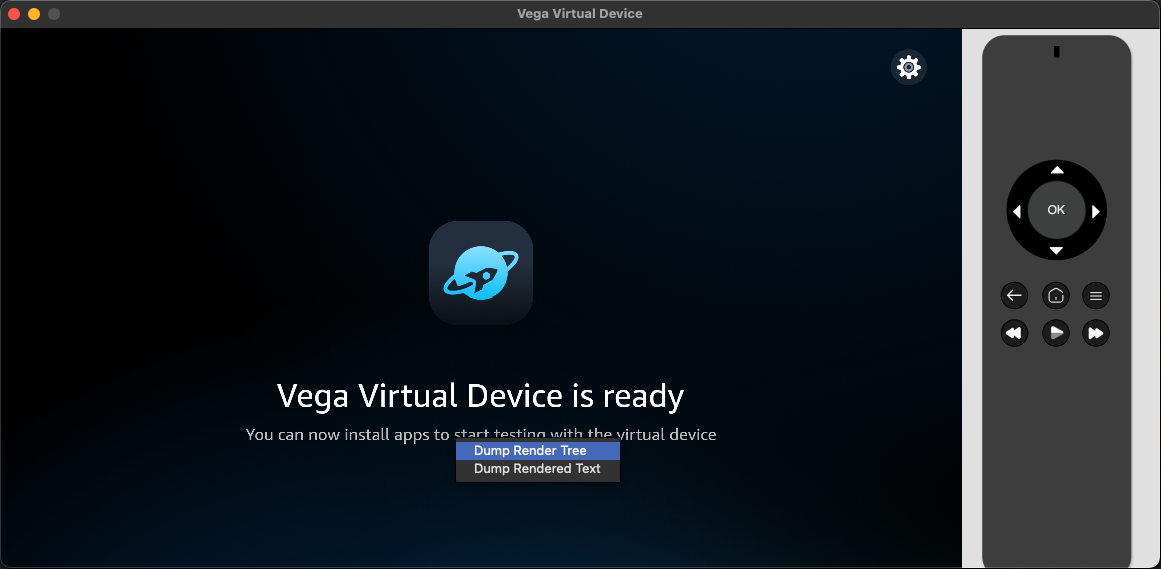
The Dump Rendered Contents feature lets you inspect the content currently displayed on the Vega Virtual Device screen. It provides two output formats: a complete XML render tree of the UI hierarchy and a plain text extraction of visible text. Use it for debugging layout issues, verifying UI content, auditing accessibility properties, or extracting text for localization testing.To dump rendered contents:-
Open the context menu anywhere on the Vega Virtual Device screen.

-
Select one of the following options from the context menu:
- Dump Render Tree: Exports the complete XML representation of the UI hierarchy, including all component properties, positions, and attributes. This output is the same as the App Source available in Appium Inspector. Use this option to debug layout issues, audit accessibility properties like focusable states and roles, or understand the UI structure for writing automation tests.
- Dump Rendered Text: Extracts only the visible text content from the UI.
-
In the file save dialog that appears, choose a location and filename.
- Render Tree saves as
.xmlby default. - Rendered Text saves as
.txtby default.
- Render Tree saves as
- The file opens automatically in your default application after saving.
Enable Parental Controls
Parental Controls let you test how your app behaves when app launch protection is active on the device. Use this feature to verify your app handles the PIN gate correctly during development.To enable Parental Controls:- Register your Vega Virtual Device (if you haven’t already). See Register the Vega Virtual Device.
-
From the Account Settings screen, select Parental Controls.
The Parental Controls screen appears with an Enable Parental Controls button.

- Select Enable Parental Controls.
-
Create or enter your Prime Video PIN using the circular dial on screen.
This is the PIN associated with your Amazon account. If you haven’t set one up, the device prompts you to create a new 5-digit PIN. You can also manage your PIN at amazon.com/pin.
 Use the virtual remote’s directional pad to navigate numbers (0–4 displayed by default, select 5-9 to toggle the higher digits).
-
Wait for the PIN to validate.
 After successful validation, the Parental Controls settings screen appears with the following options:
- Disable Parental Controls: Turns off parental controls.
- Change PIN: Updates your Prime Video PIN.
- Protect App Launches: ON: When enabled, a PIN prompt appears every time an app is launched on the device.


- Select the Settings gear icon > Account Settings > Parental Controls.
- Select Disable Parental Controls.
- Enter your PIN when prompted.
Keyboard shortcuts
Use these keyboard shortcuts to control the Vega Virtual Device:Provide feedback about the Vega Virtual Device
You can share feedback about your Vega Virtual Device experience directly from the emulator or terminal. The system doesn’t collect personally identifiable information. Only session metadata (VVD version, image type, host OS) accompanies the feedback.From the emulator (macOS and Linux):Open the context menu anywhere on the Vega Virtual Device screen and select Send Feedback…. A short survey opens in your desktop browser.From the macOS menu bar:Select Feedback > Provide Feedback… in the application menu bar while the Vega Virtual Device is running.From the terminal:Run the following command to open the feedback survey at any time:vega virtual-device stop, a one-line prompt asks how the session went. Press 1 (positive), 2 (negative), or Enter (skip). On negative feedback, the survey opens in your browser.