Alexa Blogs

We’ve been talking about how to get started with Alexa using the Alexa Skills Kit page, and sample skills, such as the Color Expert, using AWS Lambda functions. This article will show you how to setup a deploy script, so that you can manage your code and modules locally, and be able to easily publish changes into AWS Lambda via the command line interface (CLI).
The AWS Lambda console provides a set of management screens for developers to create and configure custom functions, including functions that implement Alexa skills features. Short, simple functions that require only a single block of code can be opened for editing within the Lambda console. However, this online code editor is disabled if you have uploaded a multi-file project. In this case you need to organize source files and any required modules in a folder on your laptop, and then zip these into a package and manually upload them to the Lambda console.
We’ll use the AWS CLI (Command Line Interface) to help us implement DevOps style automation to avoid manually performing the steps repeatedly during an iterative development process.
Publishing Tutorial
An automation process can be setup by following a few simple steps. Here is what we will do at a high level:
- Install the AWS CLI (command line interface)
- Setup an AWS IAM user and generate keys
- Configure AWS CLI for this user
- Craft a short shell script (batch commands) to publish your code to Lambda
This tutorial assumes:
- You may be new to AWS but have setup an AWS account and an Alexa skill and Lambda function.
- You are familiar with source code files, scripts, and operating system commands.
- You are developing your code in AWS Lambda using the default Node.JS JavaScript language.
Setup and Configuration Steps
- Install the AWS CLI
First, we will need to setup a tool called the AWS CLI, or Command Line Interface. Let’s check and see if it’s already present on your system. Open your command prompt, and type the following command to verify.
aws help
If you see a Unix-style manual page, skip to the next step! If you get an error, you will need to install the AWS CLI now. The CLI is a handy toolbox of commands you can use to explore, configure, and update various AWS services running in your account. Click here for the AWS CLI installation instructions.
The CLI needs to be configured to point to your AWS Account. Keeping with security best practices, you cannot configure the CLI with your Root Account credentials (the email and password you used to setup your account), but rather you will need to use an IAM user. Here are the steps to create a new user with enough permissions to publish your code.
- Setup an AWS IAM user and generate keys
- From the AWS Console, click IAM (Identity Access Management).
- Click “Users” from the left panel.
- Click the “Create New Users” blue button.
- Enter any username, such as “user”.

- Be sure the checkbox remains checked for “Generate an access key for each user”.
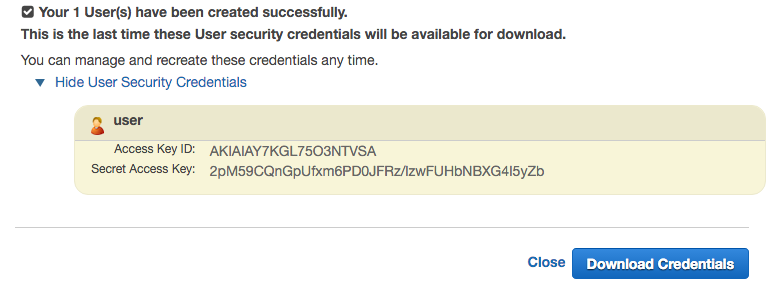
- Click the “Create” blue button. You should now see a page that will allow you to both “Show” and “Download” security credentials. Click “Show”.
- The security credentials are a pair of keys called Access Key and Secret Key. Copy the two long lines of keys into a password keeper app, or private text file.
- Click “close” to return to the IAM Users list. You can ignore the warning about not downloading the keys.
- Great, we now have a user with which to operate our CLI and upload code! But the user does not have enough permissions to do that yet. Let’s fix that.
- Within IAM Users, locate the new username you just created and click it.
- Click on the tab called “Permissions’.
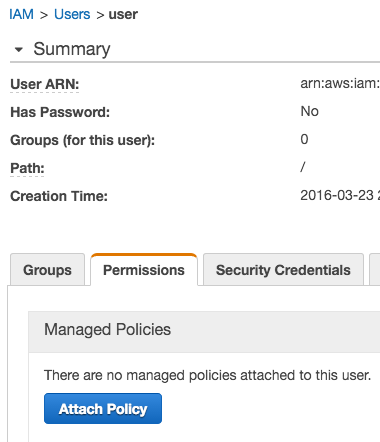
- Click the “Attach Policy” blue button.
- A list of policies will appear. In the search box, type “lambda” (without quotes).
- Locate and click on the entry called “AWSLambdaFullAccess”.
- Be aware, this policy will also grant the user rights to AWS S3, DynamoDB, Logs, and a few other services, which may be useful for further CLI development and automation.
- Configure the CLI for the new user.
- Return to the command prompt. Type:
aws configure
- You will be prompted to enter four items. Paste in the two keys, and enter us-east-1 and json for the final prompts as shown.
AWS Access Key ID [None]: AKIAIAY7KGL75O3NTVSA

AWS Secret Access Key [None]: 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

Default region name [None]: us-east-1

Default output format [None]: json
- You can now try out the CLI. Type the following to see a list of all your Lambda functions (in JSON):
aws lambda list-functions
- Well done! As a final step, let’s configure our local dev environment with a source code folder and publish script.
- Craft a short shell script (batch commands) to publish your code to Lambda
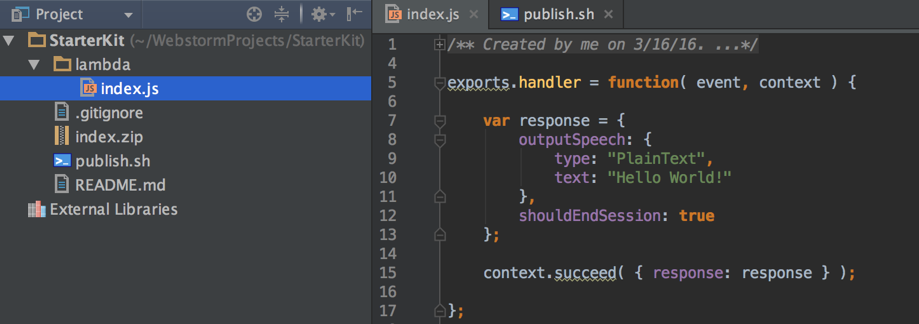
- Navigate to a local folder where your project will live. Create a subfolder called “lambda” and move your index.js and any other source files and modules here. If you are migrating your code from the AWS Lambda code editor, simply copy and paste your code into a new file (in the lambda folder) called index.js.
- From the parent folder, create a script called “publish.sh” (publish.bat if on Windows). Your project’s file structure should now look like this:
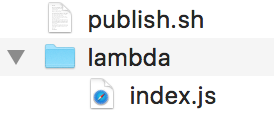
- Paste into publish.sh the following commands, which create a zip archive of all contents of the lambda folder:
rm index.zip
cd lambda
zip –X –r ../index.zip *
cd ..
aws lambda update-function-code --function-name MyLambdaFunction --zip-file fileb://index.zip
- Edit the final line to point to the name of your AWS Lambda function (replacing “MyLambdaFunction”)
- If using Windows: Modify line 1 to replace rm with del.
- If Windows: replace the third line with a call to 7zip to add folders to your zip archive (download 7zip here if necessary).
7z a -r ..\index.zip *
- From the base folder of your project, give your new publish script a try! If you are on Linux or Mac, ensure your script has execute permissions by typing chmod +x publish.sh
- Enter the following command. (For Windows simply type publish)
./publish.sh
- The very first time, you may see an error that “no file called index.zip exists”. This error is fine and should not appear again.
- Upon success, you will see a half-page JSON output with the details of your Lambda function, shown here.

- Test out your new code by talking to Alexa directly through a device, or from the Skill Developer console test page.
- If you get any error, check the logs from your Lambda function from the AWS Cloudwatch Logs console.
Next Steps
We now have publish-to-Lambda automation working. What are some next steps you can do to further enhance the development environment?
- Break your big file o’ code (index.js) into discrete modules to separate functionality and help enable team based development of individual source code files.
- Use Node Package Manager (npm) to install your favorite modules into your project.
- For example: CD into your lambda folder, and type:
npm install --save cleverbot.io
- You will now have a new folder called node_modules. Within here you will find the cleverbot code, plus all additional dependency modules such as the popular request module and all of its dependencies.
- When your publish.sh script next runs, it will zip up all the code and modules, and deploy to your AWS Lambda function.
- Setup a new custom “publish” button within your favorite text editor or IDE that calls your script.
- Check in and manage your local code with a source code control service such as git or GitHub.
- Add your script to a Continuous Integration workflow. For example, a Jenkins job that checks code out of GitHub, uses publish.sh to deploy to a test lambda function, and runs a suite of unit tests.
- Review the excellent series of blog posts by Big Nerd Ranch on setting up a robust local development environment, complete with a Node.js test server and test framework.
This article shows you how to set up a deploy script using the AWS CLI, so you can quickly and easily publish changes from your local IDE development environment into AWS Lambda. Learn more about Alexa at http://developer.amazon.com/ask and more about Lambda at https://aws.amazon.com/lambda