Alexa Blogs
We recently shared a post about how to get started with the new quick-start templates. In addition to helping you build a fact, quiz game, or high-low game skill quickly, you can use the templates to test and hone your voice user interface (VUI).
Testing Slot and Intent Confirmations with Quick-Start Templates
Designing an experience for voice is vastly different from designing for web or mobile. The fundamental difference is that the eye expects uniformity and the ear likes variety. Typically designing an app or website starts with the code – an API call or a data model. Designing for voice starts with the conversation a user will have with your Alexa skill.
Alexa skills are either one-shot invocation skills or multi-turn skills. The former is when an interaction lasts just the one conversation. For example, a user can say, “Alexa, open Space Facts and tell me a fact.” The interaction ends after the skill provides the customer with a fact.
Multi-turn skills are more complex and require a request and response between the customer and Alexa. Typically, skills that require multiple pieces of information to make a decision are multi-turn skills. A good example is a skill that helps you book flight tickets. Voice design plays a crucial part in the success of a multi-turn skill. The skill has to handle a customer over-answering or under-answering. In some instances, a good practice is for a skill to confirm the details provided by a customer before fulfilling the request. This is either slot confirmation or intent confirmation. If a customer omits a required slot, the skill has to prompt the customer to fill in the slot before proceeding. This is called slot filling.
Having appropriate slot and intent confirmations and also pertinent prompts for slot filling is part of good voice design. Before writing code to implement these constructs, you can test it out using a quick-start template. In the example below, we will use the fact skill quick-start template to add a slot, slot confirmation, and intent confirmation. If you’re not familiar with quick-start templates, check out our technical documentation for step-by-step instructions to get started.
Adding an Intent Confirmation
Let’s confirm with the customer if they want to hear a space fact. Go to the GetNewFactIntent and scroll to the Intent Confirmation section. Clicking the toggle enables Intent Confirmation where we will specify the prompt a user hears when an utterance invokes the corresponding intent.
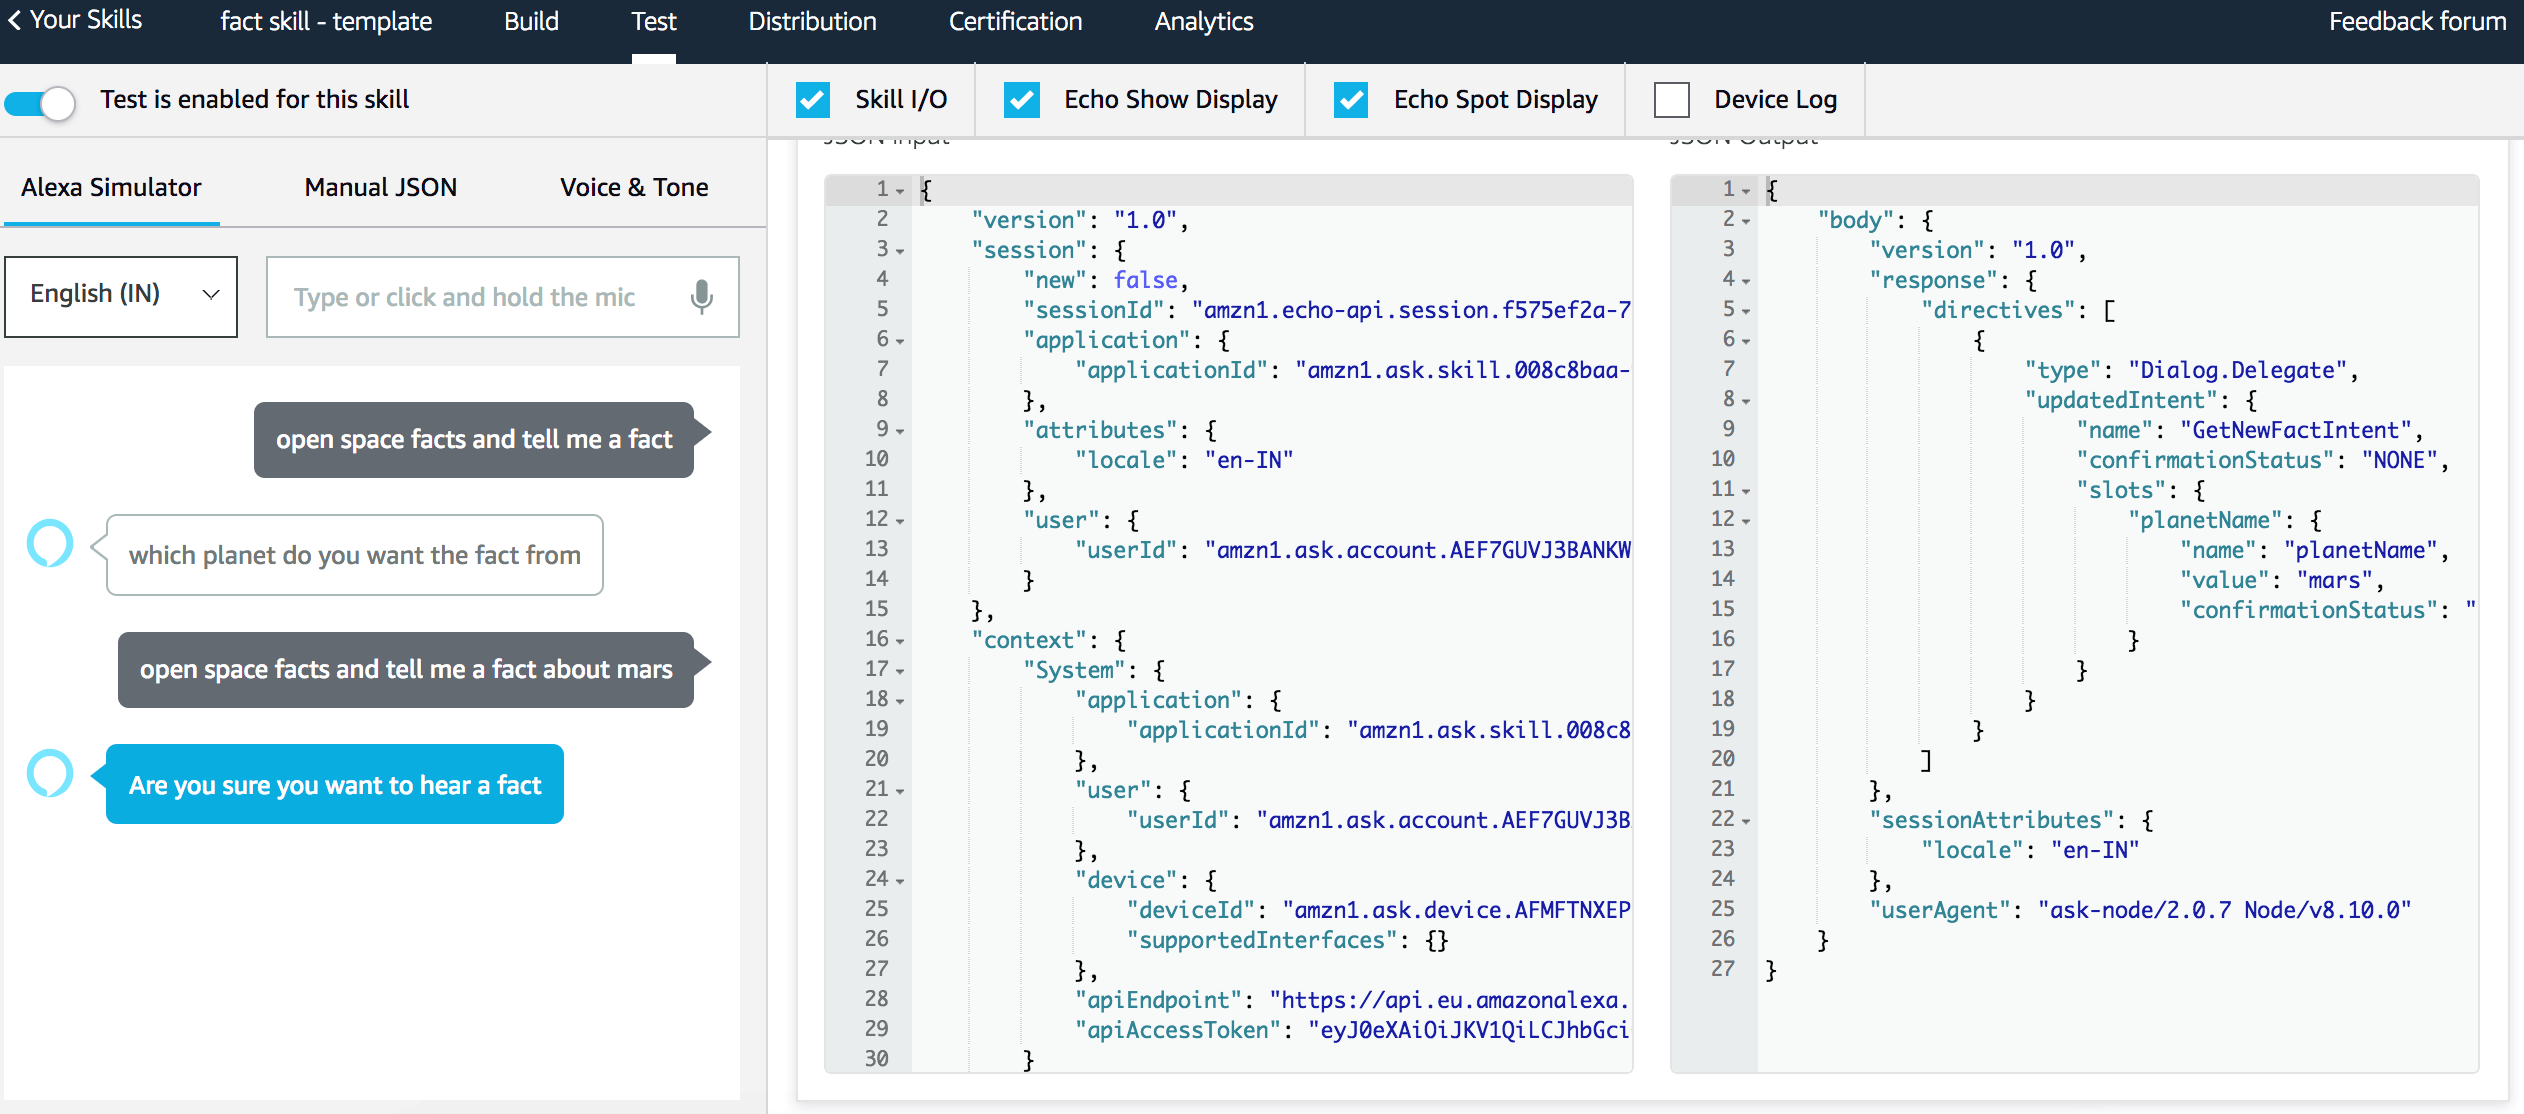
We try this out on the Test tab by typing “Open Space Facts and tell me a fact” to see an intent confirmation.
._CB482467448_.png)
Adding Slot Values
These are the default utterances in the fact skill quick-start template:
._CB482467450_.png)
Currently there are no slot values, so if a customer wanted to ask for a fact about a particular planet (or an astronomical element), that utterance wouldn’t be handled gracefully. We add a slot value for planet name so that an utterance such as “Tell me a fact about Mars” would give an appropriate response.
Then we click on the Add button next to Slot Types to create a custom slot type called planetSlot. Enter values (Earth, Mars, Mercury etc.) for the slot values. We can add synonyms for each slot value as well. For example, “The red planet” can be a synonym for Mars.
._CB482467445_.png)
Once the slot type is created, we add utterances that use a new slot called planetSlot. Utterances such as “Tell me a fact about {planetSlot}” and “Give me a fact about {planetSlot}” can be added. We save and build the model before testing out the utterances that include slot values.
._CB482467447_.png)
In the simulator, say, “Open space facts and tell me a fact about Earth” and notice what the skill responds with. We can also try an utterance with a synonym added for a slot value to see the difference in skill response and in the JSON Input, such as “Open space facts and tell me a fact about world.”
._CB482467441_.png)
Slot Filling and Slot Confirmation
Click on the slot name and scroll to the Slot Filling section. If the slot is required to fulfil the intent, click on the toggle to enable slot filling. Add a prompt to ask the user for the slot to fulfil the intent. We can also add a user’s response to the prompt.

Click on the Slot Confirmation toggle to enable confirmation of your slot value. We can add a slot name in the speech prompt as well. For instance, let’s add “you said {planetName}” as our speech prompt. Test it out on the simulator.

Adding intent and slot confirmations are a good way to ensure a good voice experience for your user. Use them sparingly though. Confirming every piece of information with your user before proceeding would lead to a frustrating experience.
Once you’ve tested your voice interaction model, you will need to handle the slot and intent confirmations as well as slot-filling in your backend. To achieve this, you can use Dialog.Directives which will ensure your user can have a multi-turn dialog with your skill. Check out the related blog posts below for some code samples on how to implement this.
Related Content
- 4 Principles of Conversational Voice Design
- Understanding Entity Resolution with the Pet Match Skill
- Confirm What Customers Want with Dialog Management
- Using Yes/No Intents with Dialog Management
Build Skills, Earn Developer Perks
Bring your big idea to life with Alexa and earn perks through our milestone-based developer promotion. US developers, publish your first Alexa skill and earn a custom Alexa developer t-shirt. Publish a skill for Alexa-enabled devices with screens and earn an Echo Spot. Publish a skill using the Gadgets Skill API and earn a 2-pack of Echo Buttons. If you're not in the US, check out our promotions in Canada, the UK, Germany, Japan, France, Australia, and India. Learn more about our promotion and start building today.
