Alexa Blogs


We are excited to introduce a new way to help you quickly build useful and meaningful skills for Alexa. The new flash cards skill template makes it easy for developers and non-developers to create a skill similar to ‘Chemistry Flash Cards’, ‘Language Flash Cards’, ‘Exam Prep’, etc. This template leverages AWS Lambda and the Alexa Skills Kit, and provides built-in business logic, uses cases, error handling, and help functions for your new skill. You just need to come up with a flash card idea (like ‘Anatomy Flash Cards’), plug in your flash cards content and edit the sample provided. Don’t worry! We’ll walk you through how it’s done.
Using the Alexa Skills Kit, you can build an application that can receive and respond to voice requests made to Alexa. In this tutorial, you’ll build a web service to handle notifications from Alexa and map this service to a skill in the Amazon Developer Portal, making it available on your Echo, Alexa-enabled device, or Echosim.io for testing and to all Alexa users after publication.
When finished, you'll know how to:
• Create a flash card based skill - This tutorial will walk first-time Alexa developers through all the required steps involved in creating a flash card based skill.
• Design a Voice User Interface - Creating this skill will help you understand the basics of creating a working Voice User Interface (VUI) while using a cut/paste approach to development. You will learn by doing and end up with a published Alexa skill. This tutorial includes instructions on how to customize the skill and submit for certification. For guidance on designing a voice experience with Alexa you can also watch this video.
• Use JavaScript/Node.js and the Alexa Skills Kit to create a skill - You will use the template as a guide but the customization is up to you. For more background information on using the Alexa Skills Kit please watch this video.
• Get your skill published - Once you’ve completed your skill, this tutorial will guide you through testing your skill and sending your skill through the publication process to make it available for any Alexa user to enable.
You will also need an AWS account and an Amazon Developer account. To get a refresher on how to do this, or if you are new to skill development, you can visit our training page to review our past tutorials. This tutorial is built on the trivia template.
Step 1 – Create an AWS Lambda Function
The first step is to create an AWS Lambda function to host your skill logic. We can use AWS Lambda to build the backbone of our skill. AWS Lambda lets you run code without provisioning or managing servers. You pay only for the compute time you consume - there is no charge when your code is not running. With AWS Lambda, you can run code for virtually any type of application or backend service - all with zero administration. Just upload your code and AWS Lambda takes care of everything required to run and scale your code with high availability.
Note: If you are new to AWS Lambda and would like more information, visit the AWS Lambda Getting Started guide.
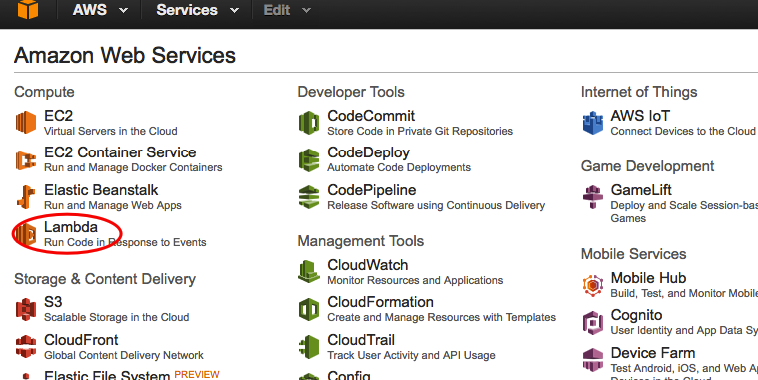
1. Select US East (N. Virginia) region (upper right). If you do not select the correct region, it will not work.
2. Select 'Lambda' from Compute services (upper left).
3. Select ‘Create a Lambda Function’ to begin the process of defining your AWS Lambda function.
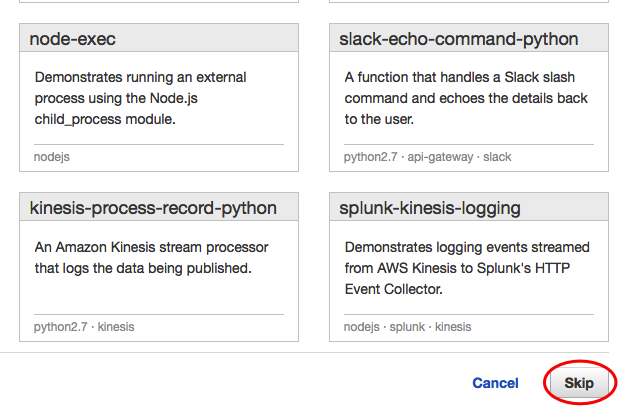
4. At the bottom of the ‘Select blueprint’ page, select ‘Skip’. You may be taken directly to the Function list without having to skip.
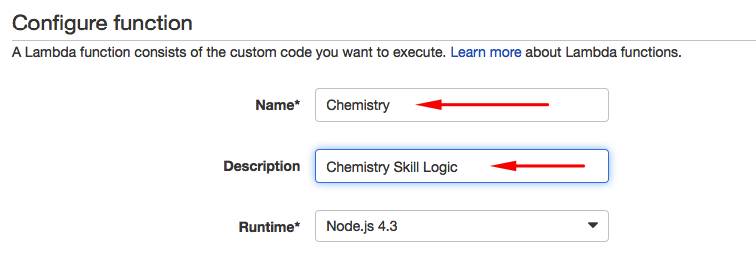
5. You should be in ‘Configure function’. Enter the:
- Name: Chemistry
- Description: Chemistry Skill Logic
- Runtime: Node.js 4.3
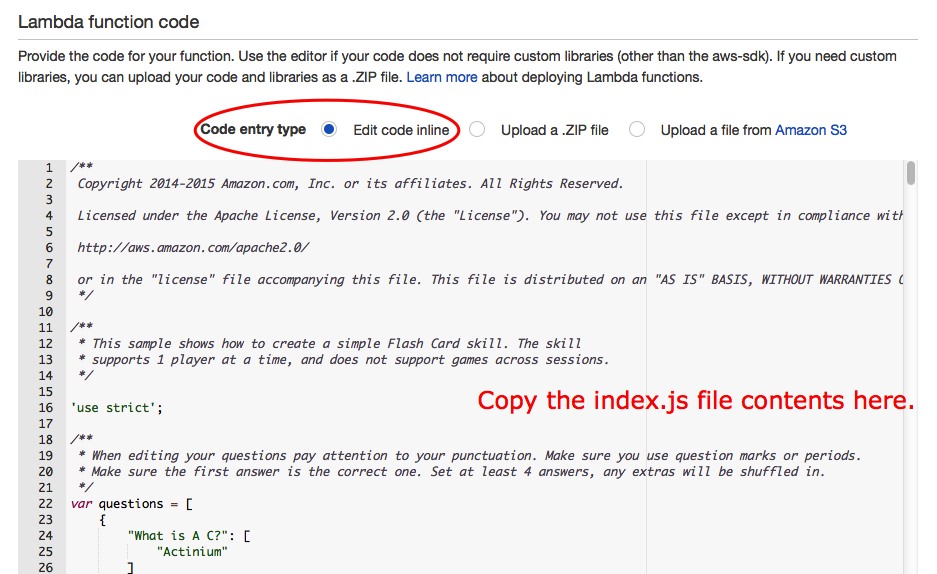
6. Select the ‘Code Entry Type’ as ‘Edit code inline’ and copy/paste the AWS Lambda function code node.js script from the GitHub repository.
7. Set your handler and role to the following:
a. Keep Handler as ‘index.handler’
b. The next selection is to chose the AWS IAM role that will execute this function. AWS Identity and Access Management (IAM) enables you to securely control access to AWS services, such as AWS Lambda and resources for your users. Using IAM, you can create and manage AWS users and groups, and use permissions to allow and deny their access to AWS resources. We need to create a role that allows our skill to invoke this AWS Lambda function.
Add a new Role for ‘lambda_basic_execution’ (see how to set up your IAM role in the next step). Note also if you have already used AWS Lambda you may already have a ‘lambda_basic_execution’ role created you can use. Scroll down in the Role menu to find your previously created role.)
 c. You may be prompted to set up your IAM role if you have not done so yet. This will take you to the IAM Management console and you will see a page that looks similar to this.
8. Keep the Advanced settings as default.
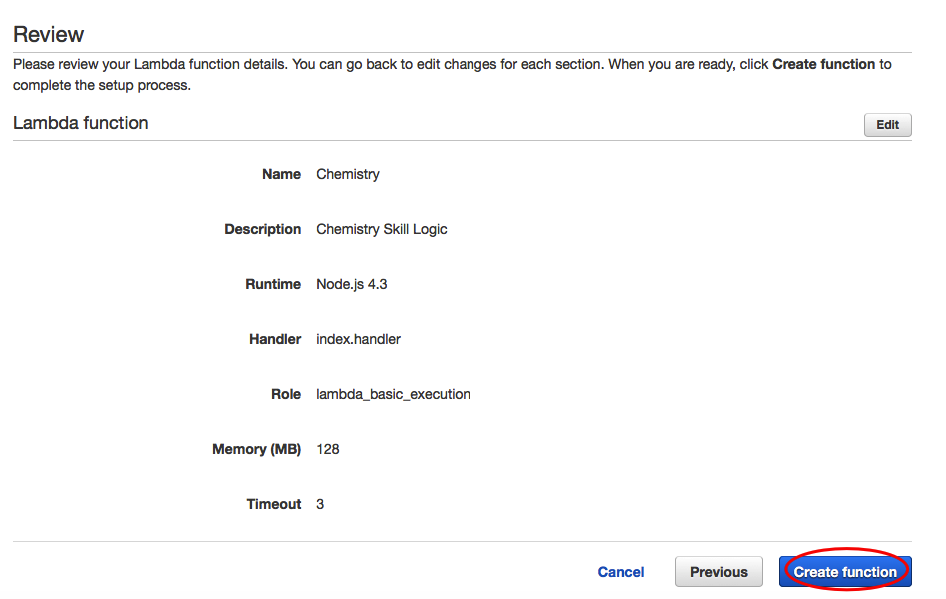
- Select 'Next' to review. You should see something like below – Then select 'Create function'.
9. Next we need to create an Event source. Event sources publish events that invoke the AWS Lambda function. Upon invocation, AWS Lambda executes your code by passing the event to the handler in your AWS Lambda function code. You associate an event source with your function using an event source mapping. We will use the Alexa Skills Kit event source and map it to this function.
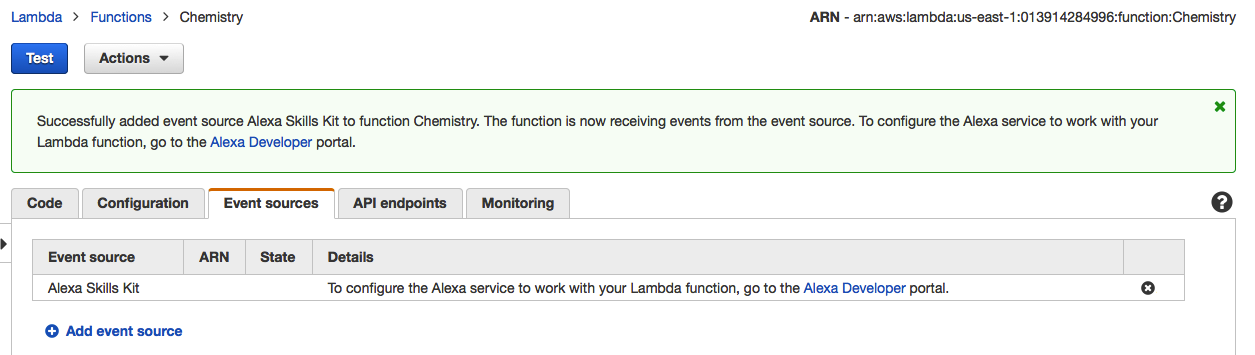
a. In your AWS Lambda function, select the ‘Event sources’ tab.Select ‘Add event source’.
b. Select ‘Alexa Skills Kit’ from the dropdown. Then click 'Submit'.
c. You should now see a success message.
10. We will be using an identifier for your function. Amazon Resource Names (ARNs) uniquely identify AWS resources. AWS requires an ARN when you need to specify a resource unambiguously across all of AWS, such as a unique AWS Lambda Function. You can locate the ARN in the upper corner of the screen.
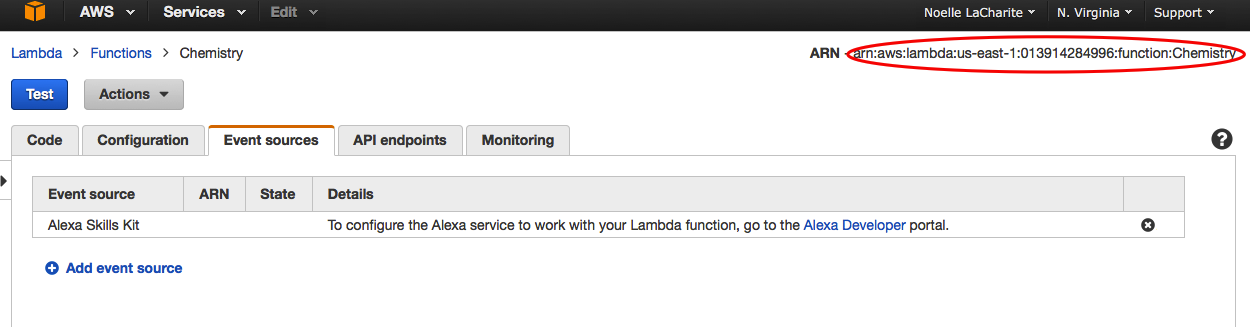
Keep this tab open in your browser as you will need to copy the ARN for your AWS Lambda function (located in the upper-right corner of your function); you will need it for setting up your skill in the Developer Portal. When you copy it, be sure to only copy the text after ARN (as pictured).
Step 2 – Set up Your Alexa Skill in the Developer Portal
Skills are managed through the Amazon Developer Portal. You will link the AWS Lambda function you created in the previous step to an Alexa skill defined in the Developer Portal.
1. Sign into your Developer Portal account and navigate to ‘Alexa’. Under ‘Alexa Skills Kit’, select ‘Get Started’.

2. This is where your skill is defined and managed. Select ‘Add a New Skill’. This will guide you through the setup required to create your skill.

a. First, you need to select the type of skill you are creating. For this example, select the ‘Custom Interaction Model’ radio button. Add the name of your skill. You can use ‘Chemistry Flash Cards’ for this example. Keep in mind, when creating a skill to publish, you will use the name you’ve chosen to define your skill. That name will show up in the Alexa app. Note: You will NOT be publishing this example skill.
b. Add the Skill Name and Invocation Name. Since we are using the sample, type ‘Chemistry Flash Cards’ for the 'Name' and 'Invocation Name'.
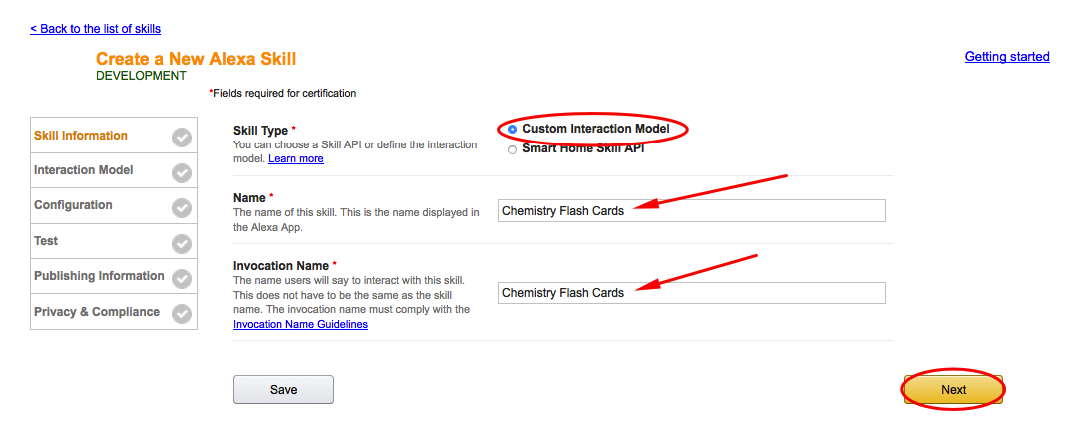
c. Select ‘Next’. When you select 'Next', your work is saved and you are moved to the next section. When you select 'Save', you work is saved and you stay in the same section.
d. Now we need to define our skill’s interaction model. Let’s begin with the intent schema. In the context of Alexa, an intent represents an action that fulfills a user’s spoken request. Intents can optionally have arguments called slots. We will be using a custom slot to provide the specific answers to the flash card questions. (More information about custom slots can be found here.) Let’s review the Intent Schema.
3. The Intent Schema is written in JSON and provides the information needed to map the intents we want to handle programmatically. Copy the intent schema in the GitHub repository or from the code sample below:
    {
      "intents": [
        {
          "intent": "AnswerIntent",
          "slots": [
            {
              "name": "Answer",
              "type": "LIST_OF_ANSWERS"
            }
          ]
        },

            {
          "intent": "AnswerOnlyIntent",
          "slots": [
            {
              "name": "Answer",
              "type": "LIST_OF_ANSWERS"
            }
          ]
        },
        {
          "intent": "AMAZON.StartOverIntent"
        },
        {
          "intent": "AMAZON.RepeatIntent"
        },
        {
          "intent": "AMAZON.HelpIntent"
        },
        {
          "intent": "AMAZON.YesIntent"
        },
        {
          "intent": "AMAZON.NoIntent"
        },
        {
          "intent": "AMAZON.StopIntent"
        },
        {
          "intent": "AMAZON.CancelIntent"
        }
      ]
    }
a. In this example, we use custom slot types. A custom slot type consists of a name and a line-separated list of values. Custom values are a list of values for specific items used by your skill and referenced in the intents when using a custom slot type. In order for our flash cards to evaluate the correct answer, we need to provide the values that would be accepted as correct. Let’s add this custom slot type now.
b. Select ‘Add Slot Type’:

c. Next, enter the name of the slot type 'LIST_OF_ANSWERS'. Then copy/paste the list of values from the sample in GitHub. Then select ‘OK’.
4. The next step is to build the list of Sample Utterances. Given the flexibility and variation of spoken language in the real world, there will often be different ways to express the same request. Providing these different phrases in your sample utterances will help improve voice recognition for the capabilities you add to your Alexa skill. It is important to include as wide a representative range of samples – any phrases that you think might be used with your skill (do not include samples that users will never speak).
Alexa attempts to generalize based on the samples you’ve provided to interpret spoken phrases that differ in minor ways from your specific samples.
a. Now it is time to add the Sample Utterances. Copy the utterances list from our GitHub sample or below:
AnswerIntent the answer is {Answer}
AnswerIntent my answer is {Answer}
AnswerIntent is it {Answer}
AnswerIntent {Answer} is my answer
AnswerOnlyIntent {Answer}
AMAZON.StartOverIntent start game
AMAZON.StartOverIntent new game
AMAZON.StartOverIntent start
AMAZON.StartOverIntent start new game
5. Select ‘Save’ and you should see indications that the Model being built.
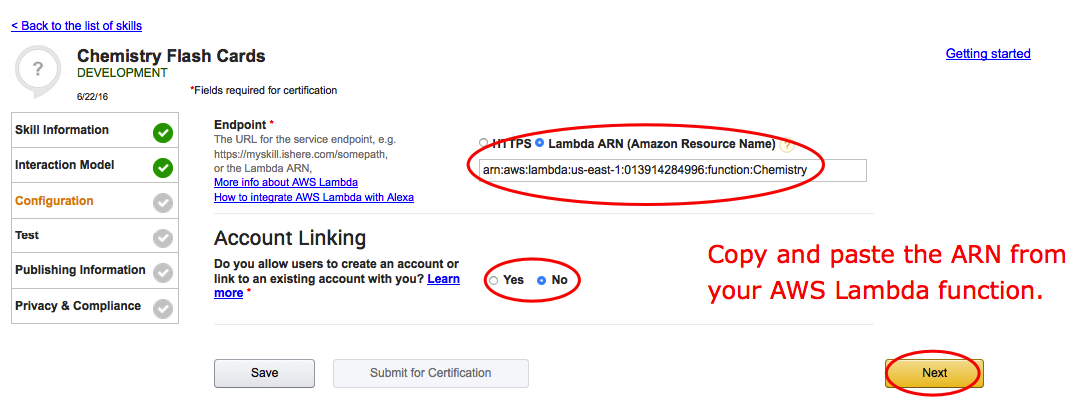
6. Select ‘Next’, and you will be taken to the Configuration screen. The skill’s endpoint is the mechanism for executing a skill's functionality.
a. Our code is running on AWS Lambda, so select ‘Lambda ARN’ as the endpoint.
b. Copy and paste the ARN from the AWS console browser tab you should still have open from a previous step.
c. Select 'No' for Account Linking
d. Then, select ‘Next’ to move to the Test screen.
Step 3 – Testing Your Skill
When you submit your skill to the Alexa skills store, it must pass a certification process before it can be published live to Amazon customers. Before you submit your new skill for certification, you should perform your own quality assurance testing. Some of this you can do in the Developer Portal but you will also want to test with other tools like Echosim.io and beta testers. We will begin in the Developer Portal.
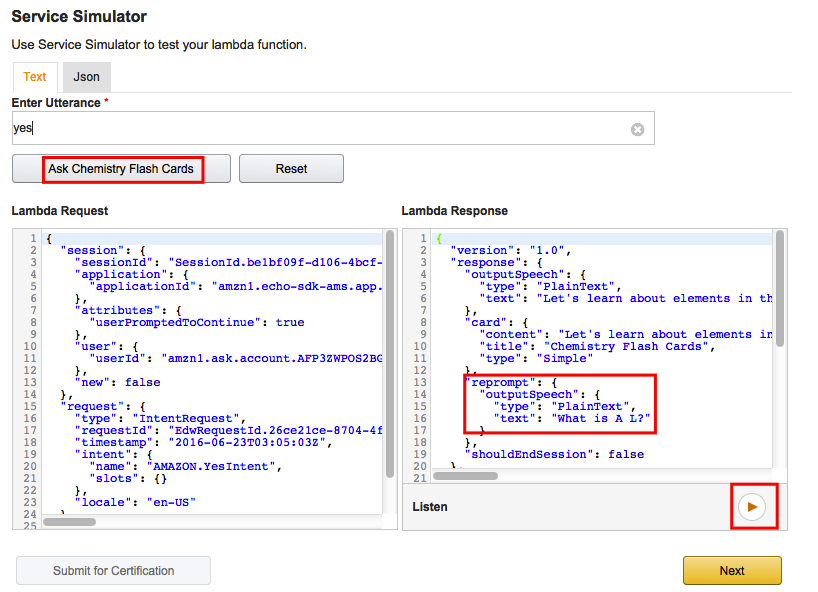
1. In the Test tab we are going to enter a sample utterance in the service simulator.
a. In this example we have called the skill ‘Chemistry Flash Cards’ – This is the Invocation Name we set up on the Skill Information section in step 2.
b. Enter ‘Open Chemistry Flash Cards’ under ‘Enter Utterance’ in the Service Simulator and select ‘Ask Chemistry Flash Cards’

c. You should see the formatted JSON request from the Alexa Service and response coming back.
d. Since there was no game in progress, we need to confirm we would like to start a game. Type in ‘yes’ in the ‘Enter Utterance’ text box and click ‘Ask Chemistry Flash Cards’. Now you should see the welcome message and the first question.
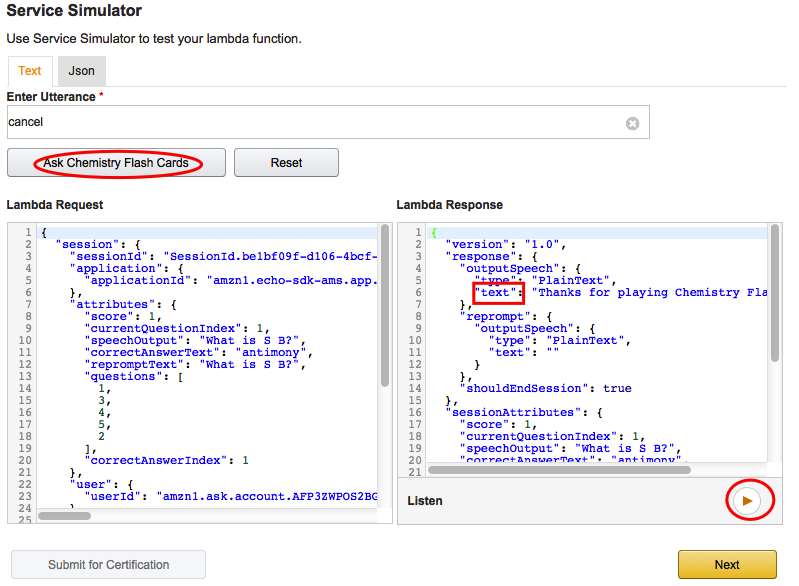
e. Let’s answer the first question by typing in the answer (you might have to look at your AWS Lambda function for a hint). You should see a successful response message. You can press the play button to hear how Alexa will respond.

f. Finally, test the user wanting to cancel. Type in ‘cancel’ and click the ‘Ask Chemistry Flash Cards’ button. You should now see the exit message. Feel free to run through the game multiple times with correct and incorrect answers to see how the skill is performing.
g. (Optional) Testing with an Alexa-enabled device. This is optional as you can do all the testing in the developer portal. Assuming your Alexa-enabled device is online (and logged in with the same account as your developer account), you should now see your skill enabled in the Alexa app and you should be able to ask Alexa to launch your skill. You can also test your skill in the browser on the Echosim.io Alexa skill testing tool.
Troubleshooting (Getting an Invalid Response?)
- Do you have the right ARN copied from your AWS Lambda function into your Developer Portal / Skill?
- Are you calling the right invocation name?
- Are you writing Launch, Start or Open in the sample utterances?
- Are you sure you have no other skills in your accounts with the same invocation name?
Step 4 – Make it Yours
1. In the Skill Information section in the Developer Console, edit the text fields to reflect your new flash cards skill.
- A new Name
- A cool Invocation Name
- A fun icon
2. Everything else can stay as is for now in the Developer Portal
3. As you build your customization, be sure to review the checklist and guides that are available to help you with the development of your idea.
4. Return to your AWS console, log back in if needed. Edit the flash cards AWS Lambda function you have already created. We are going to copy in your new flash cards questions and answers.
a. If you edit your code in the browser, you just need to edit the questions and answers to reflect your flash cards use case. If you don’t want to edit in the browser, you can use any rich text editor like Sublime, Atom etc. to edit the skill logic, and then paste it in to the page.

b. This template calls for one question and one answer for each question. The script logic takes care of randomizing the questions for you and evaluating the response.
3. Back to your Developer Portal / Alexa skill - Copy in your Application ID from the ‘Skill Information’ tab in the Developer Portal.
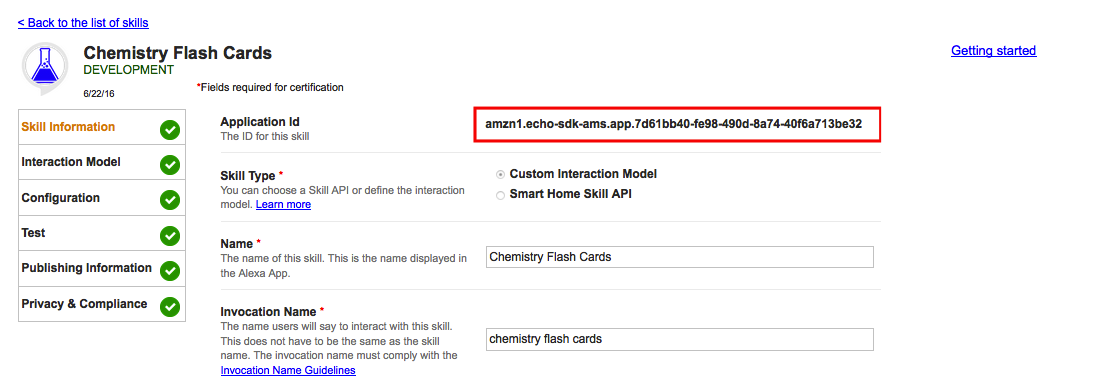
Then, paste it into your AWS Lambda script.

4. For security reasons, you will want to restrict the skills that can call your AWS Lambda function. In the code of your AWS Lambda function find the applicationId section and copy your Application ID from the 'Skill Information' tab in the Developer Portal into the section indicated below (do not copy the ID below, which is just an example) - It looks something like this when you are done: (be sure to SAVE).
// Route the incoming request based on type (LaunchRequest, IntentRequest,
// etc.) The JSON body of the request is provided in the event parameter.
exports.handler = function (event, context) {
    try {
        console.log("event.session.application.applicationId=" + event.session.application.applicationId);
        /**
         * Uncomment this if statement and populate with your skill's application ID to
         * prevent someone else from configuring a skill that sends requests to this function.
         */
         if (event.session.application.applicationId !== "amzn1.echo-sdk-ams.app.amzn1.echo-sdk-ams.app.05aebcb3-1461-48fb-a008-8ddccd1e2b516") {
         context.fail("Invalid Application ID");
         }
5. Be sure to remove any Chemistry questions.
6. A minimum of 20 questions is recommended to get started for a good user experience, about 100 is a good number to keep users engaged – the more the better. You can always add more to your AWS Lambda function later.
7. Be sure to select SAVE when you are all done. Note: We begin testing in the Developer Console, not in your AWS Lambda function.
8. Now you need to go back to the Developer Portal to test and edit your skill and you will be ready to submit for publication.
a. In your skill’s Test tab, repeat the testing process from Step 3 to make sure everything is working with your new questions and answers.
b. Go ahead and test with your Alexa-enabled device or on Echosim.io to make sure everything sounds right, you may find a few words that need to be changed for a better user experience.
c. Does every question and answer sound correct? Do you need to change any words to make them sound correct?
d. Have you added in YOUR ApplicationID as per the previous instructions?
9. Select the Publishing Information tab next:
a. Spend some time coming up with an enticing, succinct description. This is the only place you have to attract new users and train them how to use your skill. These descriptions show up in the Alexa App when a user finds and selects your skill. These descriptions should clearly identify the use and purpose of your skill.
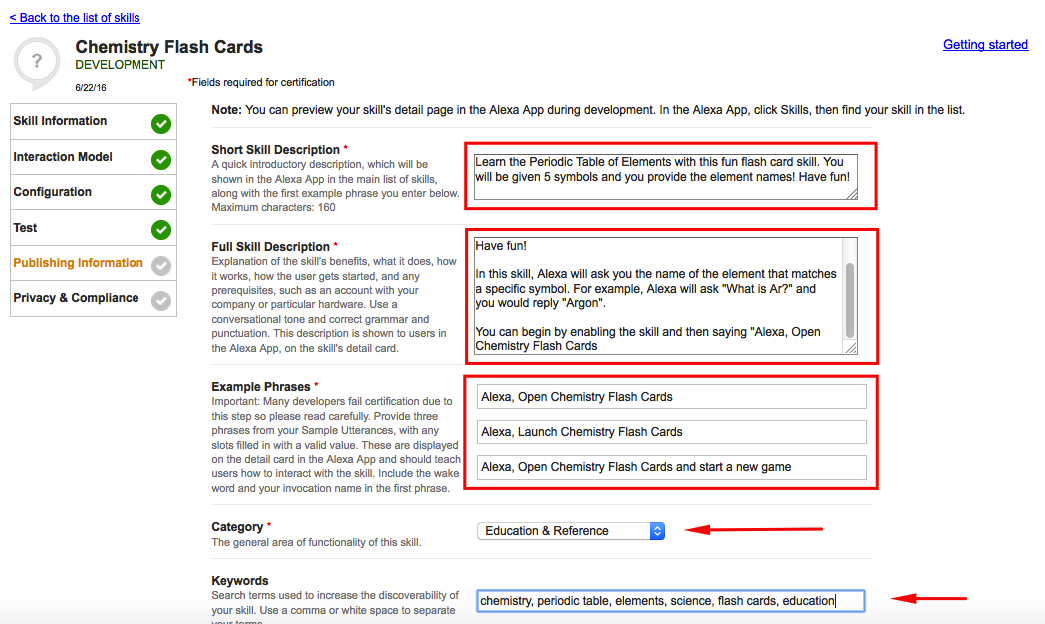
b. You will want to select the correct category (and subcategory in some cases) as well as relevant keywords. This will help your skill be discoved as users search in the Alexa App.
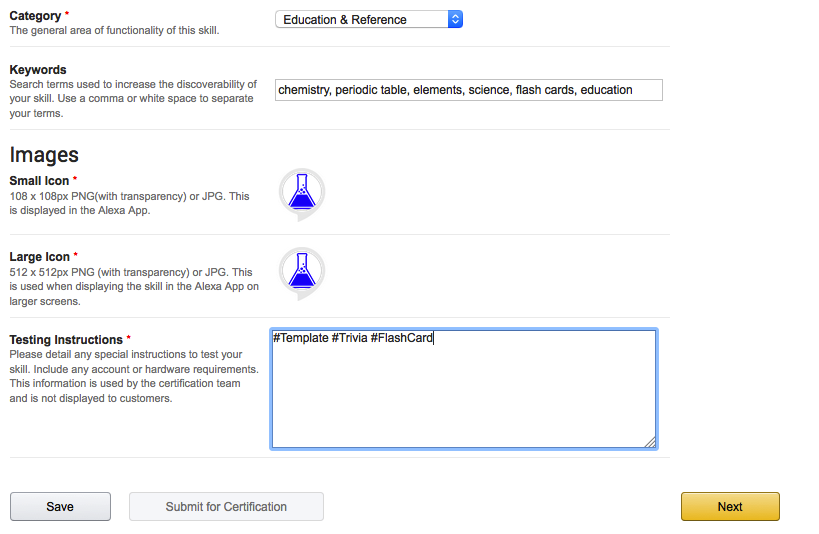
c. Be sure you have the rights to whatever icons you are uploading – you will need to provide both 108x108px and 512x512px images. If there are any concerns the certification team may fail your submission.
d. Put the following in the ‘Testing Instructions’ section:
#Template #Trivia #FlashCards.
11. Select ‘Save’ to go to the Privacy & Compliance section.
a. In the Privacy and Compliance section, select ‘No’ for spending real money and collecting users’ personal information. Privacy Policy and Terms of Use URL’s are optional. Check the ‘Export Compliance’ section to confirm that your skill can be imported to and exported from the US.

b. Select ‘Save’
12. Select ‘Submit for Certification’.

13. Finally, confirm your submission. Select ‘Yes’ to submit your skill.

Congratulations!
You have submitted your skill for publication.
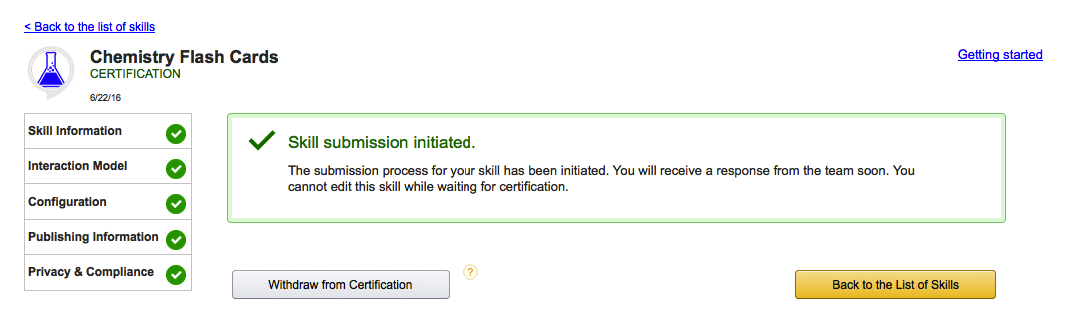
You will receive progress e-mails and possibly other suggestions from the Alexa certification team on how you can make your skill even better. You can update your skill at any time.
More Helpful Resources:
Subscribe to Alexa Announcements
Join the Conversation on the Forums
Get Help at the Developer Office Hours
Don't forget! If you publish your skill by June 30, you can get a free, limited edition Alexa dev t-shirt.

Quantities are limited. To be eligible for this promotion, you must fill out this form. See the complete terms and conditions here.